Leaderboard


Popular Content
Showing content with the highest reputation since 06/18/2025 in all areas
-
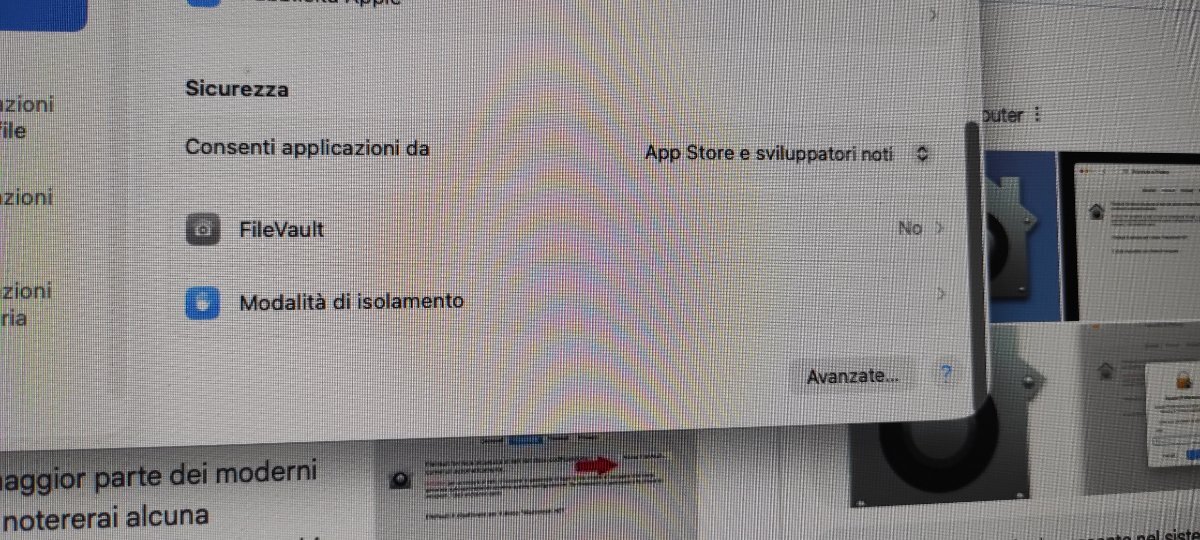
può darsi che hai il Gatekeeper abilitato verifica se l'opzione se è attiva vai impostazioni di sistema Sicurezza e privacy scorri fino a sicurezza consenti app ci deve essere dovunque, se non cè apri terminale e dai il comando sudo spctl --master-disable
 4 points
 -
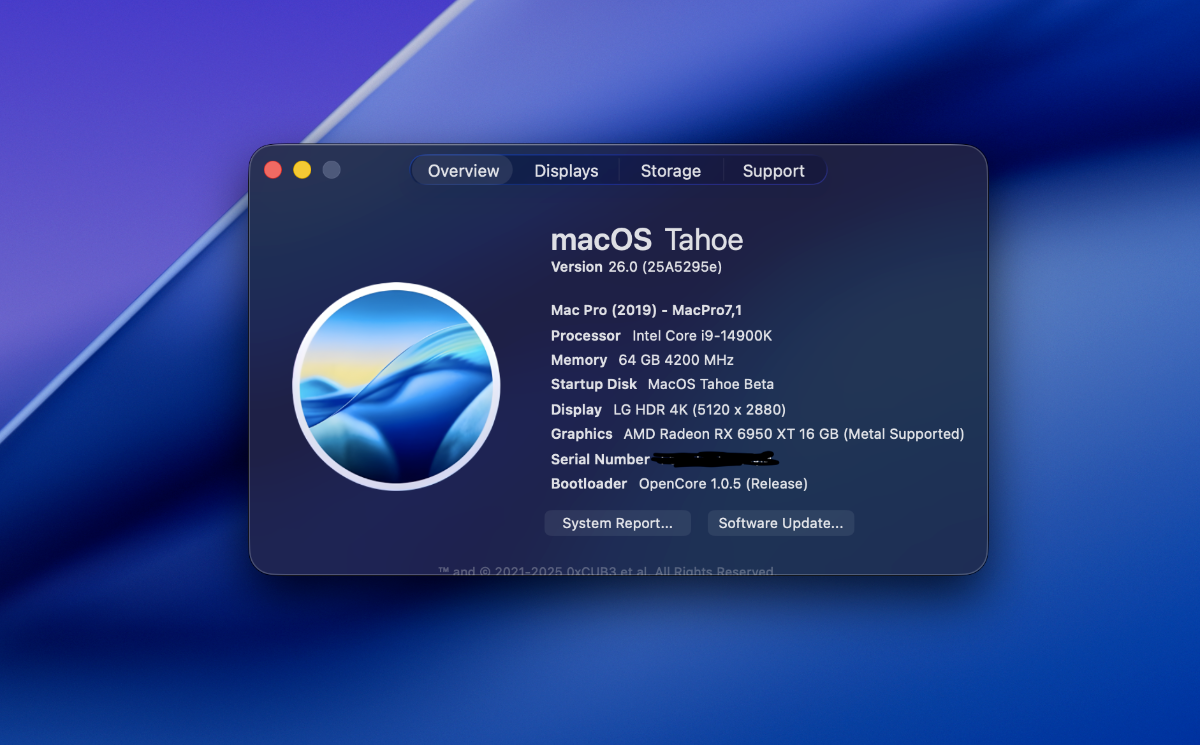
Tahoe c’è
4 points
-
eccoci arrivati funziona anche l'audio, la rx 580 va bene per il momento manca solo wifi la rete va un ringraziamento enorme al mio amico @Anto65 per i preziosi consigli e spiegazioni e la santa pazienza che lo contraddistingue 🏆 e Grazie anche a @Lorys89 per aver condiviso il IntelMausiEthernet.kext per far andare la rete ho preparato la pen drive tolto weg, impostata la scheda video onboard inserito il nuovo IntelMausiEthernet.kext, ha installato senza intoppi dopo il primo riavvio ho disabilitato la 630 e abilitato PCIE per AMD RX 580 e rimesso al suo posto WEG e arrivato come un razzo alla scrivania 😂
4 points
-
Ta daaaaaaa finalmente ce l'ho fatta 😄😄 senza WEG altrimenti non funzionava ancora...
4 points
-
Version 1.0.2
1,046 downloads
Topic di riferimento: https://www.macos86.it/topic/4308-hack-check/ Grazie a @fabiosun per il video4 points -
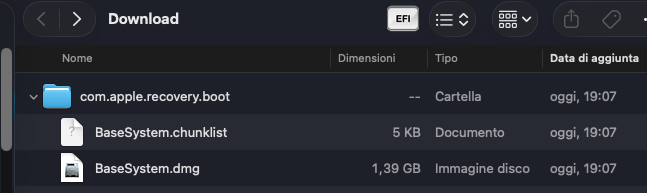
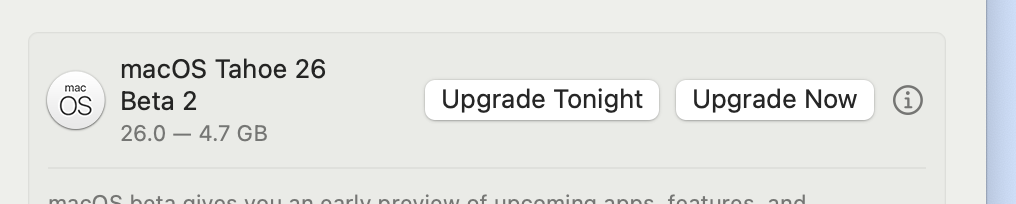
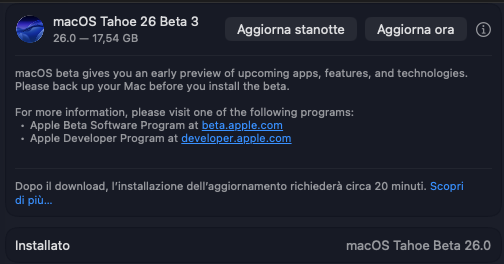
Beta 3 full installar Build 25A5306g https://swcdn.apple.com/content/downloads/47/62/082-72240-A_CYETVCLHJP/wbk0ftuo7zib1ygdzd2d5vuddt4bkro9xz/InstallAssistant.pkg3 points
-
Buonasera a tutti, scrivo per far presente che una grande mano del grande 🎓 @Anto65 sono riuscito ad installare Tahoe ad abilitare APPLEHDA e la WI-FI usb 😂 Buona serata a tutti
3 points
-
Per chi ha qualche adattatore USB - WI-FI abbandonato nel cassetto , del tipo 802.11n and 802.11ac Lista degli adattatori provati e funzionanti USB-Adapter E' possibile riutilizzarli in Tahoe grazie a laobamac ( reintrodotte le librerie IOUSBHostFamily , IOUSBMassStorageDriver , IOUSBFamily , usb.IOUSBHostHIDDevice ) tramite il suo ultimo commit OCLP-Mod ( si consiglia di scaricare e installare il KdkSupportPkg prima di eseguire OCLP-MOD ) e utlilizzando l app di @chris1111 Wireless-USB-OC-Big-Sur-Adapter3 points
-
per sistemi complessi come questo qui..credo che vada rivista almeno una patch del kernel, ma forse e' stato detto e me lo sono perso! 😉
3 points
-
Volevo portare a cononscenza questa piccola app " Bootabler " per creare un usb d installazione e non solo Creata da Cyberdevs ( utente su IM ) scaricabile e ulteriori dettagli dal suo sito https://macmeup.com/bootabler/ Credo che non servono tante spiegazioni e' semplice e intuitiva con interfaccia gradevole Seleziona l " install macos " , la usb -> Create Bootable USB ( formatta la chiavetta da se , ma consiglio di preparla prima tramite Utility Disco ) Crea anche sempre dall " Install mcOS " una iso ( Create ISO ) da usare su VM , provata sia su OSX ( Fusion ) e su WIN ( VMvare )
3 points
-
clicca su " Hackintosh And Beyond " ci pensa lui e' automatizzato non ricordo adeeso se mette pure il prefPane ( credo di si ) in caso c e' l apk nello zip abilita l estensione quando te lo chiede , disabilita ALC , reboot e mosica 😆 VodooHDA-Installer- installer.zip3 points
-
Per l audio ho risolto momentaneamente disattivado AppleAlc , installando VoodooHDA3 points
-
Penso di aver risolto il problema, aiutato da Copilot. Ho costruito una SSDT-WAK di questo tipo DefinitionBlock ("", "SSDT", 2, "FAN", "XWAK", 0x00000000) { Scope (_SB) { Method (XWAK, 1, NotSerialized) { Debug = "WAKE PATCH EXECUTED" Return (Package (0x02) { Zero, Zero }) } } } e patchato ACPI Adesso al risveglio le ventole sono silenziose!!!
2 points
-
beta 3 15.6 build 24G5074c2 points
-
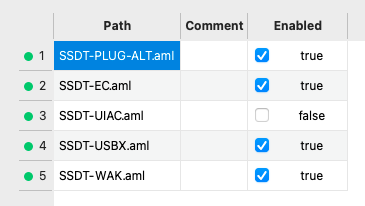
Dopo svariati test falliti , si riesce a ripristinare AppleHda ( e non solo ) su Tahoe grazie a una piccola utility mykextinstaller creata da @Mirone ( IM , lo allego qui per chi magari non e' iscritto MyKextInstaller_Beta_V4.2.zip) Requisiti Sip Disabilitata 03080000 Disabilitare Gatekeeper ( sudo spctl --master-disable ) SecureBootModel Disabilitato nel config.plist Riavviare Installare l ultimo KdkSupportPkg Navigare in /Library/Developer/KDKs/KDK_26.0_25A5279m.kdk/System/Library/Extensions copiare AppleHDA.kext sul desktop Lanciare l utility MyKextInstaller --> Install Kexts selezionare AppleHDA.kext salvato precedentemente sul desktop ... Install ... riavviare Non richiede OCLP-MOD No AmfiPass.kext Procedete a vostro rischio e pericolo 😝 Metodo provato personalmente ... Funziona2 points
-
spesso lo fa anche quando modifichi il config e riavvii non resettando la NVRAM, fa la schermata cosi ma se aspetti si avvia normalmente, quindi riavviare e resettare la nvram fa sempre bene2 points
-
known-working-and-testing-adapter2 points
-
@CaseySJ https://discord.com/channels/249992304503291905/1027560607030984766/1390244711859753062 patches_OC 2.plist.zip Corpghost did this for your new bios2 points
-
questo nuovo oclp è per tahoe? sarenne troppo bello 😇 Comuque volevo confermarti che con weg attivo e agpdmod=Pikera tutto ok va che è una bomba (solo wifi: no)2 points
-
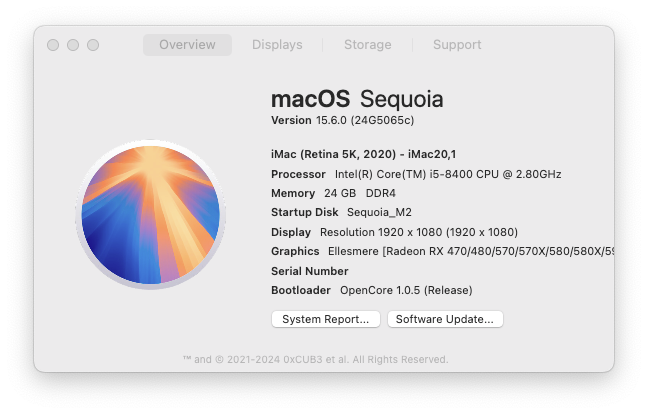
nuova beta 🙂 (24G5065c)2 points
-
OC: Prelinked patcher result 19 for com.apple.iokit.IOPCIFamily (CaseySJ | IOPCIIsHotplugPort | Fix PCI bus enumeration on AM5 | 13.0+) - Not Found questa patch e' saltata e ancora non e' possibile sistemarla se non esce il kdk di beta 22 points
-
Mi sono andato a rivedere, per scrupolo, le impostazioni del Bios, e accidenti, VT-D dovrebbe essere impostato su "Disabled" mentre era impostato enabled, quindi l'ho sistemato e rimesso su false DisableIOmapper e DisableMapperMapping e adesso funziona perfettamente ... mah, non so come mai quella impostazione sul bios era impostata cosi ma tant'è, grazie @Anto65 ero convinto che il bios fosse configurato per il meglio e non mi sarebbe mai venuto in mente di andarlo a ricontrollare.2 points
-
Per chi da Windows non ha la possibilita' di scaricare / creare il full installer di Tahoe ( kext di rete necessario ) Puo' usare il metodo Recovery installer-guide/windows https://hackintosh.one/s/recovery-tahoe-beta-1 https://hackintosh.one/s/recovery-tahoe-beta-2 Credit @luchina
2 points
-
Da me non funziona, ma non ho ben capito se il kext lo devo dichiarare nel plist al posto di AppleALC.kext ? EDIT: ok, adesso funziona, non avevo mica capito che dovevo avviare i PKG che genera in automatico e cosa importante si deve disattivare SIP La procedura esatta è : 1) Disattivare AppleALC.kext nel config.plist 2) Disattivare SIP 3) Avviare Hackintosh And Beyond 4) quando i comandi del terminale sono stati eseguiti trovate nella cartella 4 file .PKG li avviate uno per volta autorizzando l'esecuzione 5) Riavviate il pc andate in impostazioni audio e selezionate la periferica di uscita , fine .
2 points
-
2 points
-
This still works! Thank you!2 points
-
Carlo il link di corpnewt era diciamo quello beta , ormai ha fatto il merge ed e' ufficiale per Taohe https://github.com/corpnewt/USBMap ( non serve Tahoe-test ) provato e 😅
2 points
-
Ma a prescindere , una usb sempre pronta con OC funzionante per le emergenze specialmente quando si cambia qualcosa nella EFI del disco , anche se nel tuo caso adesso non dovrebbe essere un grosso rischio Ho EFI d appertutto google drive , disco dati ,usb avviabile , Windows2 points
-
Intanto potresti portarti con OC alla 1.0.5dev pronto per Tahoe ( non ancora definitivo , ma quasi ) cliccando sulla voce EDIT sulla barra in alto e spunta DEV, poi interroga l aggiornamento , selezioni " Get latest version.... " stessa cosa per i kexts ... sincronizza , salva L aggiorn. comand line senza problemi La tua scheda rientra fra quelle supportate , menzionate da Tominic e Lorys imacPro non e' supportato dovrai cambiare con maPro7,1 Oclp non e' ancora pronto per patchare Tahoe / Fenvi quindi no Wi-fi Meglio usare / creare una partizione x Tahoe se si ha la possibilita' , o un disco a parte2 points
-
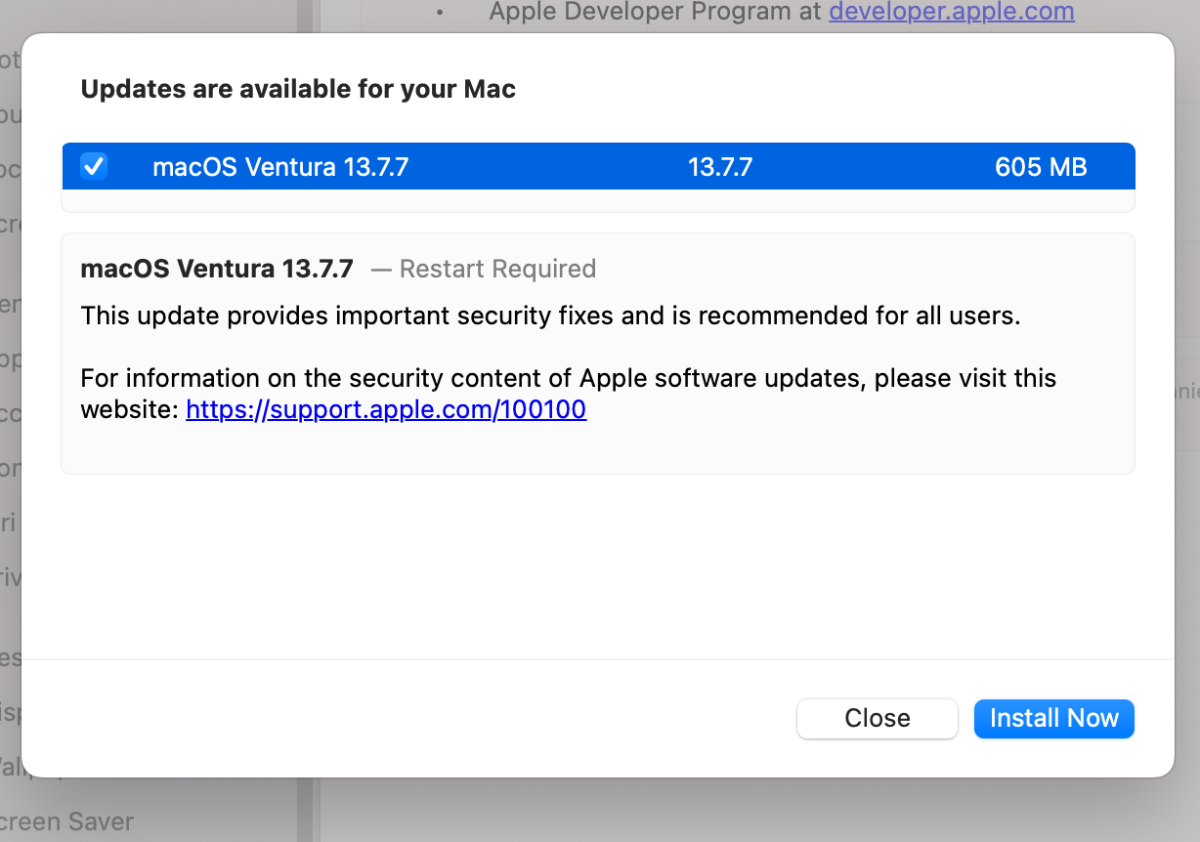
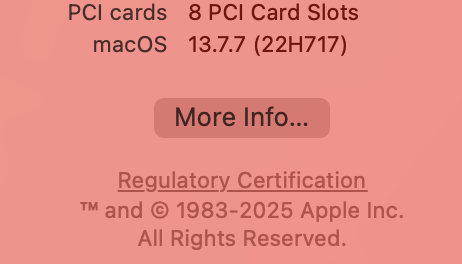
13.7.7 build 22H717
1 point
-
devi dargli in pasto tutta la cartella ACPI allora1 point
-
Come avevo gia scritto precedentemente, e secondo la mia esperienza, se l'installazione NON va a buon fine anche cambiando dei valori sul Plist si riceve sempre quel messaggio, si risolve solo reinstallando da capo ogni volta, in pratica l'installazione NON si riesce a recuperarla.1 point
-
Hai gia' Install macOS Tahoe Beta.app nelle App ? Usa Bootable Prepara prima la usb con Diskutility
1 point
-
Beta 3
1 point
-
Release v1.0.5 Fixed incorrect print in PCI device info dumping in SysReport Fixed ocvalidate error messages for overlong kext paths in Kernel section, thx @corpnewt Fixed kext injection compatibility issues with macOS 26 Updated builtin firmware versions for SMBIOS and the rest1 point
-
https://www.insanelymac.com/forum/topic/361162-pre-release-macos-tahoe/page/101/#findComment-2836147 😀 Questa l ha postata oggi1 point
-
Hi to both 🙂 I have always my old x670 WE hero for wife's pc 🙂 i do not touch anymore that pc 😉 however it is possible it would work with old acpi patches. if no, post dsdt on amd discord or here and Corpghost will help you as usual with new patches1 point
-
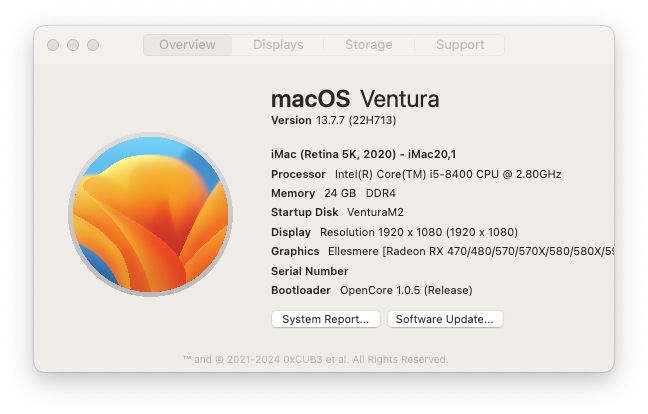
macOS Ventura 13.7.7 22H713 fatto
1 point
-
1 point
-
ho postato giusto 🙂 o mji avete spostato nella sezione giusta 🙂 io sto aggiornando ventura 🙂1 point
-
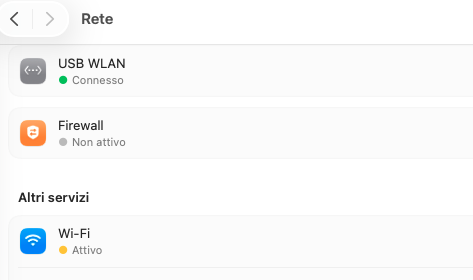
È disattivo credo
1 point
-
umm lo mette in /Library/Extensions/ nel disco Tahoe non dovrebbe interferire con gli altri In OC si ( ma non va ) , li puoi specificare l kernel ... o sbaglio 🤔 " sudo cp -R /path_to/VoodooHDA.kext /Library/Extensions/ "1 point
-
Cimabue ha colpito ancora 😆 Mi hai fatto prendere un colpo1 point
-
e che comando gli do? diskutil erase disk0s3 ? con diskutil mi intrigo con i comandi, dove trovo una lista dettagliata dei comandi? comunque l'ho formattato apfs e prima in dos come mi hai detto di fare... ti ringrazio, ora provo a installaci ventura, mi serve questa partizione per disco prova, avevo sopra win 10 ormai obsoleto, e poi ho win 11 su altri 2 pc che me ne facevo di win 10 qui. > arrivato rporpio ora il nuovo nvme da i tera per tahoe...ho formatto questo per cosa boo...va be e con questo sono 10 nvme1 point
-
1 point
-
Forse dal config. ? Togli la spunta su WhateverGreen.kext Oppure lascialo abilitato e su MaxKernel metti 24.0.01 point
-
per la ethernet ho risolto attivando disableiomapper che era spento, grazie a max230778 che mi ha dato l'imbeccata , adesso vediamo di risolvere AppleAlc 😄 Non ho fatto nulla di particolare, ho solo disattivato WEG poi riattivato quando ha completato l'aggiornamento...ti passo la EFI in pvt1 point
-
Una chitarra suona nella notteeee , 🎼 🎶 🎸 cantando va dicendo Tahoe , Tahoeeee 😅1 point
-
S e non vuoi usare il terminale per creare la usb puoi usare quest app , con interfaccia grafica bootabler OC e Kexts servono le versioni beta .... reperibili da qui https://dortania.github.io/builds/?product=AppleALC&viewall=true&version=1.9.51 point
-
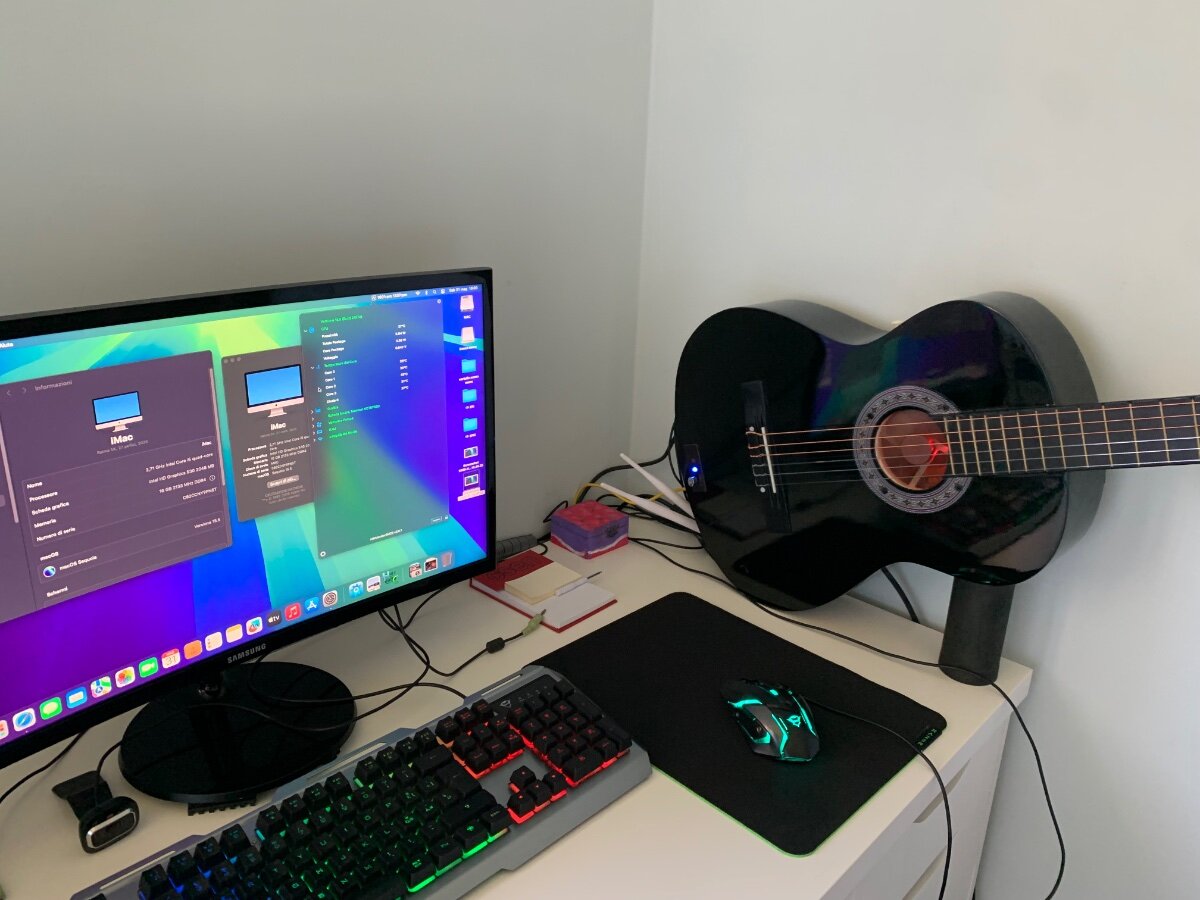
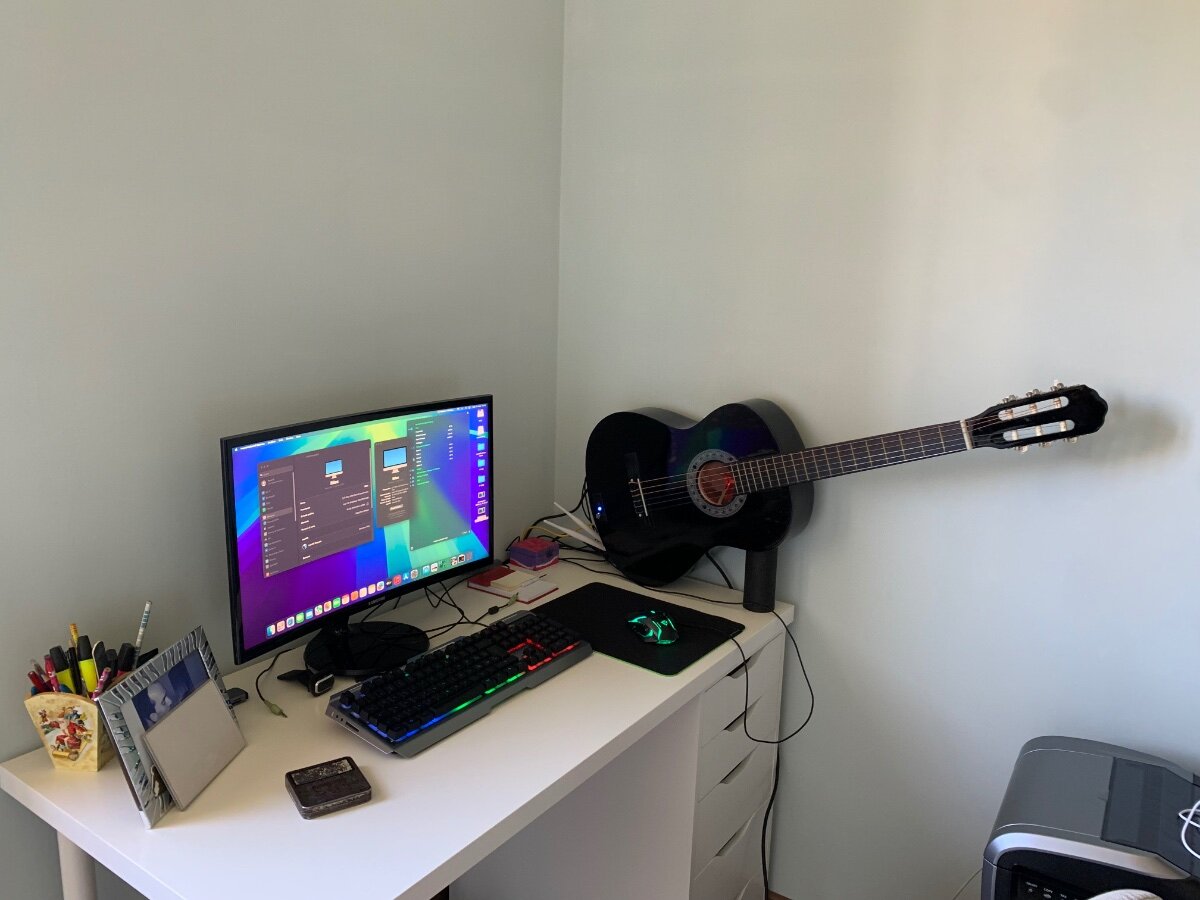
Ciao ragazzi volevo condividere con voi a mia nuova creazione ed è esclusiva come questo forum❤️ Vi presento iGuitar
1 point