Leaderboard
Popular Content
Showing content with the highest reputation on 04/05/2020 in all areas
-
un link dallo staff di macOS86.it Il pc in questione e' quello in firma... notate che ottimo cable management e che ordine sulla scrivania 🙂 🙂2 points
-
Ricomincia da capo. Metodi e distro Di Olarila non li supportiamo, né li sopportiamo Questo è un buon punto di partenza.2 points
-
Mi ero dimenticato di dirti che se ti vuoi levare dai piedi una volta per tutte il nag “You do not have a valid subscription for this server” ci sono 2 modi: 1) con il comando sed (che alcune volte non si sa ma non funziona a dovere) sed -i.bak "s/data.status cript/proxmox-widget-toolkit/proxmoxlib.js && systemctl restart pveproxy.service 2) con questa sequenza di comandi (quello che personalmente preferisco usare e ti consiglio) cd /usr/share/javascript/proxmox-widget-toolkit Fatti una copia del file giusto per stare tranquillo cp proxmoxlib.js proxmoxlib.js.bak con vi, nano o quel che preferisci edita il file proxmoxlib.js cerca l'istruzione if (data.status !== 'Active') { e sostituiscila con if (false) { salva il file e per ultima cosa fai ripartire il servizio pveproxy con il comando systemctl restart pveproxy.service Quella finestra rompiballe non la rivedrai mai piu'2 points
-
1 point
-
Version 1.1.0
272 downloads
Unico SSDT per abilitare il power management su varie serie Molto più utile per OpenCore Attualmente supporta e abilita il PM, indistintamente da Desktop o Laptop, su: Haswell Skylake Skylake-R Kabylake Kabylake-R Coffelake Whiskeylake Icelake Nota: per IvyBridge è consigliato usare ssdt_automator che crea un ssdt apposito basato sul lavoro di Piker Alpha Ringraziamento speciale al team ACPICA per tutte le loro preziose informazioni la versione decompilata (.dsl) è disponibile qui: https://github.com/macos86/OpenCore-Utility/blob/master/SSDT-PM-All.dsl1 point -
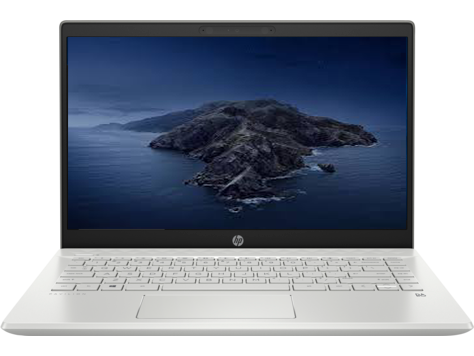
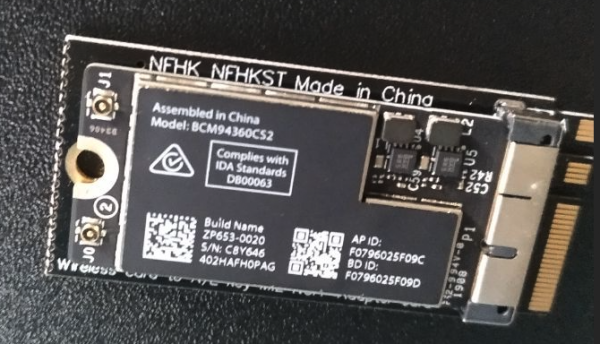
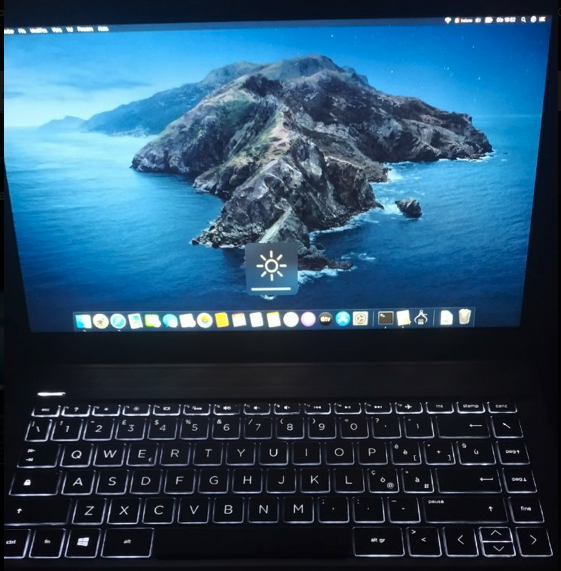
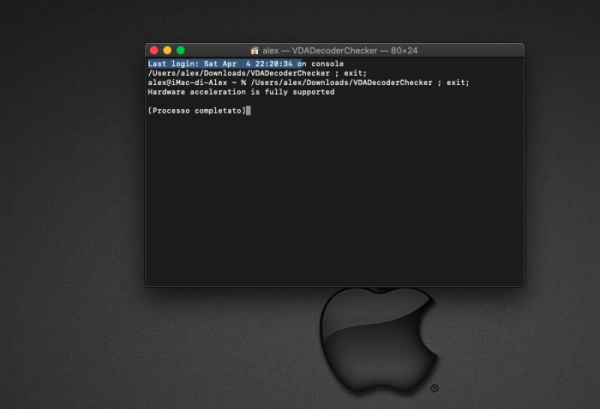
Specifiche: i5 8565u UHD620 8GB DDR4 512 GB nvme Display FullHD IPS 14" Tastiera retroilluminata Scocca in alluminio Lettore di impronte Bootloader: OpenCore 😍 Kexts: VirtualSMC + Plugins VoodooPS2Controller + Plugins (acidanthera) Lilu Whatevergreen AppleALC RTL8111 NoTouchId: per disabilitare il lettore di impronte (personalmente non lo uso, disattivato direttamente tramite aCPI) Cosa funziona: Power Management Grafica Audio Rete Lan Batteria Wifi M2 (ngff) : sostituito l'originale Intel con scheda originale apple BCM94360CS2 montata con adattatore. (supporto nativo) Bluetooth: integrato nel modulo (supporto nativo) Regolazione Luminosità compreso da tasti Fn Luminosità tastiera compreso regolazione da tasti Fn iMessage FaceTime Sleep (anche con ibernazione impostata a 3) Note: Accesso alle impostazioni avanzate premendo CTRL+F10 (thx @A23SS4NDRO) Nessuna patch sul kernel richiesta, quindi nemmeno AppleXcpmCfgLock. Usb tutte funzionanti nativamente, ho solo corretto alcuni connettori perchè sono pignolo 😅 Trackpad funzionante compreso tutte le gestures Risultato soddisfacente direi... 😁 Considerando poi che l'ho acquistato usato da amazon Warehouse e pagato il 40% in meno, ricevendo un oggetto perfetto, nessun graffio nemmeno minimale... un oggetto nuovo di fatto e un gioiellino in hack! HP sempre ottimi in hack... e di fatto si accoppia bene con quello di @Ciro82 https://www.macos86.it/topic/2342-hp-pavilion-14/ Caratteristiche simili ma questo a differenza ha una scheda madre di serie successiva e lettore di impronte1 point
-
1 point
-
@AlexAMD se vuoi provare, da me ora la rev22 avvia sulla Z97 metti tutti i 3 file, config incluso mi raccomando e CF rev22_mod-1_iCanaro.zip1 point
-
pure da me sulla Z97 @AlexAMD evidentemente occorre apportare qualche modifica al plist incluso quando ci guardo, se risolvo, poi scrivo qui 😉1 point
-
1 point
-
1 point
-
1 point
-
certo, in ACPI --> patch lascia tutto come è in GUI --> scan imposta su auto=yes oppure su custom e lascia flaggate tutte le voci1 point
-
Ora controllo...come faccio a reimpostare nella gui di clover l icona per avviare anche Windows? Le patch che avevamo disabilitato le lascio disabilitate? intanto grazie 1000 ICanaro 👍🏻👍🏻👍🏻1 point
-
La 760 è ancora supportata. Di AMD so poco, quindi attenti altri pareri per quanto riguarda il resto della configurazione.1 point
-
ecco il bello dei forum.. le cose rimangono dopo ricerca: https://www.macos86.it/topic/2373-stavo-provando-ad-installare-un-software-per-far/?tab=comments#comment-60185 https://iriun.com/1 point
-
1 point
-
Non so da dove siano usciti quegli SSDT, dato che di fatto la mia EFI conteneva solo il DSDT.aml, SSDT-PLUG.aml e SSDT-PNLF.aml (+ SSDT-USBX.aml) e bootava correttamente. Faremo delle prove per vedere se si riesce a bootare senza tutti quegli SSDT1 point
-
ok ho solo sostituito il file nella cartella patched e ho riavviato... iMac di Cinzia.zip1 point
-
il Fix FixHPET come consigliato nel wiki di Audio codec info quello l'ha fatto abilitare poi ho attivato la patch change HDAS to HDEF1 point
-
sei tutto a posto, quindi eventuali limitazioni, dipendono dalle app che usi1 point
-
Ciao, ma non avevi già la tua configurazione? in caso dovevi usarla come base1 point
-
Buongiorno (anzi buonanotte). Sto seguendo il caso di @Lucatek. Ci sono evoluzioni in merito al suo notebook. Funziona pressoché tutto (speakers audio, grafica, batteria, trackpad, tastiera) ma mancano giusto due cosine: - tasti fn luminosità - combojack E soprattutto: !!! USB !!!. Stando a quanto mi ha riferito l'utente, "il PC gli ha bruciato le chiavette". L'SMBIOS di riferimento è quello di un MBP15,2 con relativo SSDT-USBX. Il problema è che nel momento in cui collega una chiavetta USB, questa si riscalda (come se ci fosse un overtensione) con conseguente rottura della chiavetta. Ci sono soluzioni? Abbiamo fatto diverse prove, senza arrivarne a capo. Idee? Grazie 🙂1 point
-
1 point
-
1 point
-
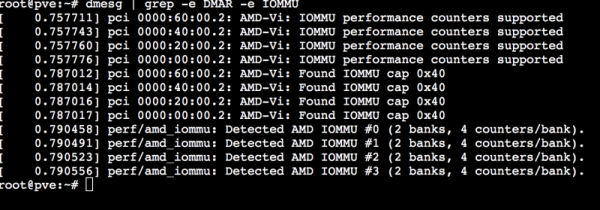
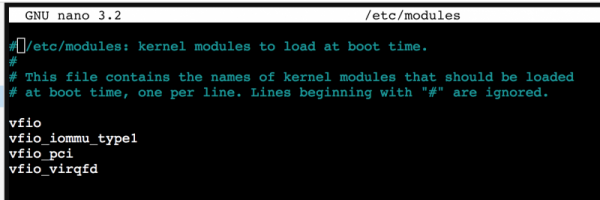
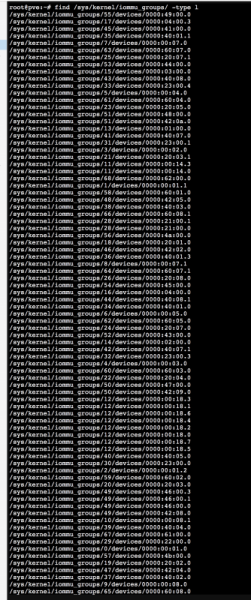
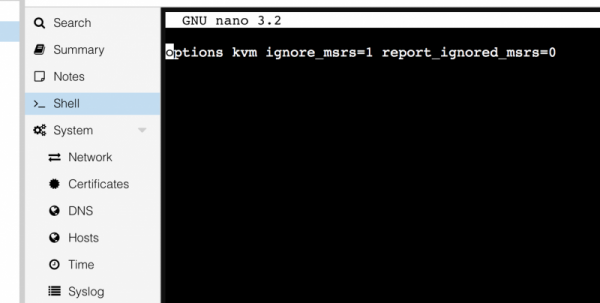
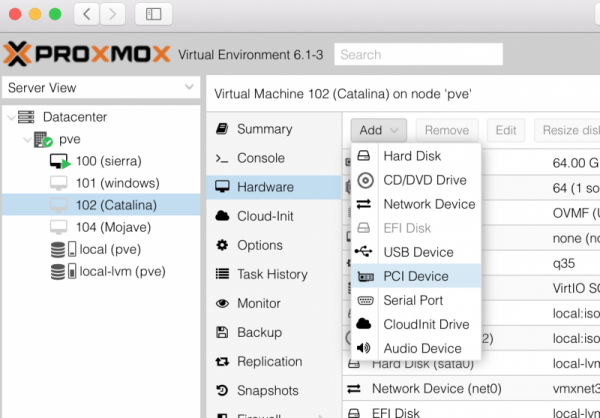
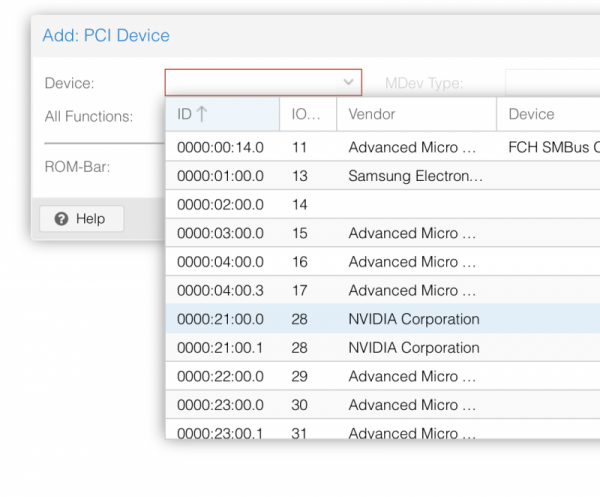
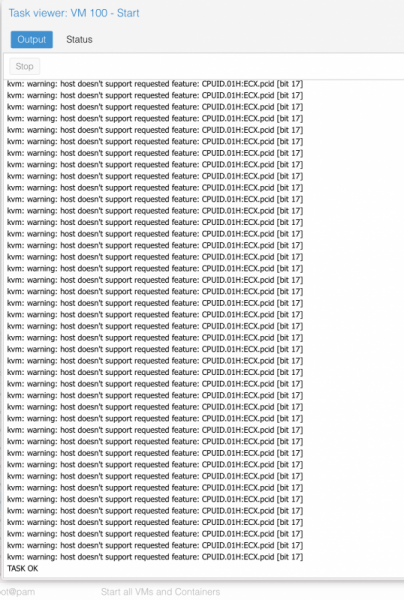
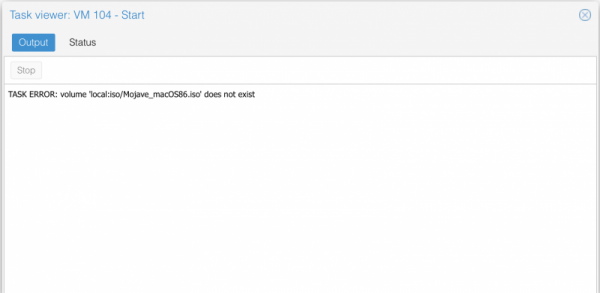
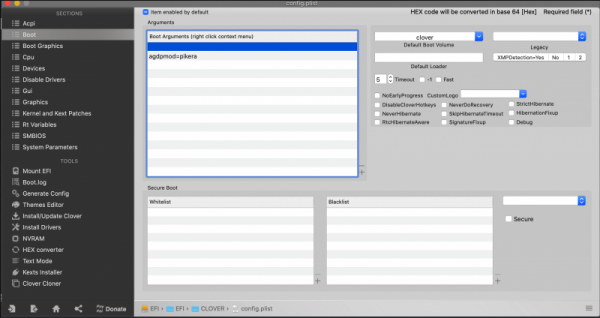
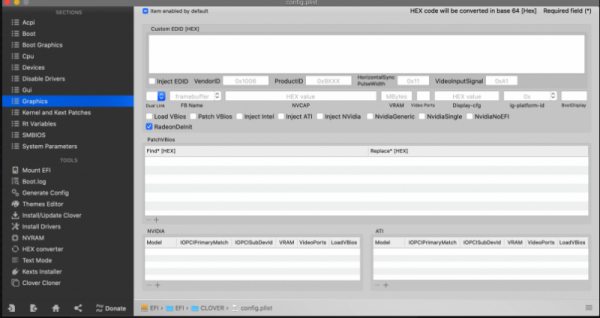
Useful link. Proxmox wiki In this site you can find a tons of useful informations. So read it to clear doubts you can have. Now some useful informations to start thinking to PCI Passthrough. from Proxmod wiki site: Modify grub for your cpu: first step enable the IOMMU. to do this open a shell from Your Proxmox's web interface: type nano /etc/default/grub insert in it "amd_iommu=on" without quote as you see here: ctrl x then Y to save then do not launch upgrade-grub but pve-efiboot-tool refresh then reboot, to verify all is fine, open shell again and type: dmesg | grep -e DMAR -e IOMMU you have a pretty similar output if all is fine..otherwise repeat step above: you can add also iommu=pt to improve some performances in PCI device not in use by your VM. Now another very important part. We need some modules to load, by default they are not loaded: type: nano /etc/modules and add these modules: "Verify also IOMMU isolation (follow Proxmox wiki just in case) (follow my situation which may differ from your)" "To have separate IOMMU groups, your processor needs to have support for a feature called ACS (Access Control Services)." now the tricky thing: Determinate your GPU address: in shell type: lspci and check for your graphic card address: this is my GFX address, then type: lspci -n -s 21:00 you will see: root@pve:~# lspci -n -s 21:00 21:00.0 0300: 10de:1b02 (rev a1) 21:00.1 0403: 10de:10ef (rev a1) root@pve:~# Create a file in etc/modprobe.d/ named vfio.conf: echo "options vfio-pci ids=10de:1b02,10de:10ef" > /etc/modprobe.d/vfio.conf and add on it: options vfio-pci ids=10de:1b02,10de:10ef disable_vga=1 (ctrl x then y) then you have to blacklist the drivers.. PAY ATTENTION and save it , when you reboot after this step it could be possible to have to operate exclusively from Web Pc interface: so type: echo "blacklist radeon" >> /etc/modprobe.d/blacklist.conf echo "blacklist nouveau" >> /etc/modprobe.d/blacklist.conf echo "blacklist nvidia" >> /etc/modprobe.d/blacklist.conf reboot your pc Note.. remember..we have set our VM bios in this way: bios: ovmf GFX need to be UEFI supported visit this link to understand other important stuff just in case: http://vfio.blogspot.fr/2014/08/does-my-graphics-card-rom-support-efi.html then to avoid some crashes add this line in kvm.conf: echo "options kvm ignore_msrs=1" > /etc/modprobe.d/kvm.conf also useful to avoid warning messages in your system log this: echo "options kvm ignore_msrs=1 report_ignored_msrs=0" > /etc/modprobe.d/kvm.conf as advice check always that command went fine in this way ie: for now this is an important step, now we have to access to our previously vm created and add "The passthrough" add PCI Device and choose your GFX: in my case it adds this: and this is enough 😉 to summarize..before rebooting check this files: grub.cfg blacklist.conf kvm.conf vfio.conf and see if all stuff is there. After reboot in your Threadripper you will see initial Proxmox VE Boot menu (blue one page) and the only two lines (loading stuff) If not check again all steps above. Remember some Mandatory parameter: 1) mce=off in grub 2) all conf files set properly for your system/GPU and so on 😛 If you see only those two lines..launch your vm in your Web interface or via terminal command : qm start 100 and see the log: this is good 🙂 (warning message disappear if you do no t use +pcid in VM conf boot args) this no 😛 Any different case could be possible... remember to check Proxmox wiki if some different problems appear! For now is enough..I will check this guide and if you find some incongruence fill free to declare. added 24-04-2020 The above GPU configuration is perfectly calibrate for my system and my Nvidia TitanXp GPU I have asked @Imanol to describe procedure for a different GPU (AMD 5700XT). He had success following this guide and now he is helping me to show you how he did with his Navi card. this is working in his system, maybe you have to adapt it for your system. ------- I'll share some tips to get the 5700XT GPU passthrough working. This can be helpful for other people using AMD GPUS. I had to do some extra things: The default GPU BIOS doesn't have UEFI enabled. Instead of updating the firmware, which is risky (or non existent tools) , you can download a ROM with UEFI support and let proxmox load/expose it when starting the VM. In my case I downloaded this rom (https://www.techpowerup.com/vgabios/212439/gigabyte-rx5700xt-8192-190616). You have to copy it to: /usr/share/kvm/5700xtcustom.rom and specify the ROM file in the GPU pcie passthrough line vm conf: hostpci1: 03:00,pcie=1,x-vga=1,romfile=5700xtref.rom Additionally, I had to enable some extra flags in clover or it didn't boot correctly. Make sure that you pass the agpmod=pikera boot argument. In graphics settings enable RadeonDeinit. Make sure that InjectATI is correctly disabled. If you are using clover configurator press the checkbox twice, otherwise it's enabled by default. I forgot to mention that to make my 5700XT passthrough work I needed to unbind some system drivers and framebuffers before launching the GPU. Just blacklisting the GPU drivers, enabling nomodeset in Grub or setting GRUB_GFXMODE_LINUX=text in grub didn't work for me. Those unbinds need to be done each time you restart the computer, before launching the VM. I automated it using the linux crontab utility. First open crontab config using this command in a proxmox terminal: crontab -e Add this line into the document and save it: @reboot /root/unbind.sh Create a script in the specified path: nano /root/unbind.sh Add those unbind command (Change 03:00 with the PCI address of your GPU): #!/bin/bash echo "0000:03:00.0" > /sys/bus/pci/drivers/vfio-pci/unbind echo 0 > /sys/class/vtconsole/vtcon0/bind echo efi-framebuffer.0 > /sys/bus/platform/drivers/efi-framebuffer/unbind Don't forget to set the correct permissions for the script after saving: chmod 755 /root/unbind.sh Now, each time you restart the computer proxmox will run this script and the guest mac VM will launch without any conflict. ------- Important stuff: macOS86.it is a free site and people here are helpful if tone remain in a calm way..Any different approach will not be tolerate . Now some kudos: to algrey and @Shaneee for their work to understand if there is a way to have this new chip booting in a real hack (for now not possible at all) best people here @Gengik84 to host this and solving many problem for us @Ciro82, @carlo_67 @iCanarofor their invaluable passion and help @tomnic who is corresponsible of this "success"..we can define this hack..."The first AMD Hack fast then ever" Have a nice life1 point
-
1 point
-
1 point
-
Naaaaaaa te sei ordinato. Se vedi il troiaio che ho sulla la mia scrivania..................0 points
-
Si diciamo che forse tornando indietro avrei preso una Asus, ma ormai dai ho tutto montato. Poi tutto sommato non credo avrei grossissimi benefici su hackintosh rispetto a gigiobite. Su DeviceProperties ho questo (preso dalle EFi sul thread di Semantica che gentilmente sta postando) Ehi mi sa che hai sbagliato 😜0 points
-
0 points
-
vale sempre questo... o ti prendi il tempo di fare quanto richiesti, altrimenti rimani sempre al blocco di partenza si ma lui vuole bloccare la nvidia e lasciare attiva la AMD gengik gli ha già detto cosa fare, ma ci gira intorno0 points


