Search the Community
Showing results for tags 'hackintosh'.
-
Ciao a tutti, Devo aggiornare il mio hack da ventura a sonoma per ragioni software (le nuove versioni di logic pro non girano su ventura) Volevo capire se una volta effettuato il backup del disco di ventura potevo procedere tranquillamente all'aggiornamento di sistema oppure va prima modificata la EFI. Chiedo prima cosi da evitare guai ... @carlo_67 @fabiosun
-
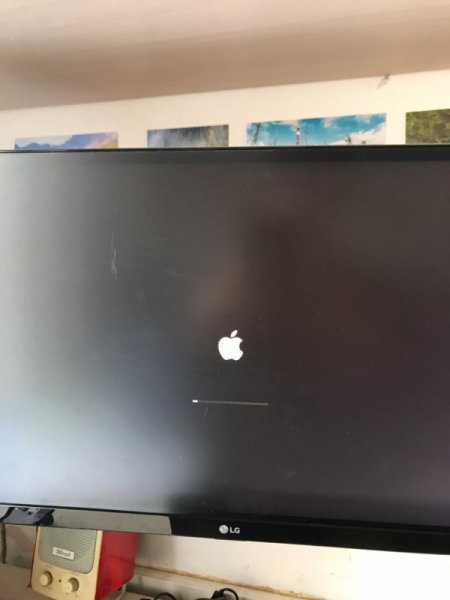
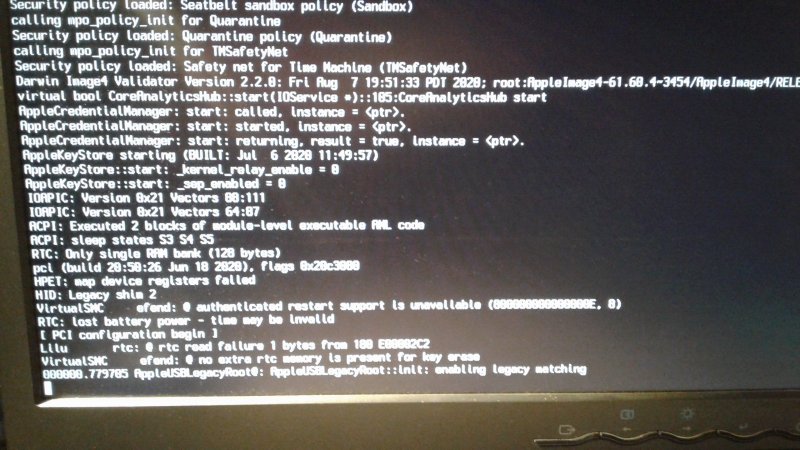
salve, ho un problema sul mio hackintosh (portatile Asus con intel i3-6100U e Intel HD 520 che ho reso compatibile con una guida trovata online). Sono riuscito ad installare macOS nella mia partizione (si chiama Hackintosh) ma quando vado ad avviarlo per la prima volta ricevo un errore che potete vedere nelle foto. Qualcuno sa dirmi dov'è il problema? EFI 17.54.20.zip
-
Salve, Sarebbe possibile fare un hackintosh su un lenovo ideapad 3 AMD? se si posso avere una efi(qualsiasi versione va bene)
-
- hackintosh
- lenovo
-
(and 2 more)
Tagged with:
-
Hello Guys! @Balamut and I try to install macOS Ventura to the new HEDT Platform. Until now we solved a couple of issue but still stuck to some. Lets start with the Specs: I use a ASUS PRO WS W790 ACE - with a Intel Xeon W3-2423 - Radeon VII - ADATA 960 Legend Balamut use a ASUS W790 Sage with a W9-3475X - AMD 6900 XT - WD SSD All components besides the CPU/Mainboard definitely work without issues under macOS. Our problem is DSDT related... RHUB like I guess at the moment to be exactly. We tried to create an RHUB SSDT, all paths are definitely correct but we still get this error message in the debug log: ACPI Error: [\_SB_.PC00.XHCI.RHUB.HS01] Namespace lookup failure, AE_NOT_FOUND (20160930/dswload-292) ACPI Exception: AE_NOT_FOUND, During name lookup/catalog (20160930/psobject-310) ACPI Exception: AE_NOT_FOUND, (SSDT: A M I ) while loading table (20160930/tbxfload-319) ACPI Error: 1 table load failures, 7 successful (20160930/tbxfload-342) The Installation stucks always on waiting for root device which is related to USB. Tried to create an USB Kext under Windows but this still didn't solve the issue. Attaching the full log and the acpi tables: log.txt.zipACPI.zip Kind Regards Alex PS: Please move the Thread to the right section. Just realized I posted it in the wrong section. @Gengik84
- 48 replies
-
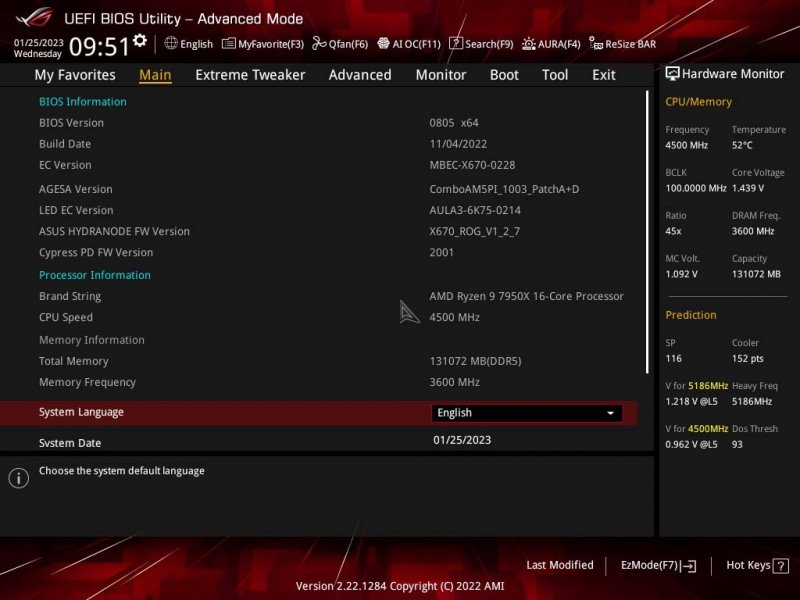
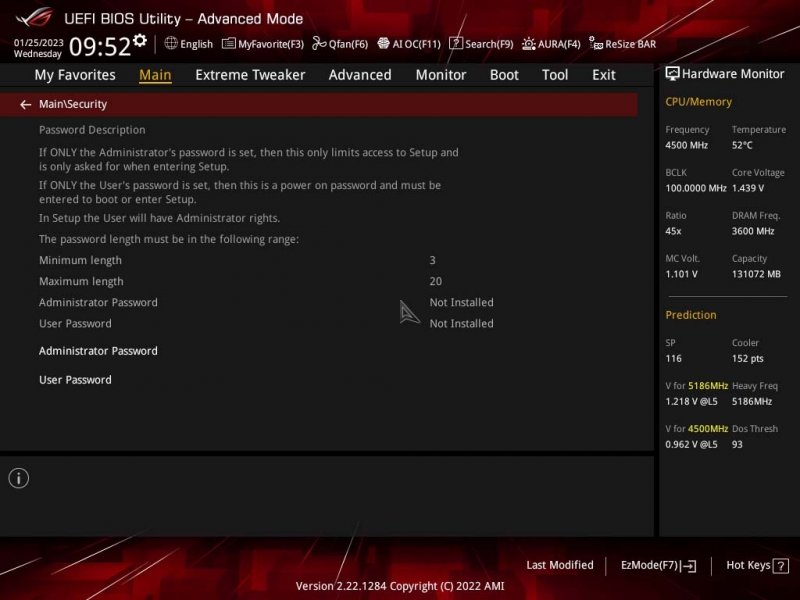
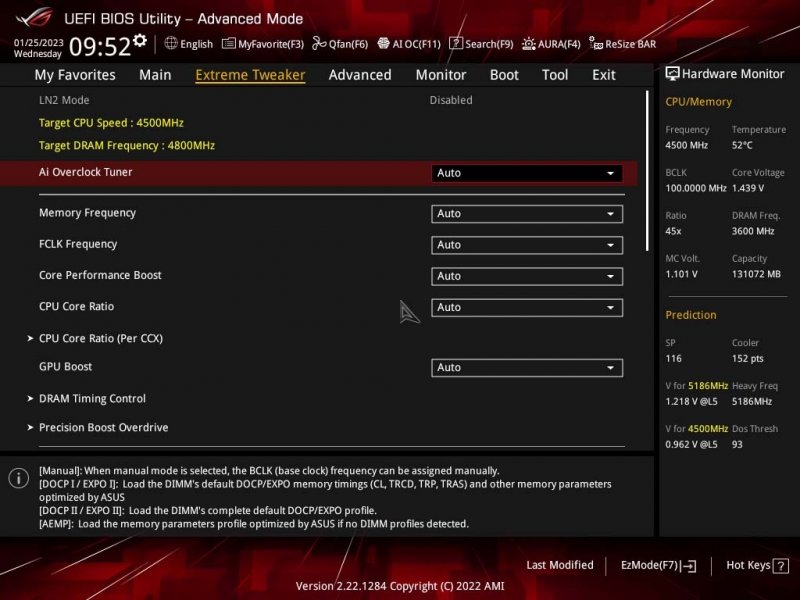
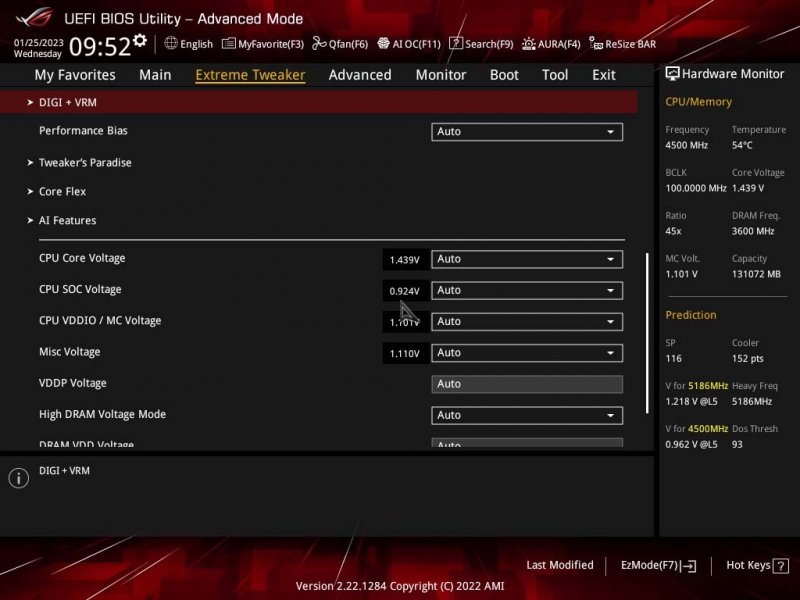
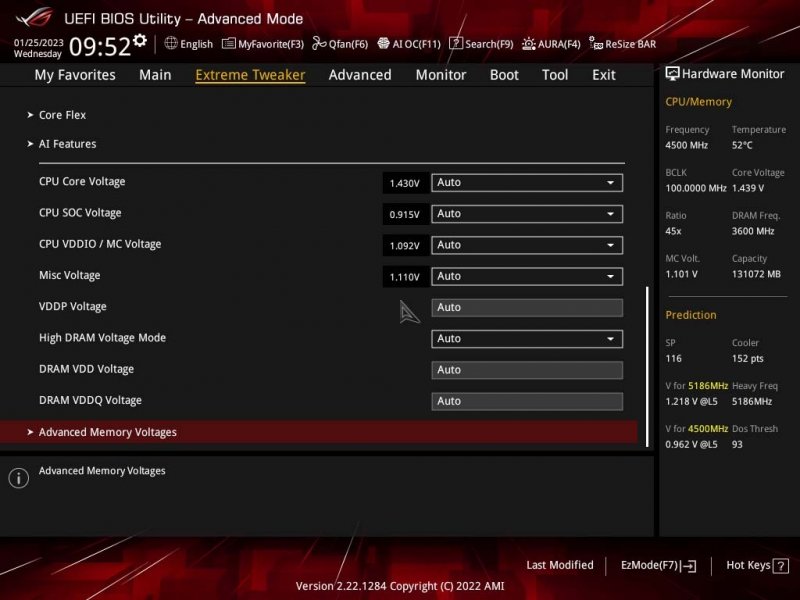
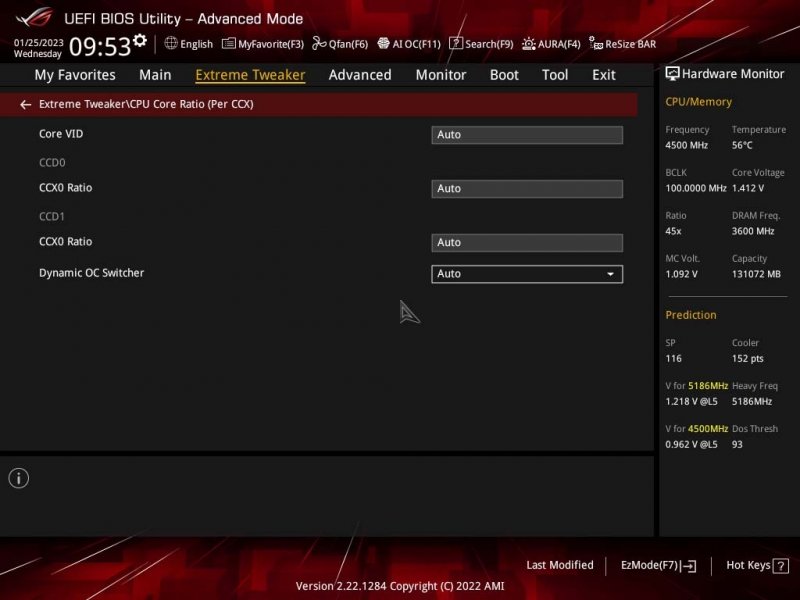
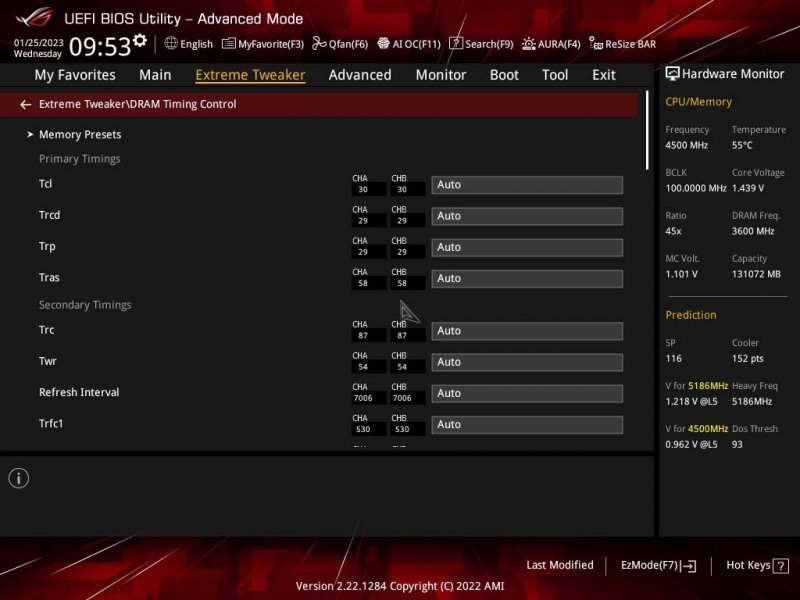
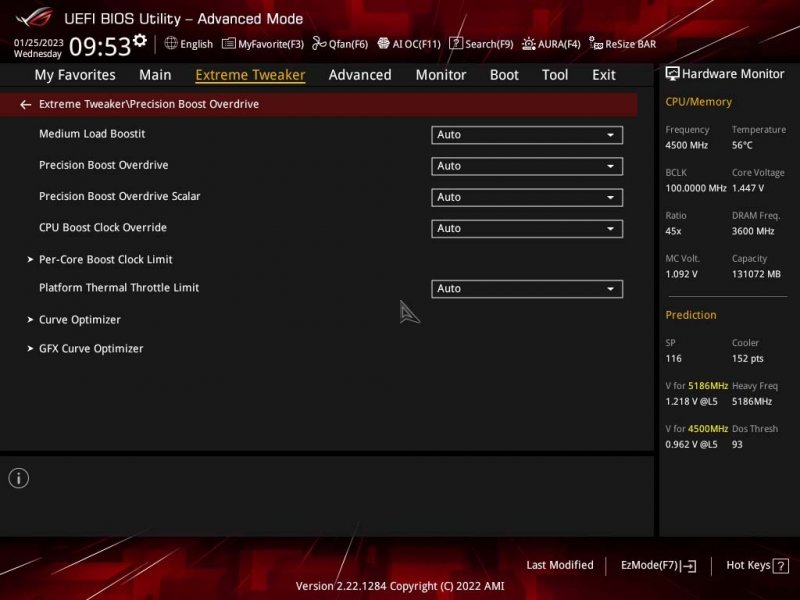
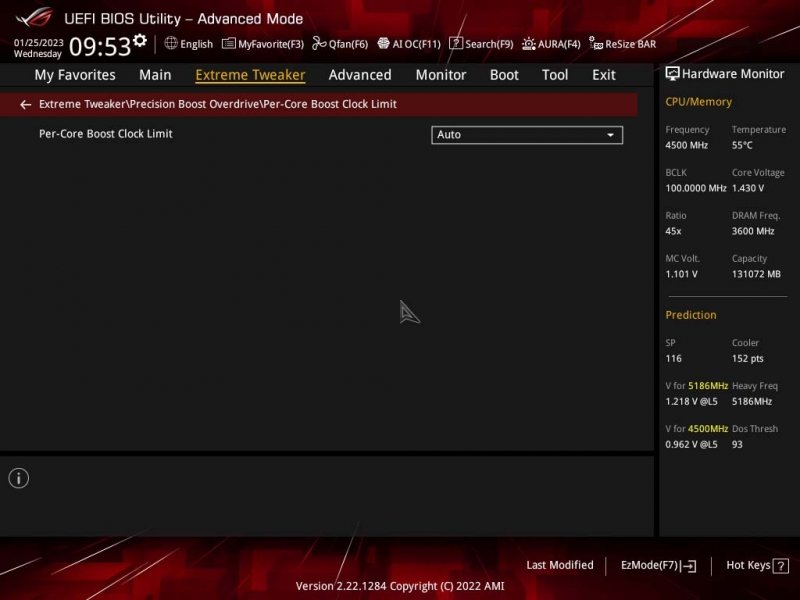
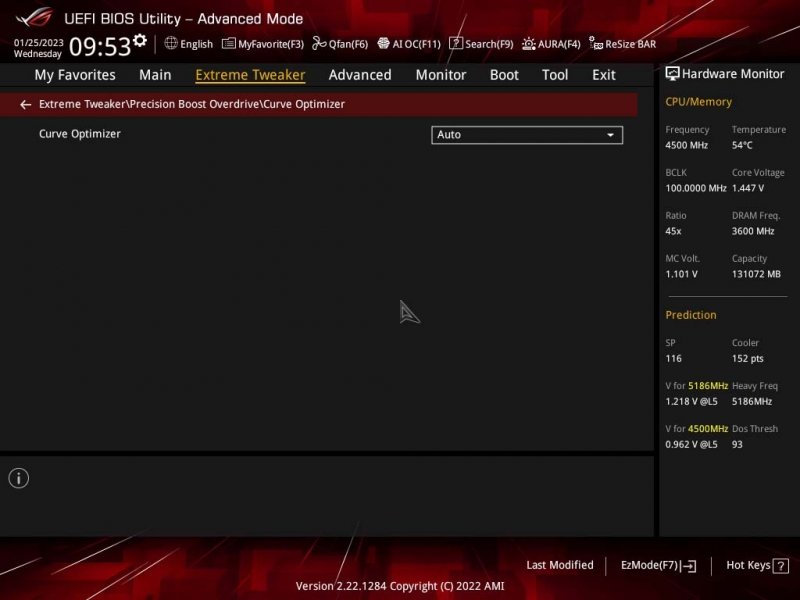
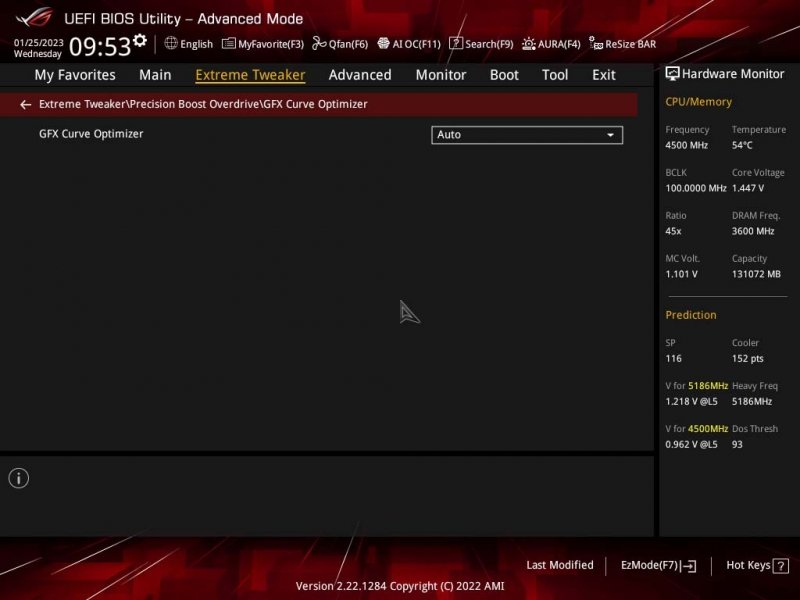
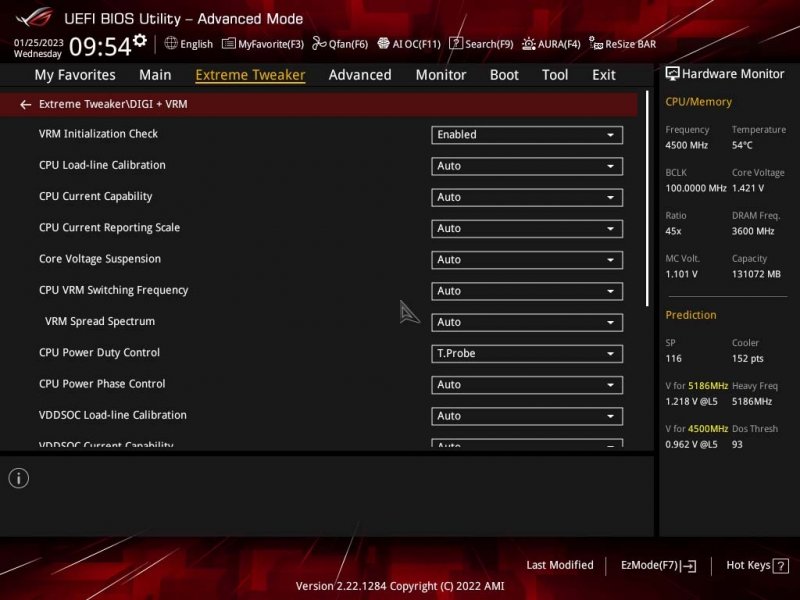
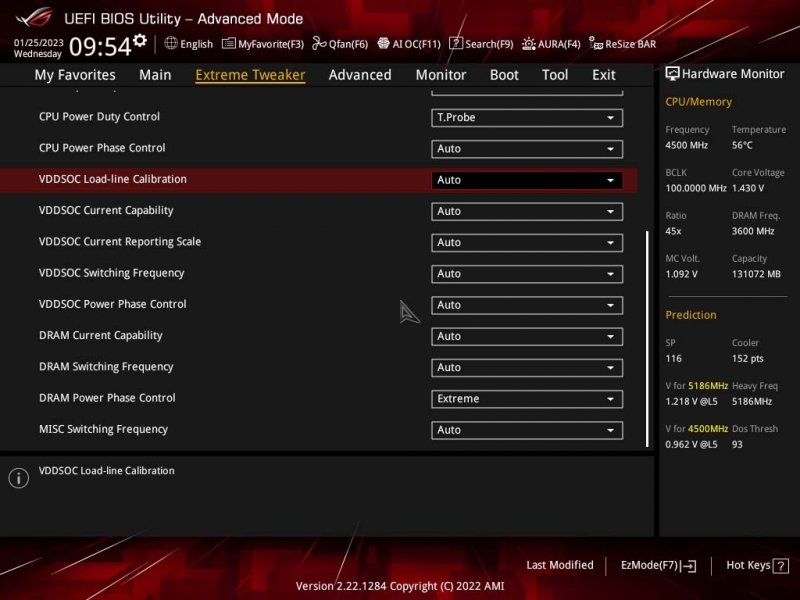
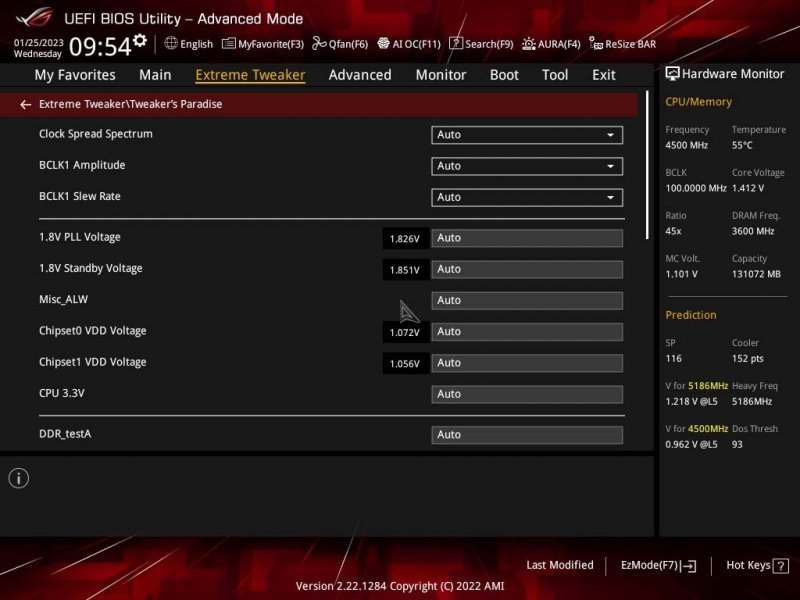
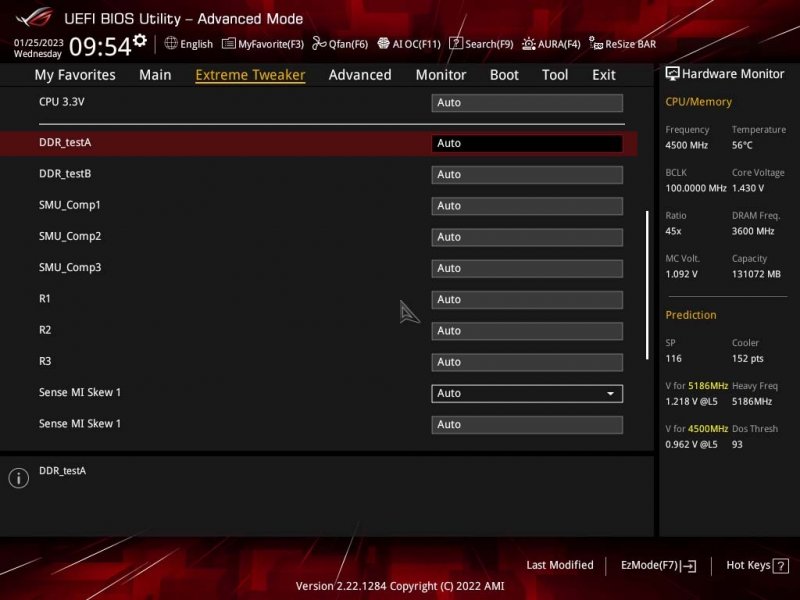
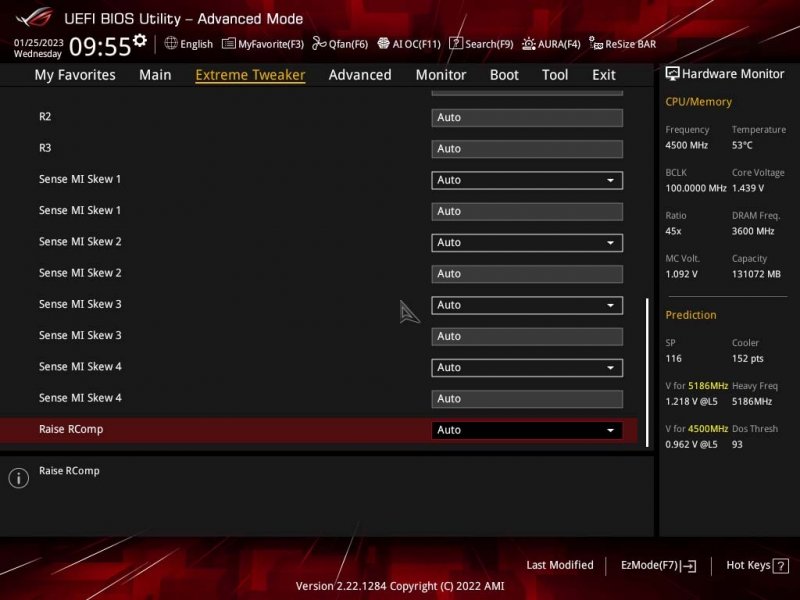
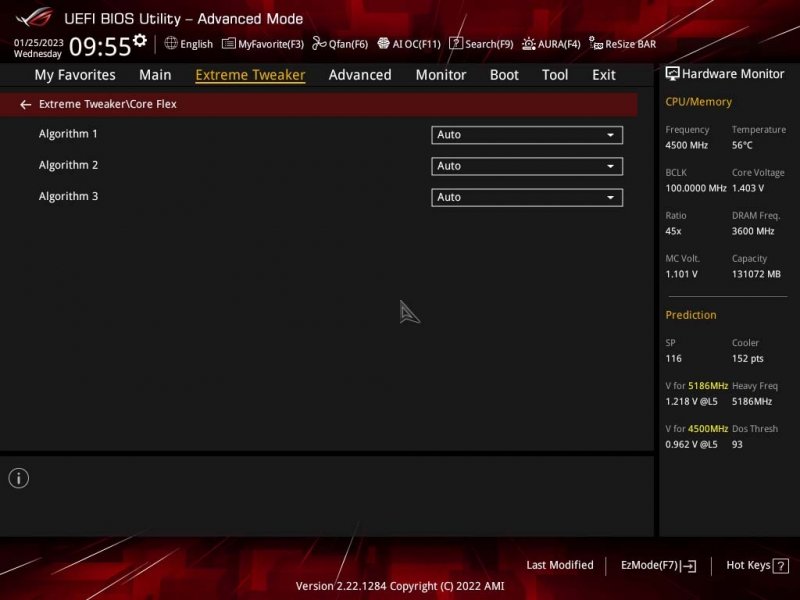
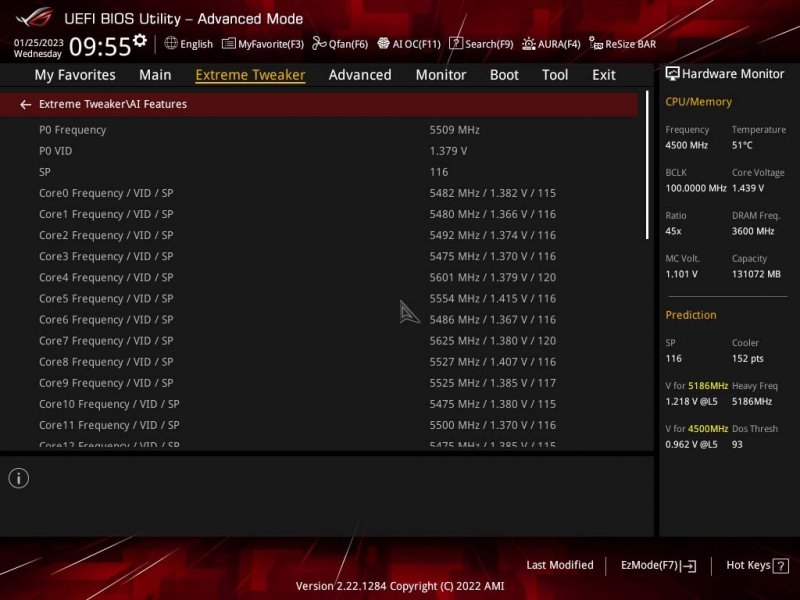
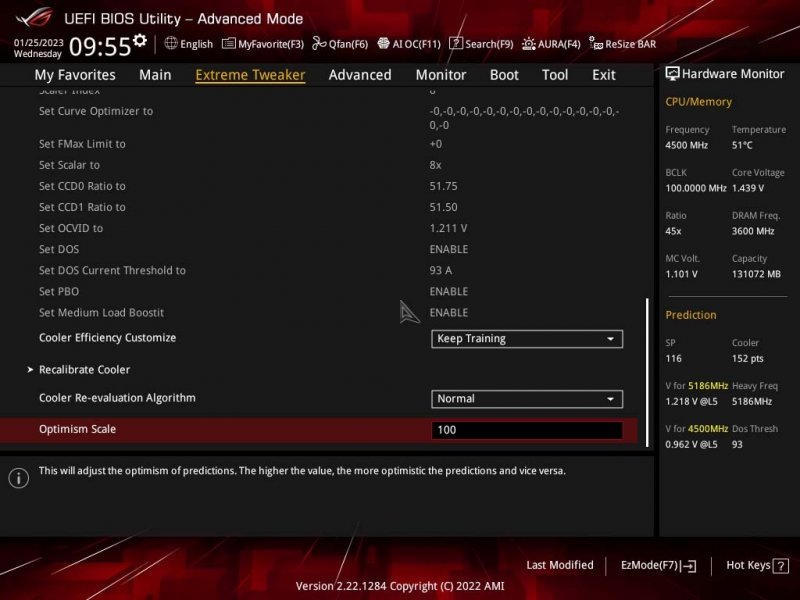
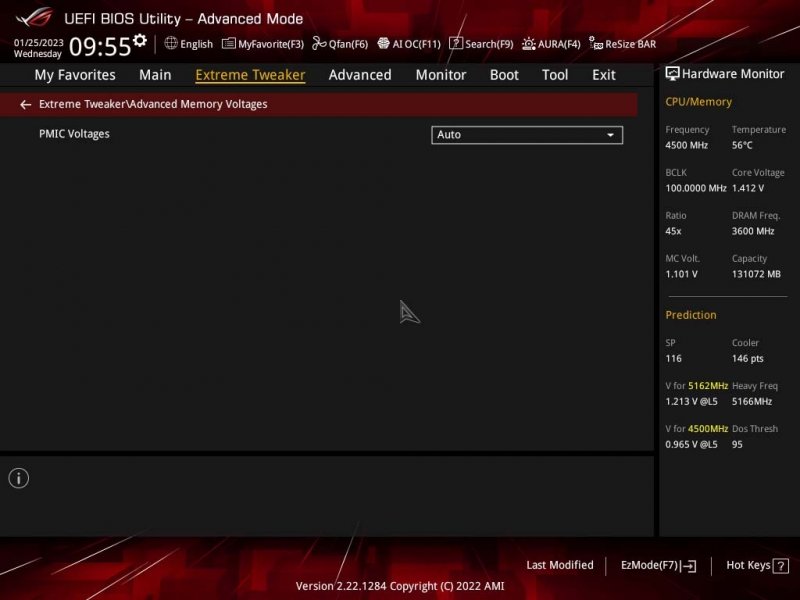
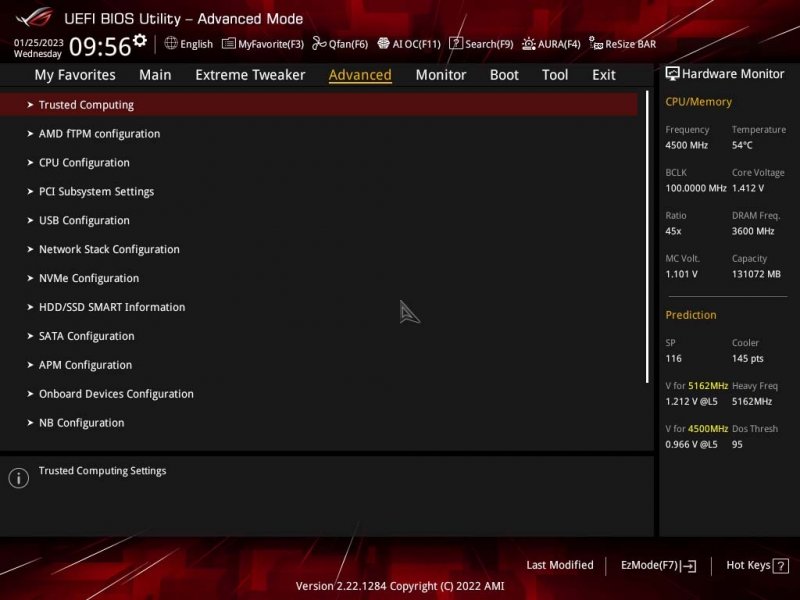
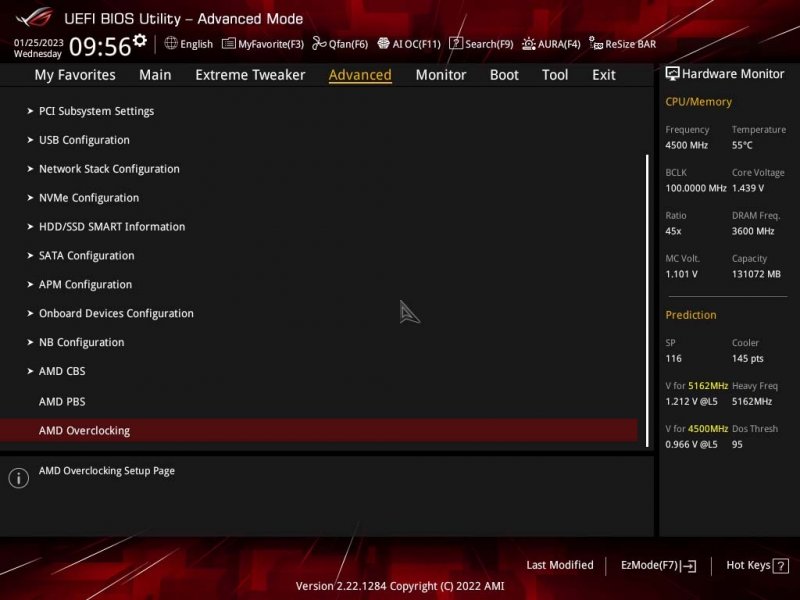
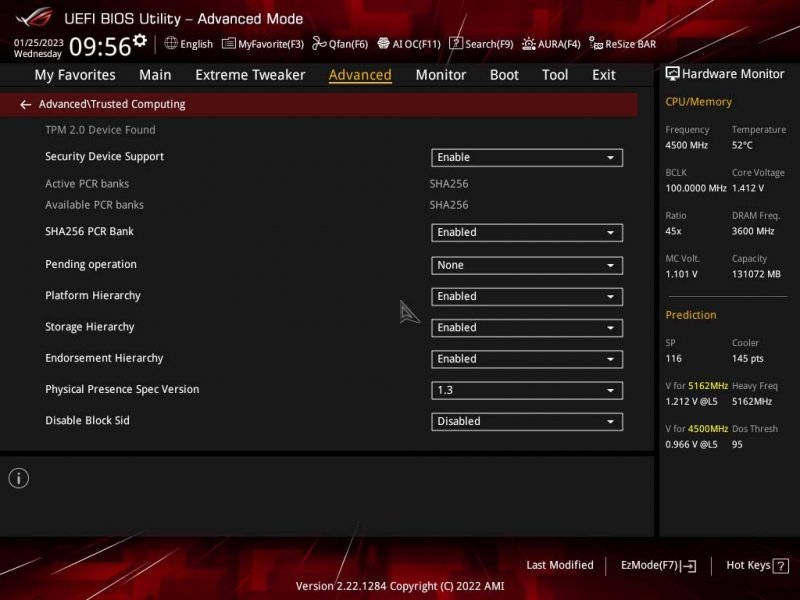
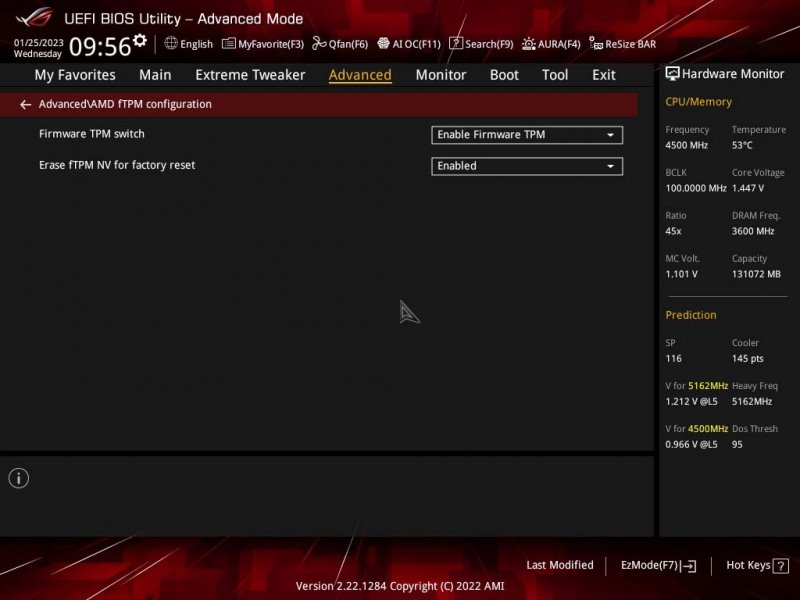
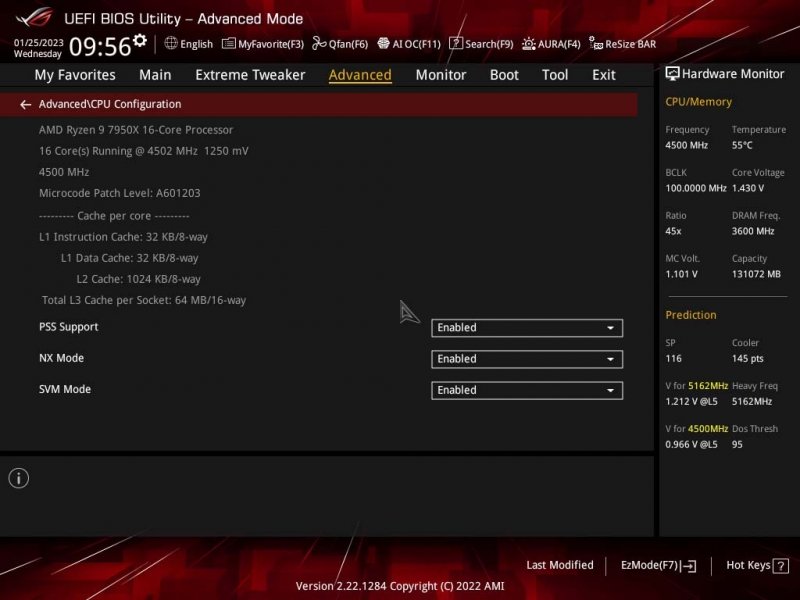
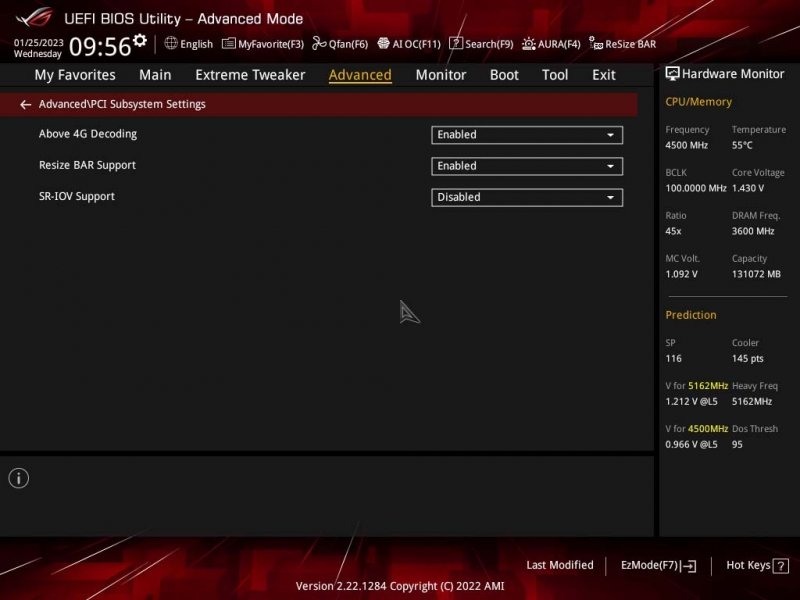
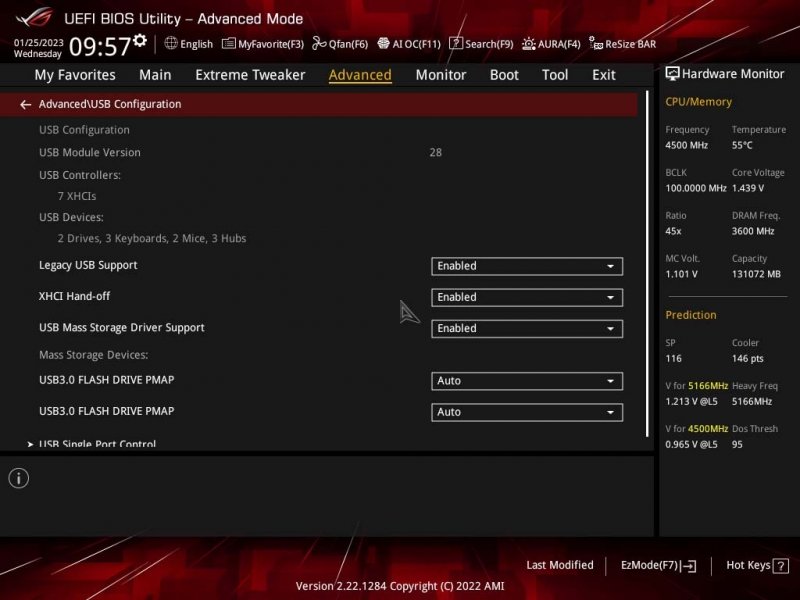
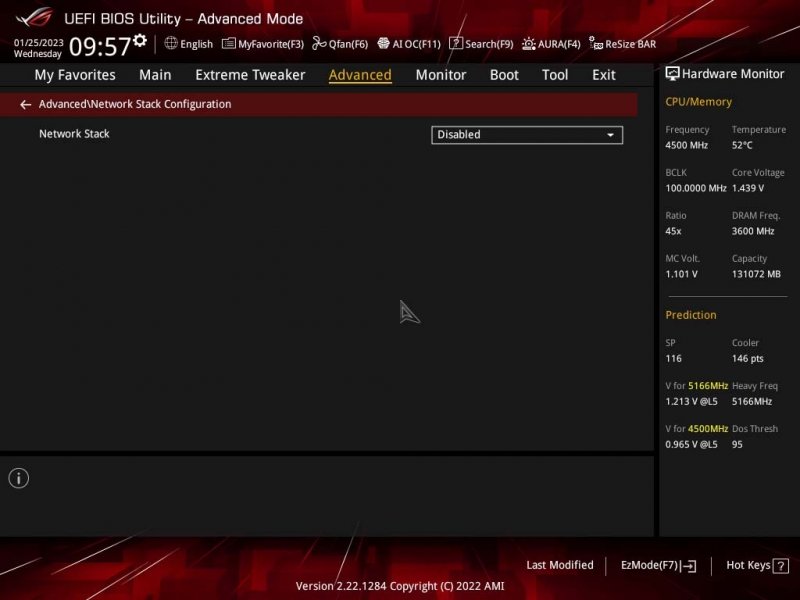
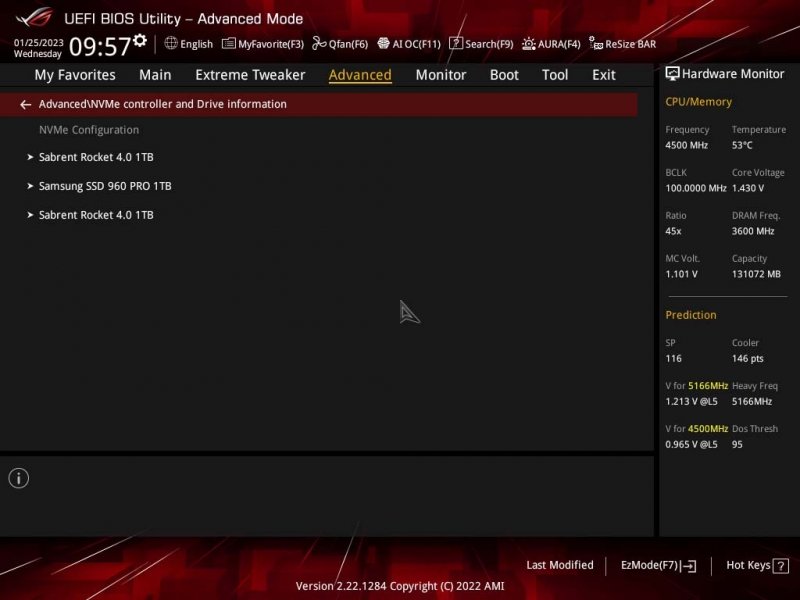
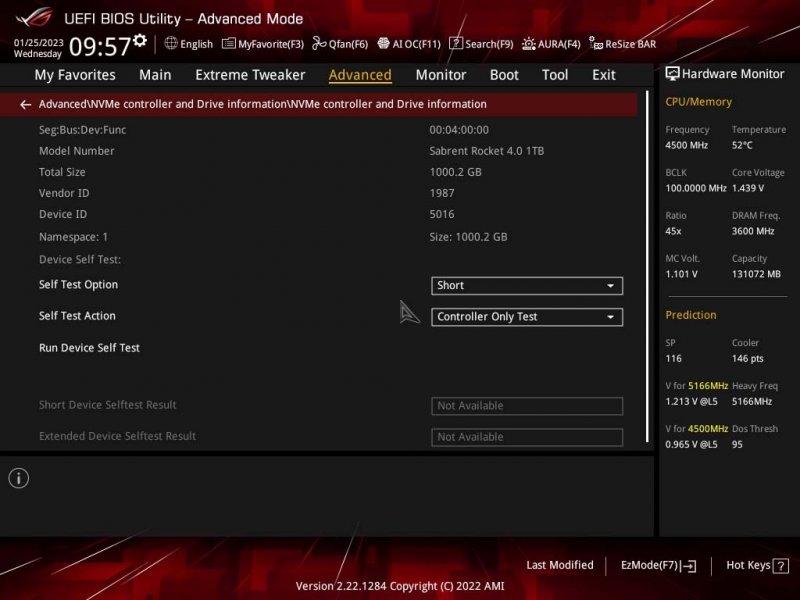
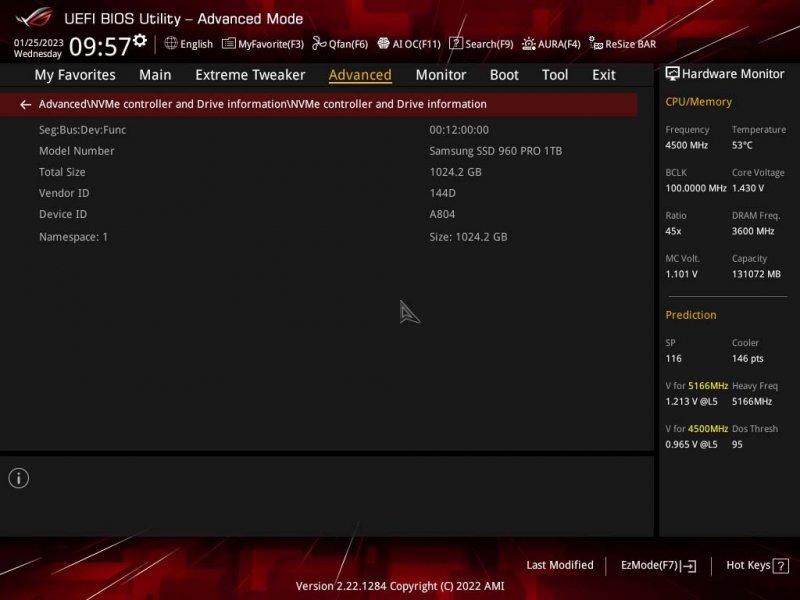
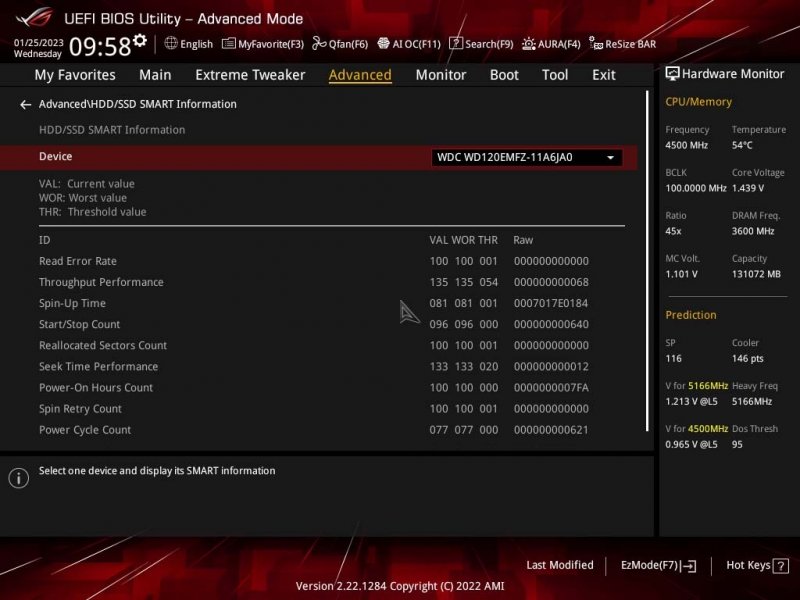
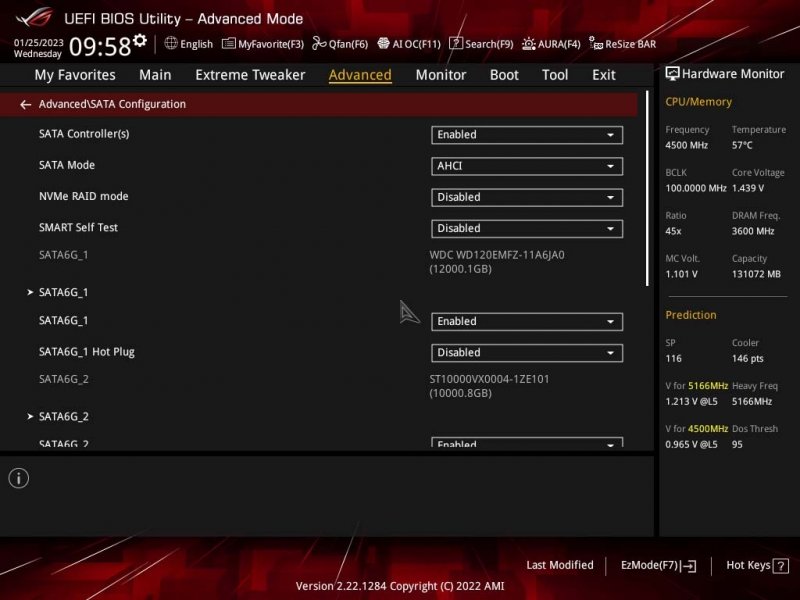
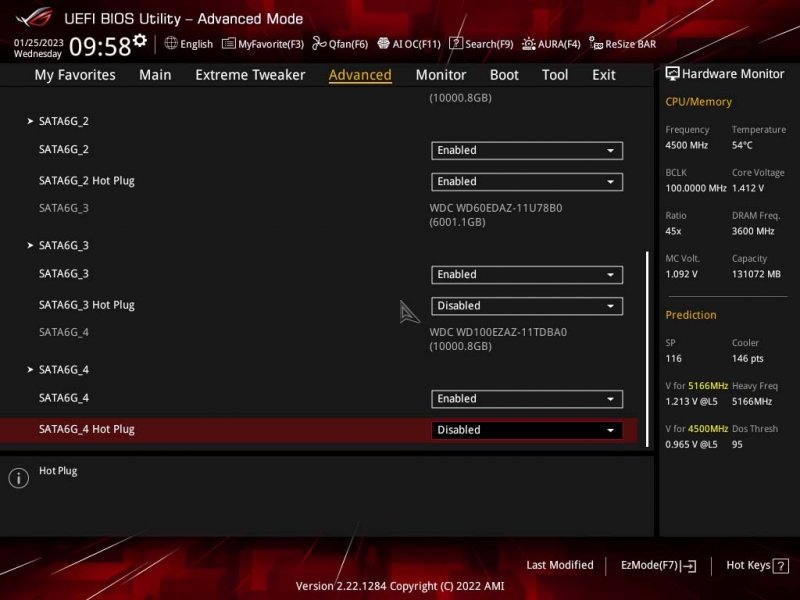
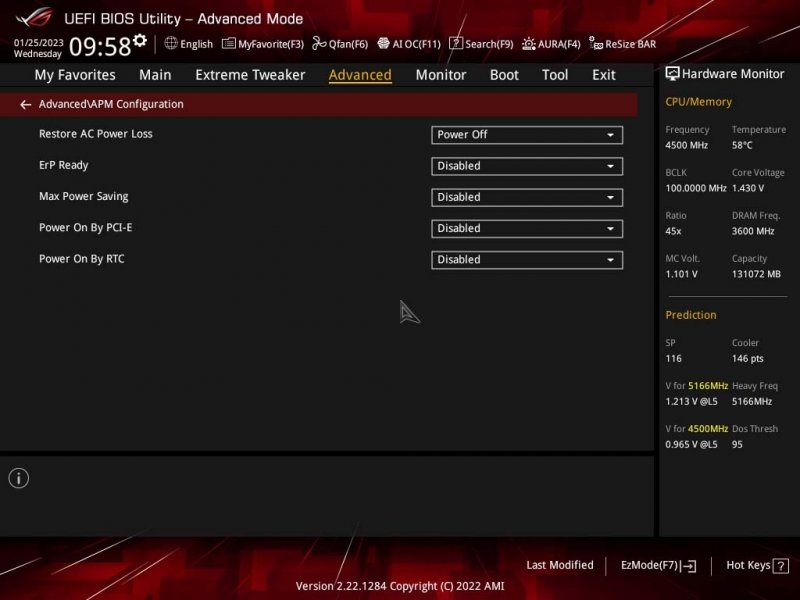
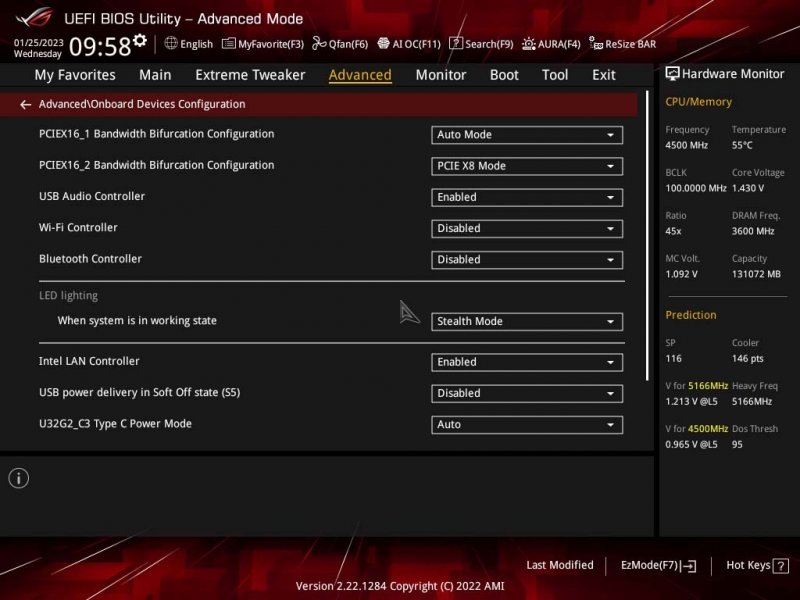
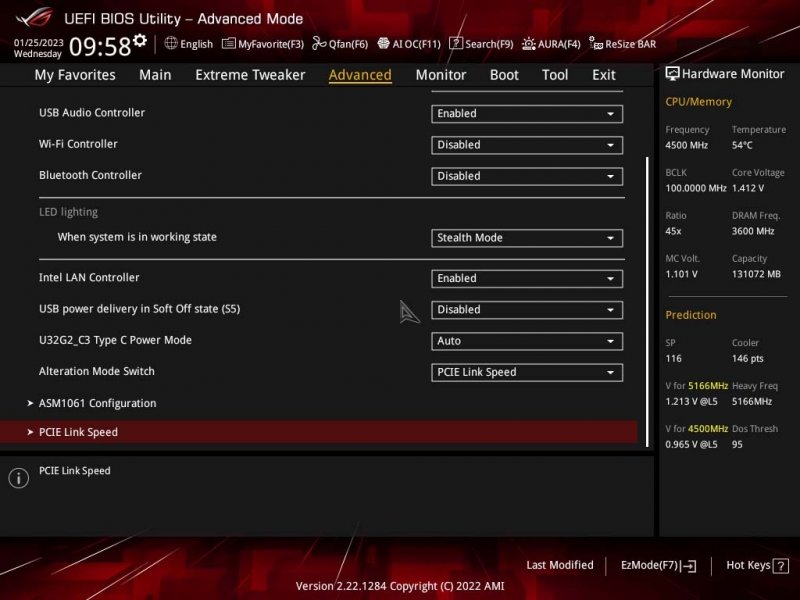
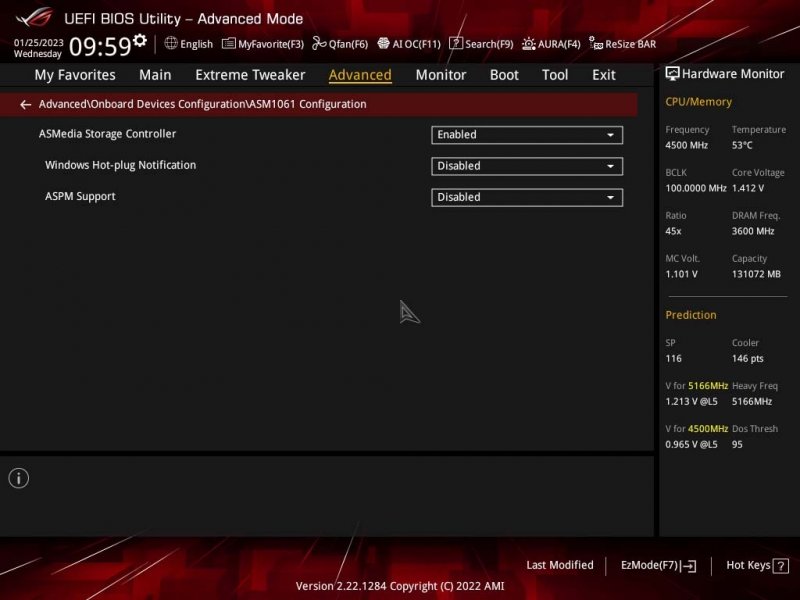
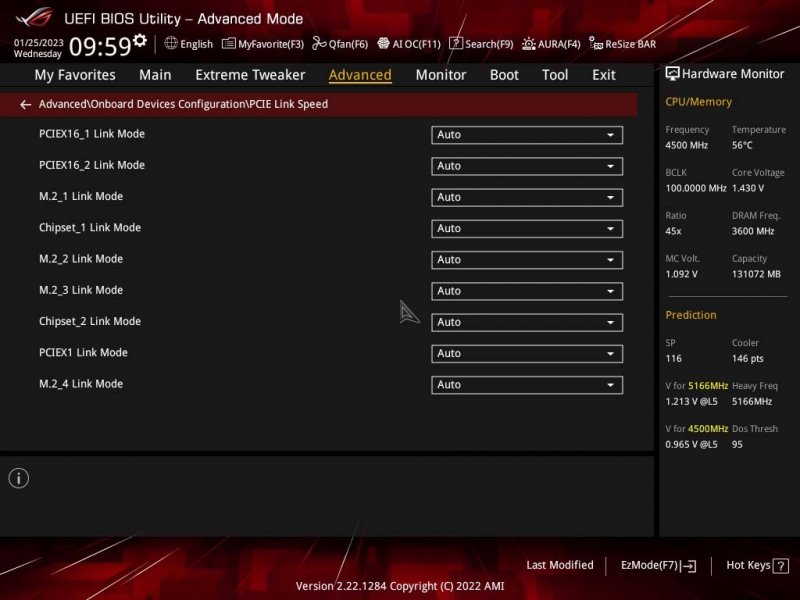
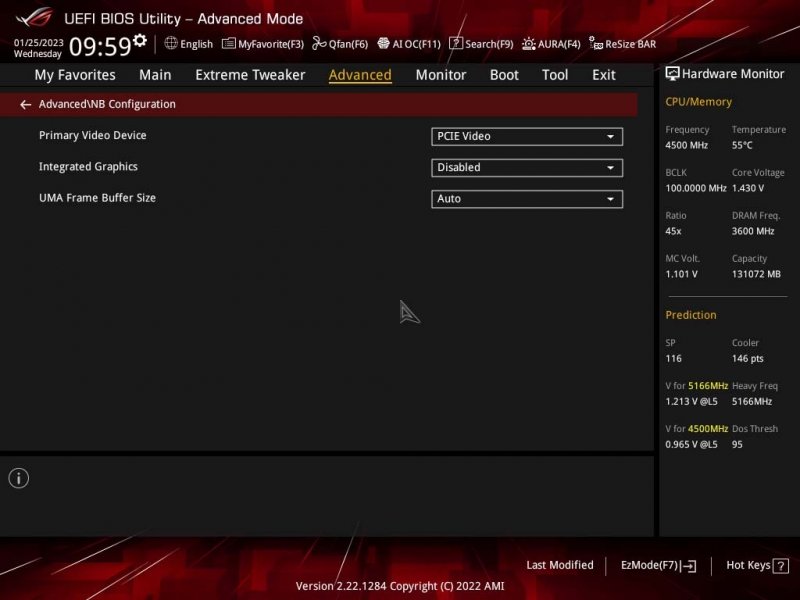
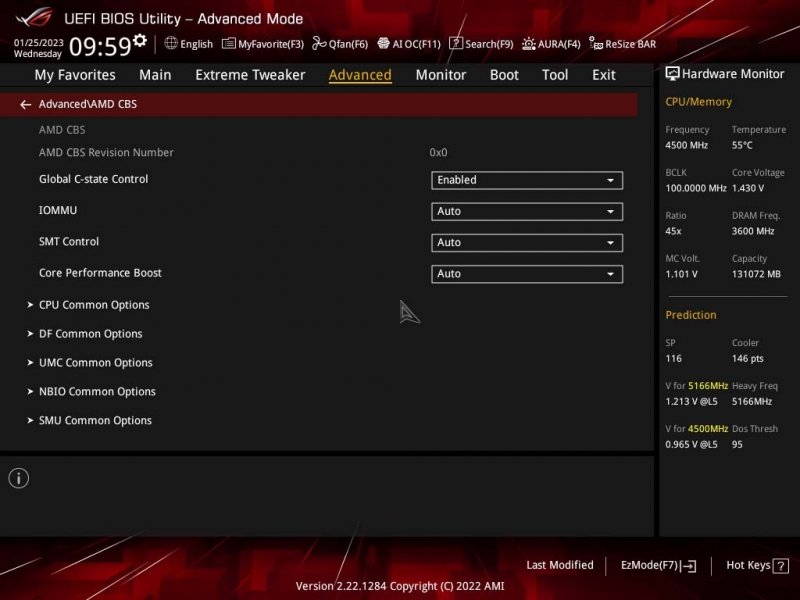
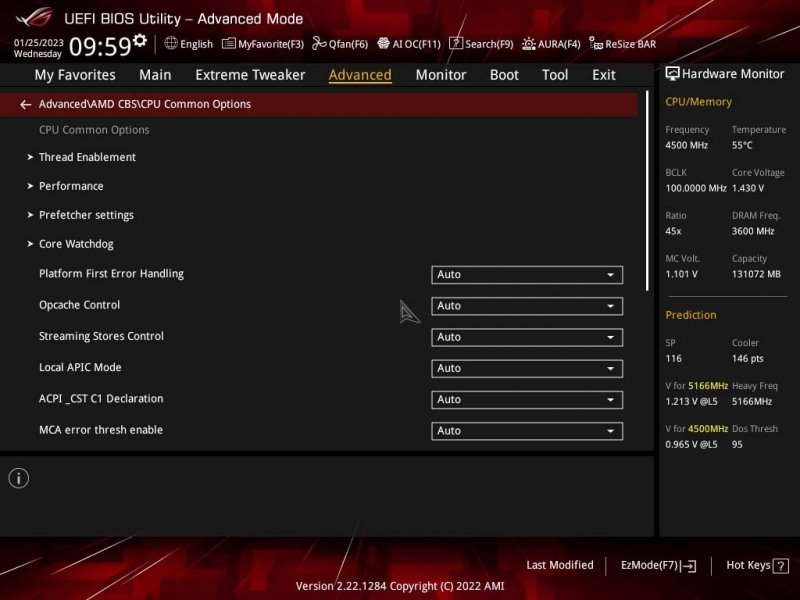
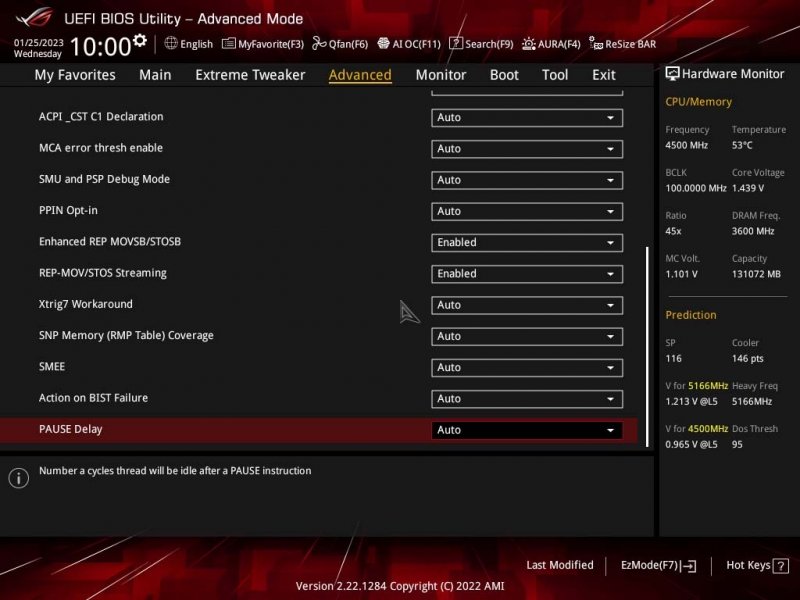
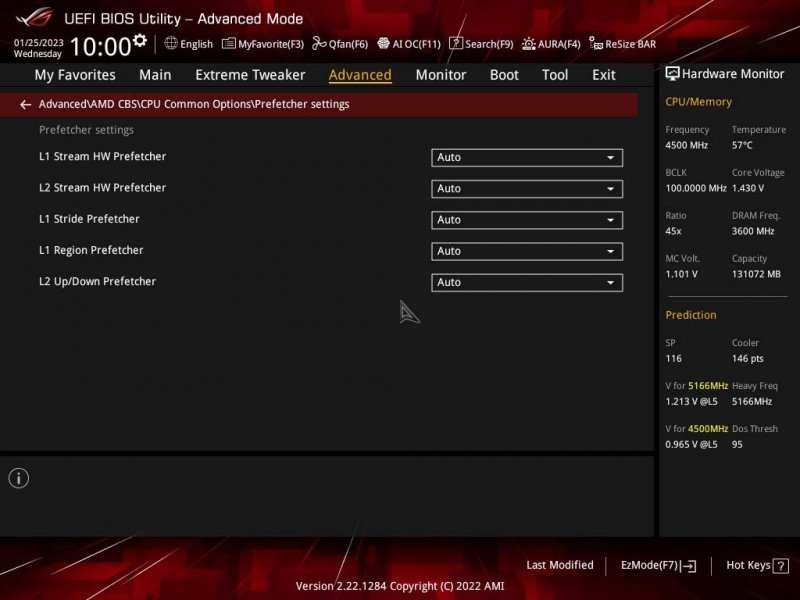
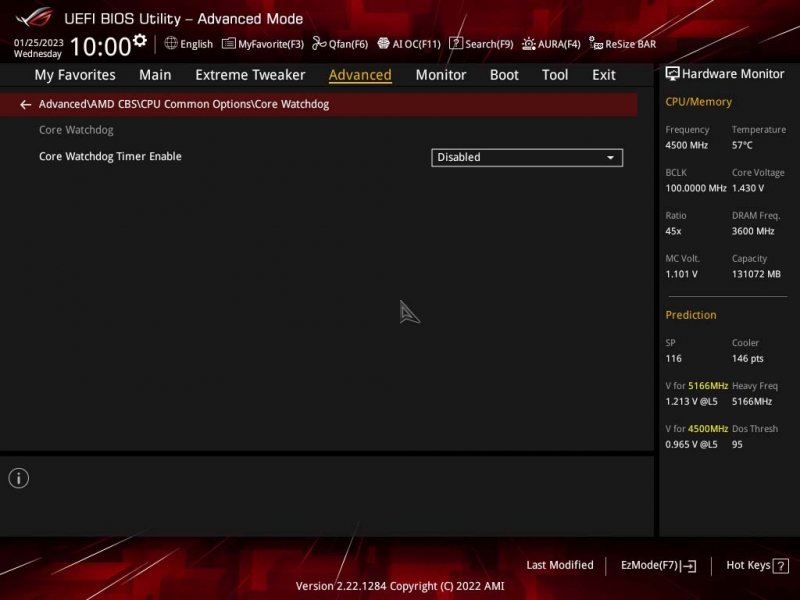
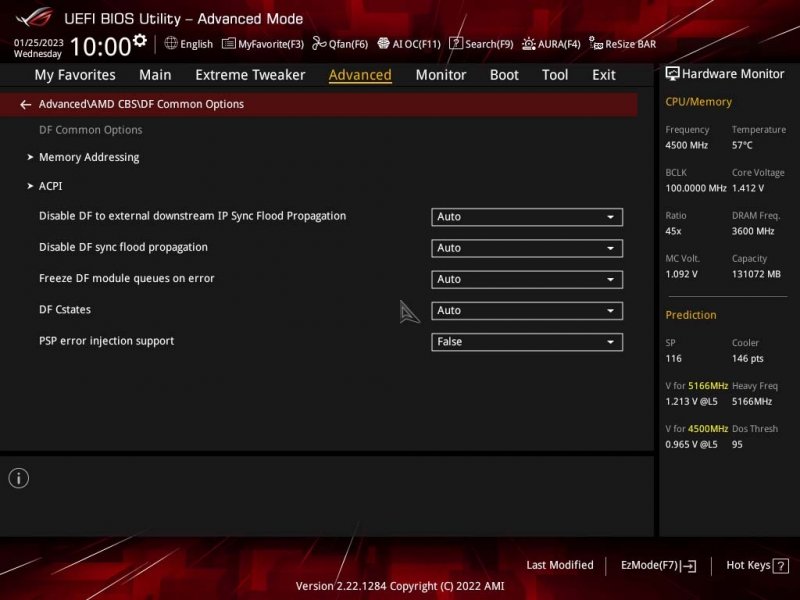
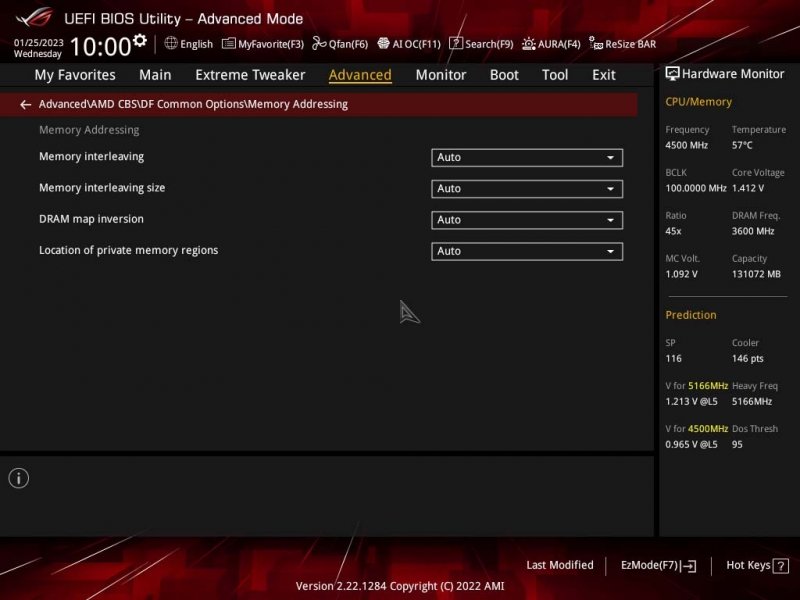
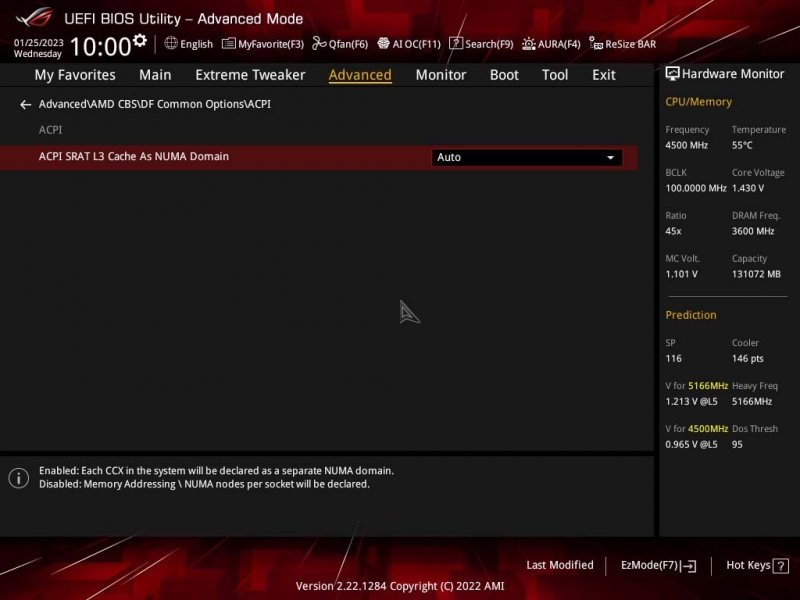
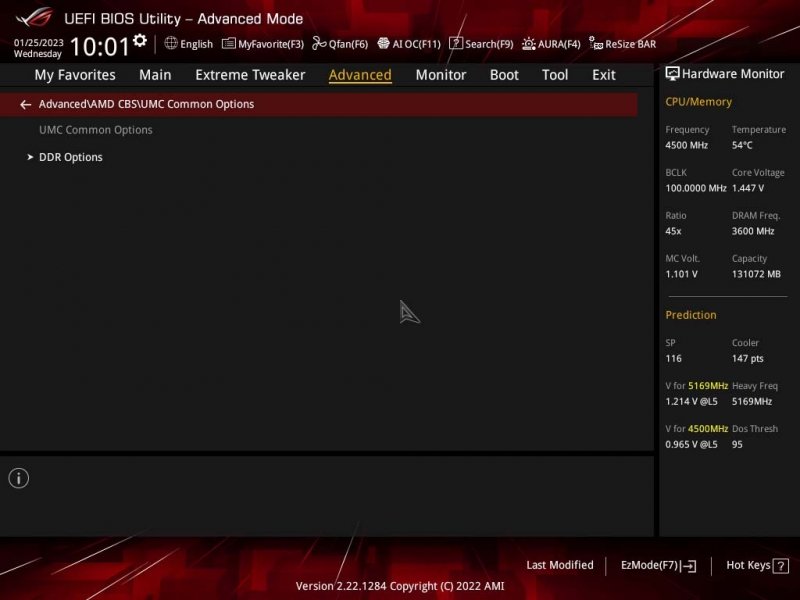
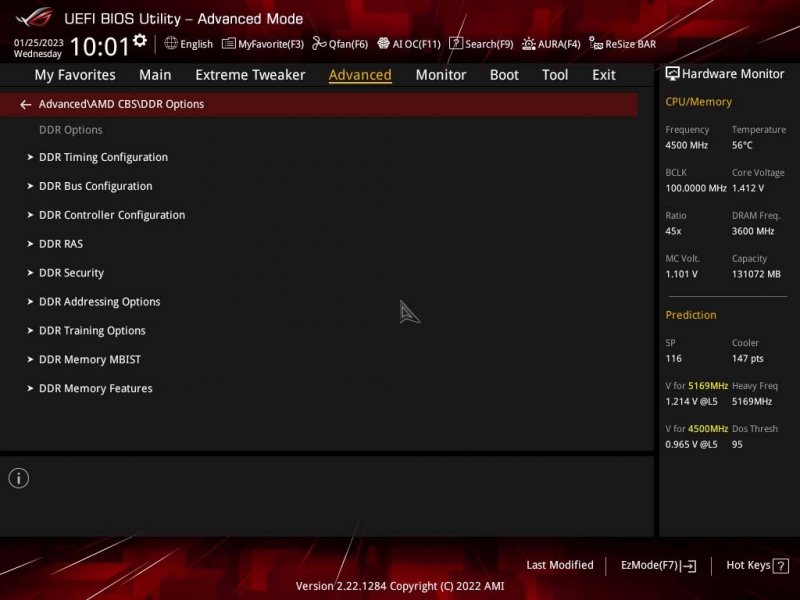
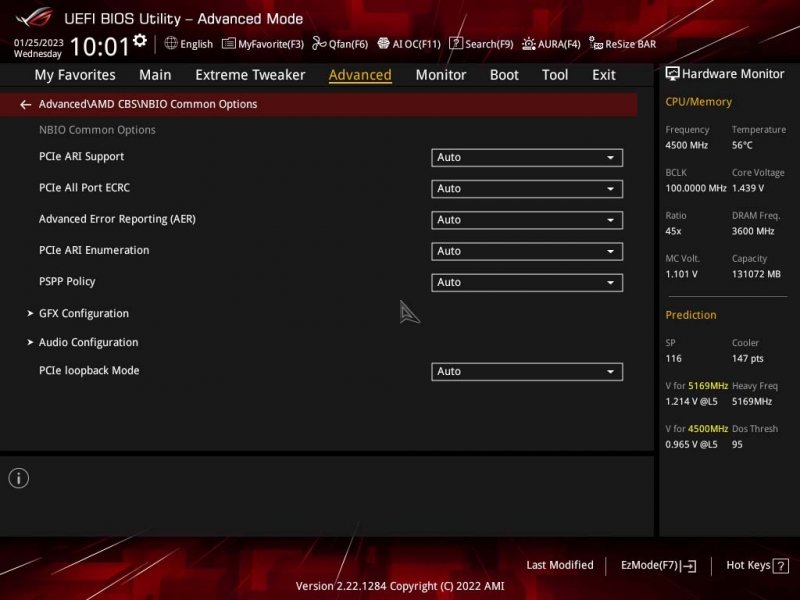
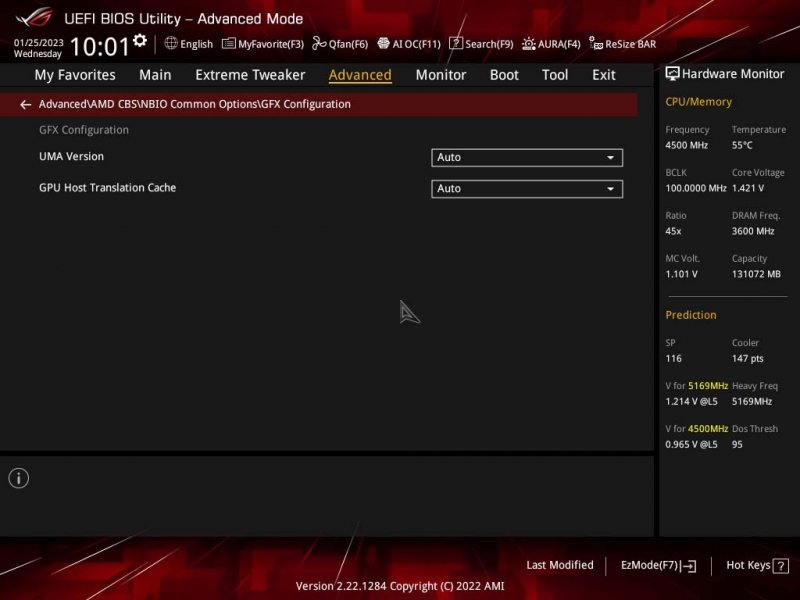
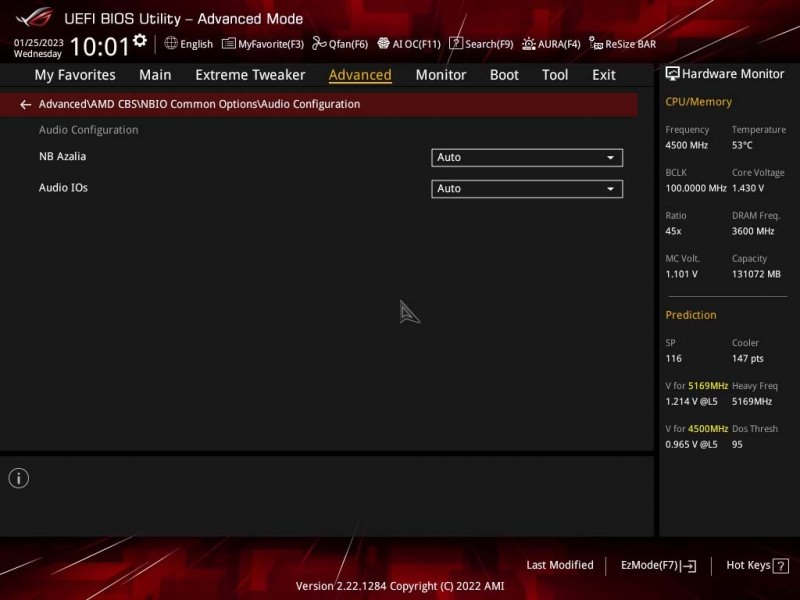
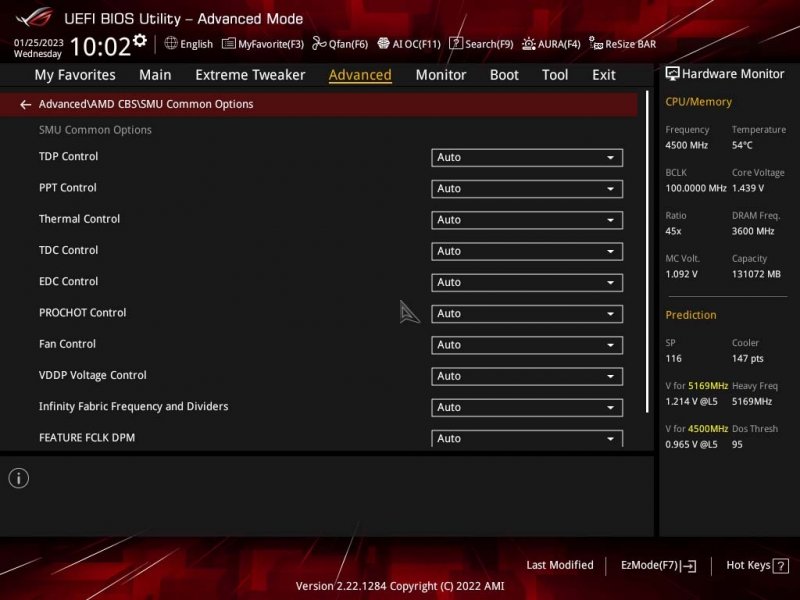
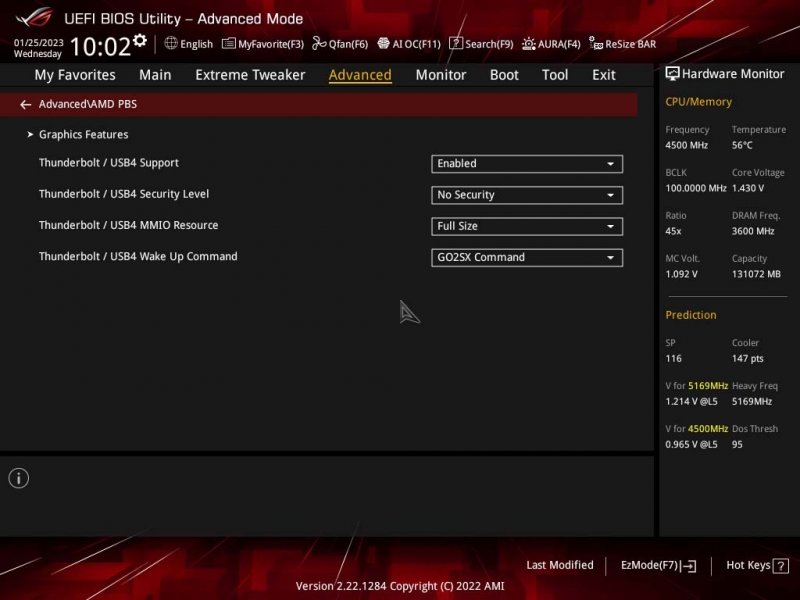
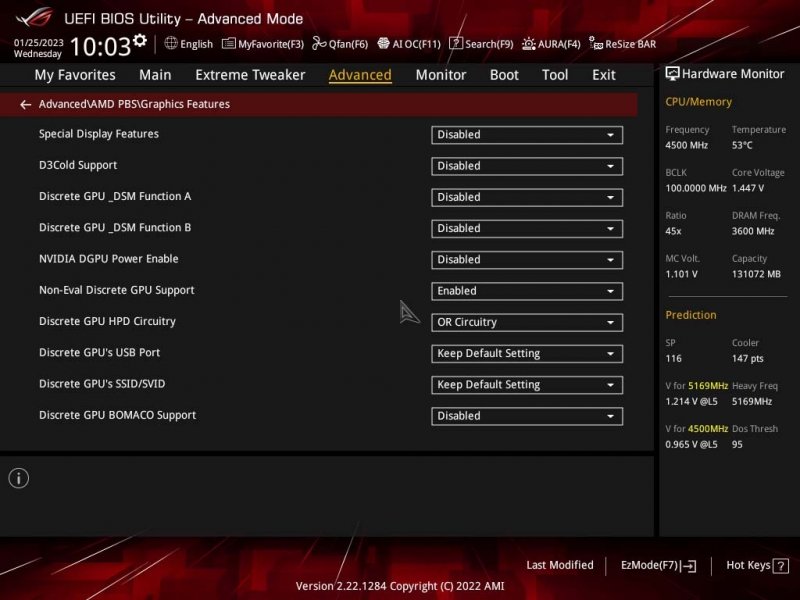
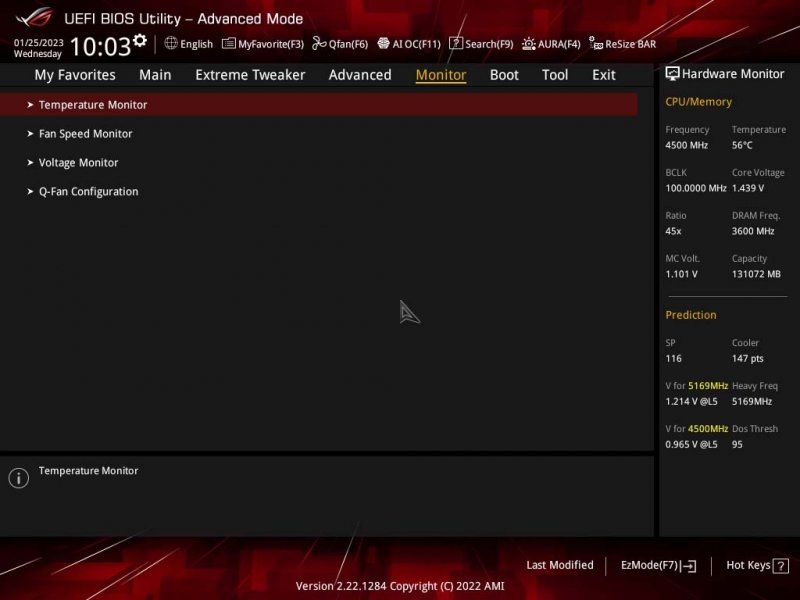
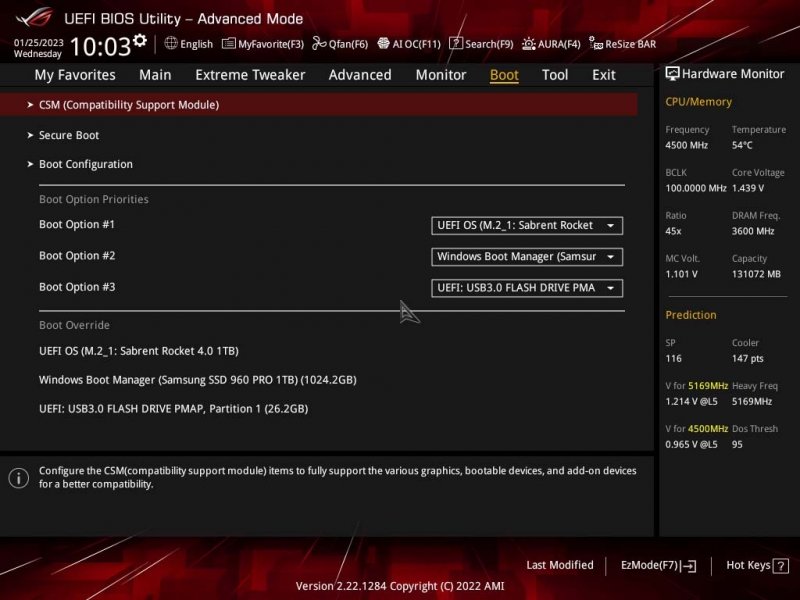
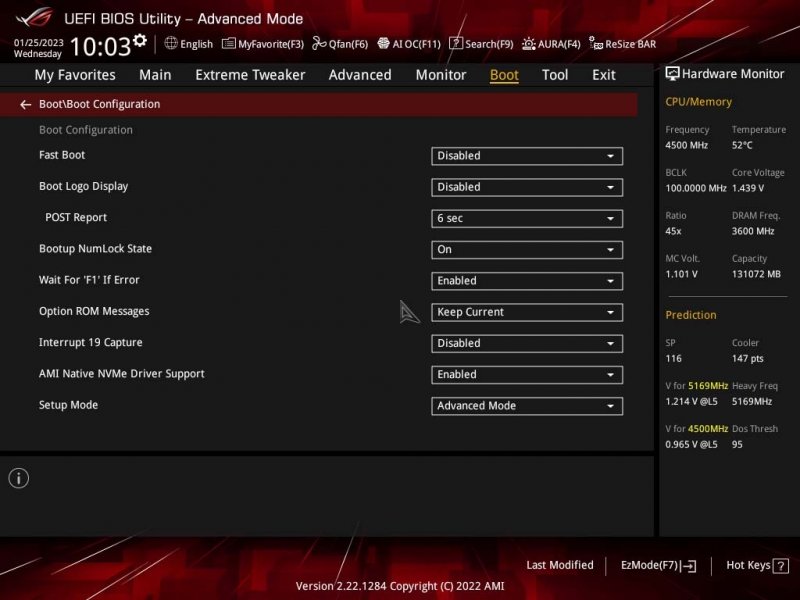
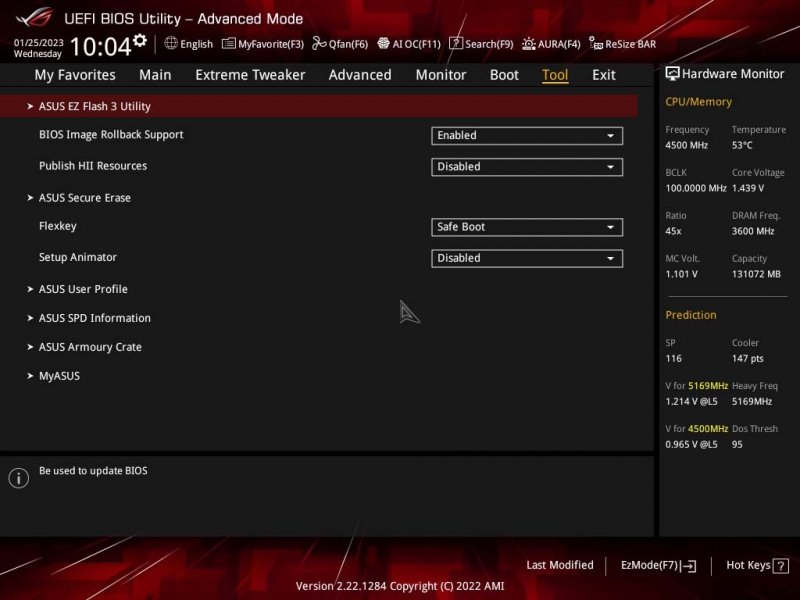
Bios version 0805 Load optimised settings then adjust some settings for your need Main Setting to hack is to disable internal AMD GPU, CSM OFF, 4G ON, Fast Boot Off.
-
- 3
-

-

-
- asus rog x670e hero bios settings
- 7950x
-
(and 1 more)
Tagged with:
-
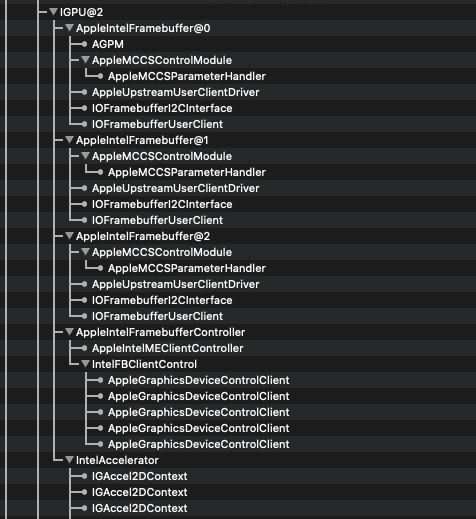
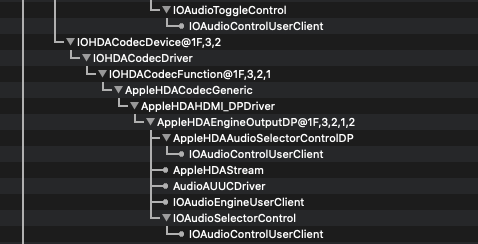
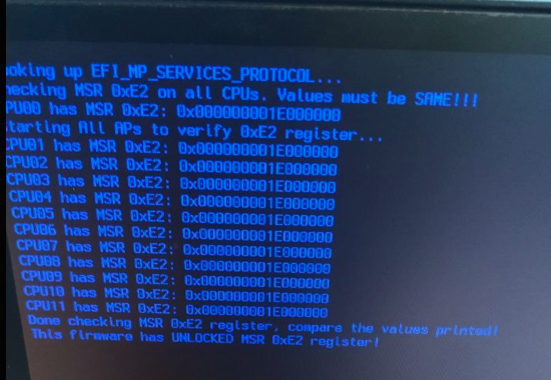
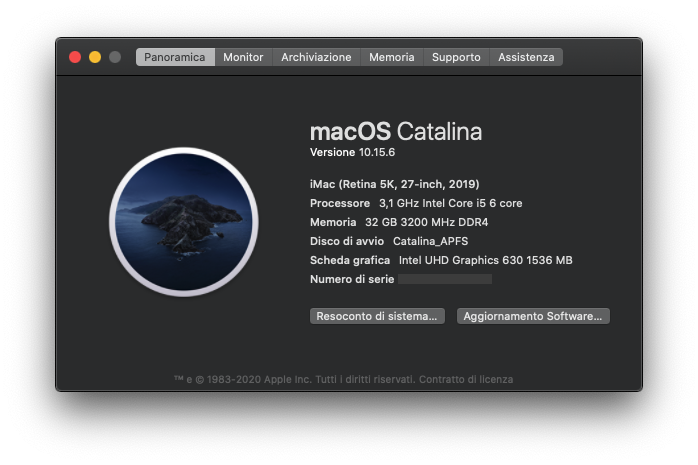
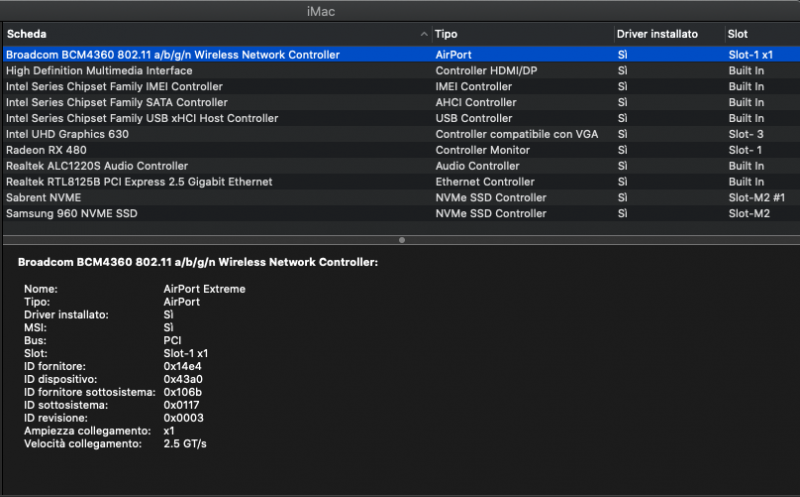
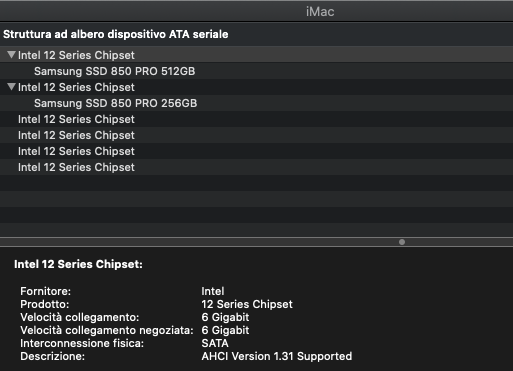
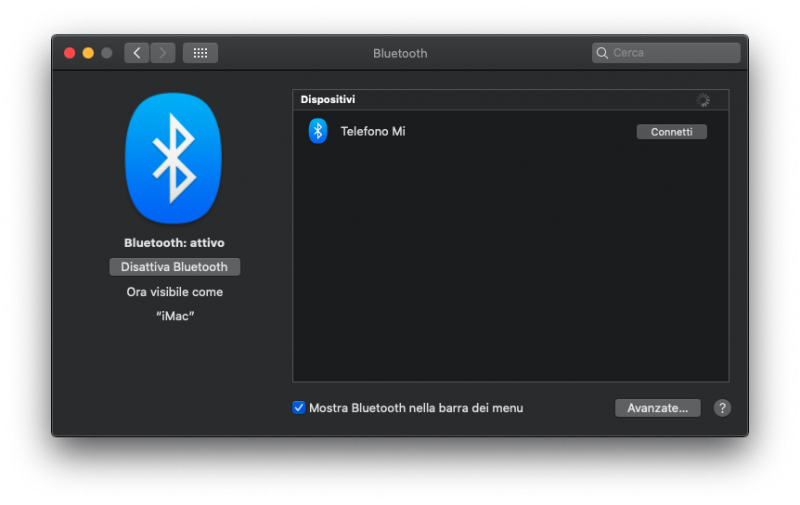
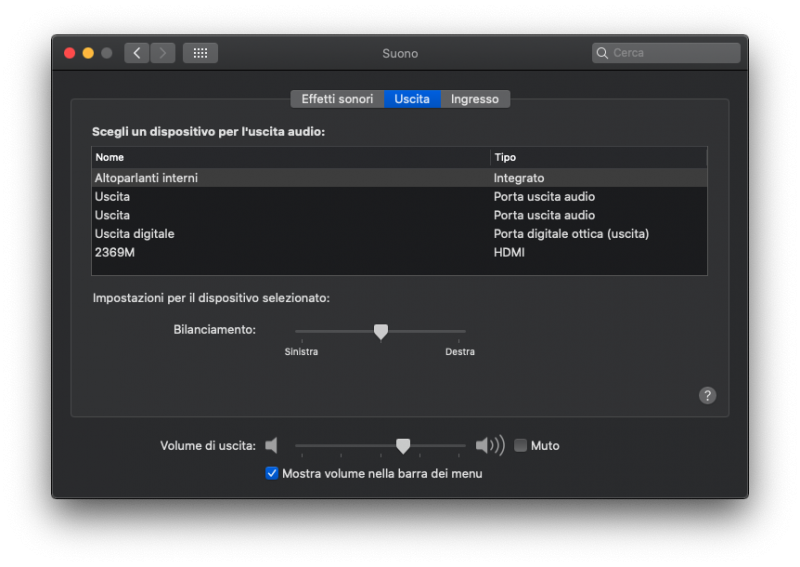
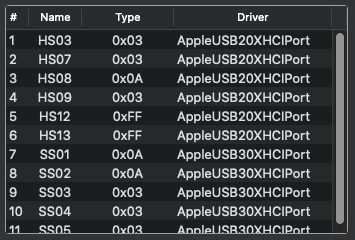
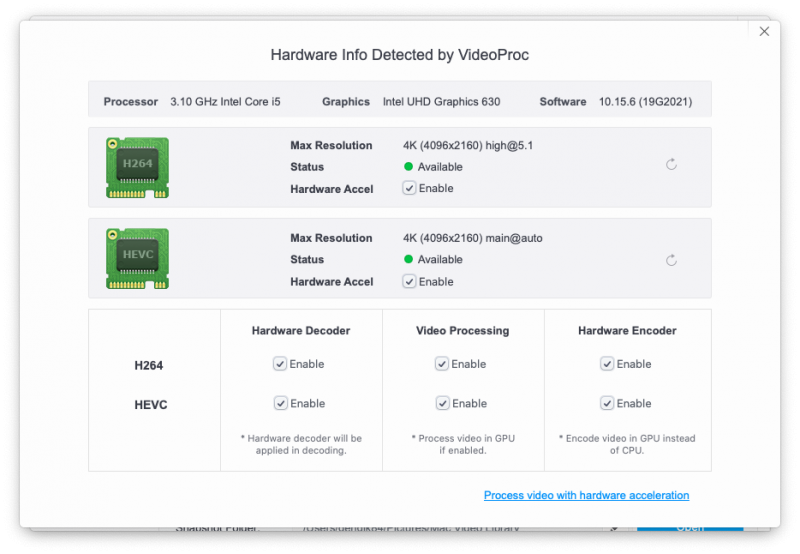
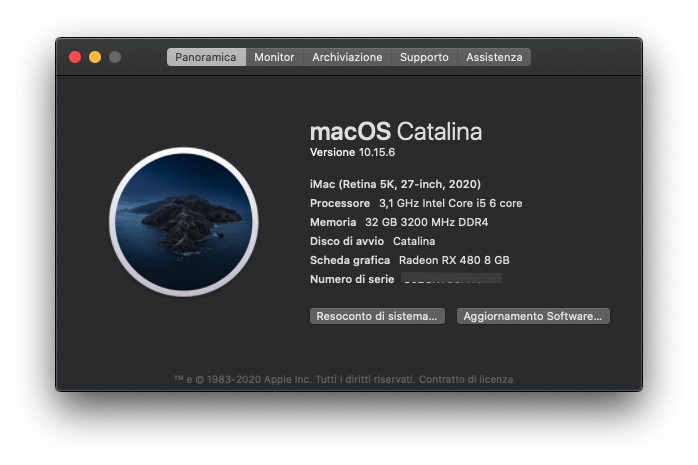
https://www.asrock.com/MB/Intel/Z490 Extreme4/index.it.asp#Specification Salve a tutti Personalmente ho assemblato questo hardware con la suddetta scheda madre e un I5 10500 (non necessito di chissà quale "potenza"), con 2x 16GB di ram a 3200Mhz Scheda madre ottima, adoro le Asrock... Nessun problema inerente al bios (AWAK), di fatto è completamente assente nelle acpi che sono estramamente pulite. IGPU: Singolarmente funzionante con WEG e relative patch (device properties), compreso audio HDMI. Nota: per adesso ho provato e usato patch per la serie precedente UHD630 CFL dGPU: personalmente monto una AMD 480, nativamente supportata, con IGPU abiltata per codifiche Last login: Thu Sep 3 18:41:37 on ttys001 gengik84@iMac ~ % /Users/gengik84/Downloads/VDADecoderChecker ; exit; Hardware acceleration is fully supported [Processo completato] Ethernet: https://www.macos86.it/topic/2703-lucyrtl8125ethernet-by-mieze/ Audio: AppleALC (layout=1) ACPI: SSDT_Basic disponibile in download Nota: tale scheda avvia senza nulla ed ha nvram funzionante "senza aggiunte", quindi tutto ok compreso shutdown e reboot. MSR: Nessun blocco a riguardo di origine, nessuna modifica effettuata. Configurazione personalizzata, tramite SSDT, con cose estetiche aggiunte come le info in PCI (queste non hanno nessuna correlazione logica in fatto di qualità hackintosh) WiFI: combo wifi/BT Broadcom nativamente supportato iMessage/FaceTime: funzionanti USB: Mappatura eseguita come da mia guida (link in firma), con relativa definizione dei connettori usando la mia patch. Nota: per ovvie ragioni, su Mojave iMac 20.x non può essere usato, quindi in caso usare il precedente iMac 19.x o iMacPro Sarebbe il caso, che cambiassi la scheda video, montando una AMD RX 5500/5600, allora sarebbe al completo per uguagliare i nuovi iMac20 😅 Per ora mi ritengo veramente soddisfatto di questo "gioiellino" quindi rimanderò la video al futuro anche perchè non sono uno che lavora con questa, quasi mi basterebbe la sola integrata... Configurazione sia con OpenCore sia con Clover (ocquirk) 🙂
-
Un ringraziamento speciale a @Gengik84 e @damiandrake per la loro pazienza e per tutto l' aiuto che mi hanno dato per arrivare fino a qui! 💪 C'e' ancora del lavoro da fare ma pian pianino arriveremo al prodotto finale! Specifiche: Intel Core i5-5200U Intel(R) HD Graphics 5500 4GB DDR3 1600MHz Qualcomm Atheros QCA61x4 Wireless Adapter (non supportato) 1000 GB Hybrid HDD Display FullHD 15.5" Tastiera retroilluminata Scocca in alluminio Bootloader: OpenCore Kext: AppleALC.kext Lilu.kext RealtekRTL8111.kext VirtualSMC.kext WhateverGreen.kext ------------------------------------------------------------------ SMCBatteryManager.kext ( da sistemare ) ApplePS2SmartTouchPad.kext ( unica alternativa per ora ) Cosa funziona: Grafica Audio Rete ( Ethernet ) USB funzionanti ma non ancora mappate Cosa non funziona: TouchPad da sistemare piccole cose, per ora non viene solo rilevato WiFi ancora da sostituire la scheda interna con una scheda WiFi Bluetooth compatibile Tasto FN da impostare con i vari shortcuts Batteria StandBy DualBoot con Windows in Partition NOTA BENE: La EFI in allegato ha i campi della PlatformInfo cancellati, questi campi dovranno essere compilati da voi con l' apposito programma ProperTree (editor per file plist) e con l' ausilio di GenSMBIOS. MLB SystemMemoryStatus SystemProductName SystemSerialNumber EFI.zip
- 5 replies
-
- 1
-

-
- catalica
- hackintosh
-
(and 1 more)
Tagged with:
-
Ciao. Sto cercando un nuovo laptop per installare Mac os Mojave 10.14.6 (18G8022) per produre musica a scopo lavorativo, che modello mi consigliate? budget 400/500 euro Sto cercando un modello che una volta installato l'OS possa garantirmi alte prestazioni e soprattutto stabilità. Il mio vecchio laptop ASUS N551JX-CN043T - HD4600 Mobile - Wi-Fi Atheros AR9485 del 2015 è ancora relativamente funzionante, però è molto instabile, spesso va a rallentatore e le app saltano durante i lavori e prensenta anomalie, sballa i passaggi che faccio tipo gli editing della voce etc. Fatemi sapere la vostra opinione. Grazie @Gengik84 @marzillo @iCanaro @Ciro82 @MacOS86 @foskvs @Jolly @Carbo @carlo_67
-
Ciao a tutti, Come da titolo ho un TPC-2A Plus (Conosciuto anche come Devo Evobook v2) con queste specs: Intel atom N270 Intel 945GM express family "gpu" 2GB RAM LAN Realtek 802.11 b/g/n Wifi ralink (posso cambiare con uno realtek) SSD 240GB o HDD 320GB Cerco di installare OS X da Leopard a Mavericks, va bene sia Clover che OC che chameleon. Grazie. Edit: se possibile, potrei avere anche il touchscreen funzionante.
- 3 replies
-
- hackintosh
- intel
-
(and 2 more)
Tagged with:
-
Ciao a tutti, ho un PC con le seguenti componenti: - ASUS P5Q DELUXE; - Intel Core 2 Duo E8600; - RAM 4GB DDR2 800MHz (presto diventeranno 8); - MSI GT710 2GB; - SSD 120GB. Prima della GT710 possedevo un'altra GPU NVIDIA compatibile nativamente con macOS High Sierra. High SIerra girava benissimo e quindi decido di tentare con Catalina utilizzando una GT710. Il sistema funziona perfettamente, però c'è un problema... ogni volta che riavvio o spengo il PC il BIOS si resetta alle "impostazioni di fabbrica" e mi tocca riconfigurarlo ogni volta. Questo problema non si verificava ne su High Sierra, ne su Windows 10. Ci tengo a precisare che ho già provato ad abilitare in Clover le voci AppleRTC ed FixRTC ma non cambia niente. Come potrei risolvere?
- 43 replies
-
- hackintosh
- catalina
-
(and 2 more)
Tagged with:
-
Salve a tutti, innanzitutto mi presento, sono Giovanni, vado subito al sodo: non riesco in nessun modo e con nessun bootloader a far partire mac os catalina sul mio portatile lenovo, ho provato di tutto, dalle immagini olarila a quelle nieresh, da clover, opencore e chameleon. Lascio le specifiche hardware del portatile qui sotto. Spero che qualcuno possa aiutarmi e ringrazio in anticipo chi lo farà. 🙂 P.S. se avete bisogno altre informazioni sul portatile ditelo. Scheda tecnica Lenovo Yoga C640-13IML 81UE0011IX SCHERMO: Touch 360° IPS Led lucido 13.3”, 16:9, Full HD 1920x1080, 300 nit, 60 Hz. CHIPSET: nd. CPU: Intel Core i5-10210U (1.60/4.20 GHz, 4 core / 8 thread, 6 MB L3, TDP 15W). SCHEDA GRAFICA: Intel UHD Graphics 620 memoria condivisa. HARD DRIVE: SSD M.2 2242 PCIe NVMe 512 GB G3x2. RAM: 8 GB DDR4-2400 saldati in dual channel. DRIVE OTTICO: non presente. AUDIO: 2x2 watt altoparlanti + 2 microfoni. WEBCAM: HD 720p con otturatore. RETE: Wi-Fi 5 802.11ac (2x2), Bluetooth 5.0. INTERFACCE: 2 x USB-A 3.1 Gen 1, 1 x USB-C 3.1 Gen 1 (Display Port, alimentazione), 1 x mini-jack ingresso microfono/uscita cuffie.
-
Version 1.2.6
115 downloads
Download Check Hackintosh Tool Command-line con relative funzioni che possono essere visualizzate usando come "argomento" -h oppure --help USAGE: /Users/'user'/../DCHT [Options] OPTIONS DCHT -h, --help Show this message. ----------------------------- ACIDANTHERA -------------------------------- DCHT Default (No options). Download Release Version. DCHT -dbg Download Debug Version. DCHT -sv, --showversion Show Latest Available Version. DCHT -dloc, --download-oc Download OpenCore Latest version. DCHT -loc, -log--opencore Show OpenCore Boot log. DCHT -ocver, -opencore--version Show My OpenCore Version. DCHT -d, -download <kext name> Download single kext. DCHT -ocem, -oc--efimaker Make OC EFI's folder with latest kexts. DCHT -ocbd or -oc--bindata Download OC OcBinaryData (Gui). ----------------------------- CLOVER ------------------------------------- DCHT -dlclover, --downloadclover Show Clover Latest Version and Download. DCHT -dlcloveriso, --downloadclover-iso Show Clover Latest Version and Download. DCHT -dlcapp, --download-cloverapp Show Clover Latest Version and Download. DCHT -dsfakesmc or --download-sfakesmc Show Slice FakeSMC Latest Version and Download. DCHT -lcl or -log--clover Show Clover Boot log. DCHT -clver, -clover--version Show My Clover Version. ----------------------------- EXTRAS ------------------------------------- DCHT -dlped,--download-plistedplus Show PliestEDplus Latest Version and Downloads. DCHT -dlpb, -latest--prebuild Show and Download latest pre-compiled master commits. DCHT -pm, --powermanagement Check Power Management. DCHT -info, --files It lists all supported items DCHT -uf, -user--friendly Use menù choice. Note:added a lot of functions -------------------------------------------------------------------------- Può essere collocato per comodità in /usr/local/bin Può essere usato semplicemente richiamandolo con DCHT <opzione> oppure trasportandolo direttamente sul terminale, spazio, e poi <opzione> Eseguito di default scarica files acidanthera Release- 1 comment
-
- 6
-

-

-

-
- hackintosh
- tool
-
(and 1 more)
Tagged with:
-
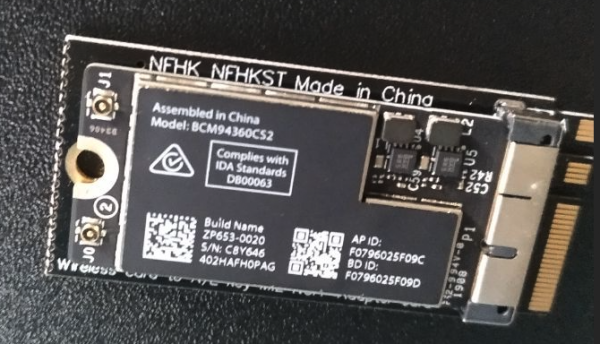
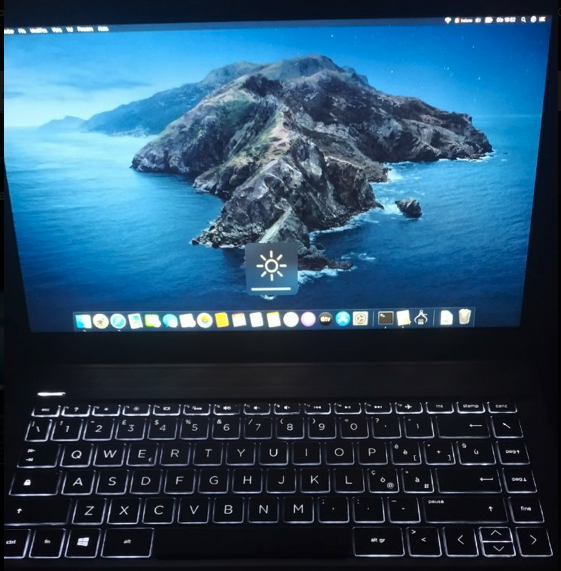
Specifiche: i5 8565u UHD620 8GB DDR4 512 GB nvme Display FullHD IPS 14" Tastiera retroilluminata Scocca in alluminio Lettore di impronte Bootloader: OpenCore 😍 Kexts: VirtualSMC + Plugins VoodooPS2Controller + Plugins (acidanthera) Lilu Whatevergreen AppleALC RTL8111 NoTouchId: per disabilitare il lettore di impronte (personalmente non lo uso, disattivato direttamente tramite aCPI) Cosa funziona: Power Management Grafica Audio Rete Lan Batteria Wifi M2 (ngff) : sostituito l'originale Intel con scheda originale apple BCM94360CS2 montata con adattatore. (supporto nativo) Bluetooth: integrato nel modulo (supporto nativo) Regolazione Luminosità compreso da tasti Fn Luminosità tastiera compreso regolazione da tasti Fn iMessage FaceTime Sleep (anche con ibernazione impostata a 3) Note: Accesso alle impostazioni avanzate premendo CTRL+F10 (thx @A23SS4NDRO) Nessuna patch sul kernel richiesta, quindi nemmeno AppleXcpmCfgLock. Usb tutte funzionanti nativamente, ho solo corretto alcuni connettori perchè sono pignolo 😅 Trackpad funzionante compreso tutte le gestures Risultato soddisfacente direi... 😁 Considerando poi che l'ho acquistato usato da amazon Warehouse e pagato il 40% in meno, ricevendo un oggetto perfetto, nessun graffio nemmeno minimale... un oggetto nuovo di fatto e un gioiellino in hack! HP sempre ottimi in hack... e di fatto si accoppia bene con quello di @Ciro82 https://www.macos86.it/topic/2342-hp-pavilion-14/ Caratteristiche simili ma questo a differenza ha una scheda madre di serie successiva e lettore di impronte
- 121 replies
-
- 7
-

-

-

-
- hp
- macos catalina
-
(and 1 more)
Tagged with:
-
avrei bisogno del vostro aiuto ho un acer aspire 5742zg,con 4gb di ram,una ati radeon 6370m e un i5 520m (che ho sostituito al pentium che c’era in precedenza) vorrei installarci hackintosh,magari versioni più vecchie come high sierra o mojave ho provato in un sacco di modi tra qui hackintosh zone e niresh dove la chiavetta non riesce ad avviarmelo infatti mi esce “still waiting for root device” nonostante io abbia provato con vari flags all’avvio unibest (tramite macchina virtuale) che però nella creazione della chiavetta smette di leggermela ,come se l’avessi tolta dal pc avreste qualche consiglio?
-
- pc
- hackintosh
-
(and 6 more)
Tagged with:
-
Ciao, ho trovato su internet una cartella efi con tutti i file necessari per installare Mac Os Big Sur sul mio Corebook X, il problema è che quando faccio partire il boot mi esce la schermata di open core ma c'è solamente Windows.. Quindi non mi esce "Install Mac Os" o roba simile. Qualcuno potrebbe aiutarmi? Ci tengo a dire che qualche giorno fà sempre grazie a questa cartella efi che avevo trovato ma non era aggiornata all'ultima versione di open core ero riuscito ad installare Big Sur, poi ho fatto uno sbaglio provando ad aggiornarlo ed è andato tutto male. Vi lascio la cartella, grazie se mi aiuterete. CoreBook_X_OC-main.zip
- 3 replies
-
- hackintosh
- laptop
-
(and 2 more)
Tagged with:
-
Buongiorno ragazzi, ultimamente ho provato a realizzare una EFI con OC per il mio notebook un lenovo g500 con: processore i7 3632QM, scheda grafica integrata hd graphics 4000 e 12 gb di ram ddr3. Ho provato ad installare Mac OS catalina (dato che è l’ultima versione che supporta) ma ogni volta che faccio il boot dalla EFI mi fa selezionare il disco da avviare e poi mi restituisce questa schermata; qualcuno sa come fare? EFI.zip
-
- opencore
- lenovo hackintosh
-
(and 9 more)
Tagged with:
-
[GUIDE] MSI MEG Z490I Unify ComponentsSingularity Computers WraithIntel i7 10700KMSI MEG Z490I Unify2x 32 GB 3200MHz Patriot Viper 4 Blackout RAMMSI RX 5700 XT Evoke OC1 TB Samsung 970 EVO Plus NVMeApple Broadcom BCM94360CS2 Bluetooth/WifiSeasonic Focus SGX-650 Watt PSUCableMod Custom PSU Cable4x Noiseblocker B12-PS FansPrehistoryThis build came about through a cooperation with igorsLAB and was supposed to be something very special.mITX form factor, Z490 chipset, powerful, quiet and water-cooled,which in itself is not an easy thing to do if you assume a mITX build.When it came to the case selection, I chose a Singularity Computers Wraith Case,because it has an integrated distribution panel with pump mount which makes it easier to build. We use a MSI MEG Z490I Unify motherboard which is equipped with a 10th Gen i7 10700K.For RAM we decided to use a 64 GB kit ala 2x 32 GB 3200 MHz Patriot Viper 4 Blackout with CL16-18-18-36.Because the mainboard can only be equipped with CNVi NGFFm2 modules,I was forced to come up with something regarding Bluetooth/Wlan.I removed the original Intel® AX201 NGFFm2 card from the module and installed new antenna cables including connectors.The original antenna cables were far too short for our use.The BCM94360CS2 is a Original Apple Notebook solution and does not fit into the NGFFm2 module,for this purpose one of the two NVMe slots that the board owns had to be sacrificed.With a DeLock m.2 Key -> m.2 Key E module the original Apple Broadcom BCM94360CS2 Bluetooth/Wifi card was installed into the NVMe slot.For the Bluetooth data connection I used the JUSB1 USB 2.0 Connector on the Motherboard. The 1 TB Samsung 970 EVO Plus with current Firmware was installed on the back of the motherboard.For this project Igor released a MSI RX 5700 XT Evoke OC from his private stock.For the water cooling components we got support from the company Alphacool, who completely equipped us with everything our heart desires.For the 10th Gen i7 10700K we use an Alphacool ice block XPX in the Polished Clear version.The MSI RX 5700 XT Evoke OC was equipped with an Alphacool ice block Aurora acrylic GPX-A GPU cooler including backplate. The cooling system is connected by Alphacool 13/10mm Black Chrome Tubes and Alphacool icicle PRO fittings in chrome.An Alphacool ice pump VPP755 pumps the coolant into the two 240mm Alphacool NexXxoS ST30 V.2 radiators.The radiators were equipped with 4x Noiseblocker NB-eLoop B12-PS Fans.The power is provided by a sponsored Seasonic Focus SGX-650 Watt SFX power supply,the original cables were replaced with cables from CableMod.A very big thank you to the sponsors at this point again: Alphacool, Blacknoise, igorsLAB and Seasonic! BIOSFirst download the following Bios File and the Bios Settings Profile attached to this post and extract them.Bios: https://www.dropbox.com/s/ea0dq7uzayu3ita/E7C77IMS.120.zip?dl=0Bios Profil: https://www.dropbox.com/s/m29ssxrthb0u2oi/Hackintosh Bios Settings.ocb.zip?dl=0Copy the two files to a Fat32 formatted USB stick and plug it into a free USB port.Start the computer and open the bios menu with the ESC key, then switch to EZ mode with the F7 key.Open the M-Flash menu You will be informed that your system will perform an auto reboot and start the flash mode.Confirm the selection with Yes. In flash mode you choose the firmware on your USB stick and confirm the flash process with Enter.After you have flashed the bios successfully and the system has rebooted,you open the Bios menu again with the ESC key and switch back to the EZ mode with F7.Afterwards you open the Save/Load Bios Settings OC PROFILE menu. Once there select the option "OC Profile Load From USB" and choose the "Hackintosh Bios Settings.ocb" file.Once the settings are loaded, save them with the F10 key before leaving the Bios.Alternatively you can also save the settings manually. BIOS SETTINGS PCIe/PCI Sub-system SettingsAbove 4G : EnabledSettings/Advanced/Integrated PeripheralsSATA Mode : AHCI ModeSettings/Advanced/Intel (R) ThunderboltDiscrete Thunderbolt(TM) Support : EnabledThunderbolt Boot Support : Pre-Boot ACLSecurity Level : No SecuritySettings/Advanced/Intel (R) Thunderbolt/Discrete Thunderbolt(TM) ConfigurationGPIO3 Force Pwr : EnabledSettings/Advanced/Intel (R) Thunderbolt/Discrete Thunderbolt(TM) Configuration/Thunderbolt(TM) OS SelectThunderbolt support : Enabled + RTD3Settings/Advanced/Power ManagementUSB Standby Power at S4/S5 : EnabledSettings/Advanced/USB ConfigurationXHCI Hand-Off : EnabledLegacy USB Support : EnabledBIOS CSM/UEFI ModeUEFISettings/BootMSI Fastboot : DisabledFastboot : DisabledSettings/Security/Secure BootSecure Boot : DisabledSettings/Security/Trusted ComputingSecurity Device Support : DisabledOC/Overclocking/CPU FeaturesCFG Lock : Disabled What do we need ?1. access to a computer where Windows/MacOS is already running2. macOS license or the operating system/Internet Recovery Files.3. a USB stick with 16 GB free memory.4. OpenCore EFIExample: Original Apple Mac OS X Snow Leopard DVD Create a USB flash drive via Windows What is required ?1. big sur recovery image : https://www.dropbox.com/s/kcp3pl83qgb6c2q/recovery.7z?dl=02. USB pen drive with 16 GB memory3. etcher for the recovery stick creation : https://www.dropbox.com/s/i5uurrk7zcwzmr4/balenaEtcher-Setup-1.5.112.exe?dl=0 Create the USB flash drive via macOS 1. open the App Store, enter Big Sur in the search bar and hit enter.2. start download and wait until it is completed.Once the download is complete, the following window will appear3. insert the USB stick and open the disk utility via Spotlight search 4. in the disk utility change the view to "Show all devices" first Now select your USB stick, in my case it is an Intenso cMobile Line Media USB Drive and select the option delete.A window will open and here you can set the settings for the formatting.Name: USBFile format : MS-DOS file system (Fat)Scheme : Master Boot RecordTo perform formatting, press Delete.If the process is successful, you will see the following window which can be closed then:5. enter Terminal in the Spotlight Search and run this application.Copy the command for Big Sur, paste it into the Terminal window and confirm with Enter.Big Sur: sudo /Applications/Install\ macOS\ Big\ Sur.app/Contents/Resources/createinstallmedia --volume /Volumes/USBCatalina: sudo /Applications/Install\ macOS\ Catalina.app/Contents/Resources/createinstallmedia --volume /Volumes/USBIn the terminal the whole thing should look like this:5. you will be asked to enter your password, which you confirm with Enter.Don't be irritated by the fact that the password field remains empty even after you have typed the password.You will be reminded that the volume named USB must be deleted.Enter Y and confirm with Enter.Now the USB stick will be formatted and created correctly.This is how it looks like in the terminal when the stick has been created successfully. Create the EFI for macOS via Windows What is required ?1. A bootloader: OpenCorehttps://github.com/acidanthera…penCore-0.6.3-RELEASE.zipGUI and HFSPlus driver for the bootloader:https://github.com/acidanthera…ryData/archive/master.zip2. to be able to configure the EFI, we need an additional Plist Editor. https://github.com/corpnewt/ProperTree/archive/master.zip 3. to facilitate the generation of the serials and SMBIOS data we need GenSMBIOS. https://github.com/corpnewt/GenSMBIOS/archive/master.zip 4. in order for our system to run as a hackintosh, some kexts are required.AppleALC = Audio https://github.com/acidanthera/AppleALC/releases/ Lilu - A versatile plugin that is required for both AppleALC and WhateverGreen. https://github.com/acidanthera/Lilu/releases LucyRTL8125Ethernet - Required for the Realtek® RTL8125B 2.5Gbps LAN controller https://github.com/Mieze/LucyRTL8125Ethernet SMCProcessor - Plugin for VirtualSMC - Allows to read CPU relevant data like temperatures etc.Can be found in the table of contents of VirtualSMC.SMCSuperIO - Plugin for VirtualSMC - Allows to read out CPU relevant data like fan speeds etc.Can be found in the table of contents of VirtualSMC.VirtualSMC - Apple SMC emulator including plugins - makes it possible to boot macOS https://github.com/acidanthera/VirtualSMC/releases Whatevergreen - Swiss Army Knife for GPUs, but now also includes many additional fixes https://github.com/acidanthera/WhateverGreen/releases You can download the kexts as a package here: https://www.dropbox.com/s/klfaadmfelwk937/Kext Files - MSI MEG Z490I Unify - Build.zip?dl=0 Additionally you have to download the BASIS-SSDT.aml https://www.dropbox.com/s/x8yn33yyizsnqoa/BASIS-SSDT.aml?dl=0 Create the EFI for macOS via macOS What is required ?1. A bootloader: OpenCorehttps://github.com/acidanthera…penCore-0.6.3-RELEASE.zipGUI and HFSPlus driver for the bootloader:https://github.com/acidanthera…ryData/archive/master.zip2. to be able to configure the EFI, we need an additional Plist Editor.We use the PlistEdit Pro under macOS, the trial version is absolutely fine. https://www.dropbox.com/s/bqradkm2pgiklep/PlistEdit Pro.zip?dl=0 3. to facilitate the generation of the serials and SMBIOS data we need GenSMBIOS. https://github.com/corpnewt/GenSMBIOS/archive/master.zip 4. in order for our system to run as a hackintosh, some kexts are required.AppleALC = Audio https://github.com/acidanthera/AppleALC/releases/ Lilu - A versatile plugin that is required for both AppleALC and WhateverGreen. https://github.com/acidanthera/Lilu/releases LucyRTL8125Ethernet - Required for the Realtek® RTL8125B 2.5Gbps LAN controller https://github.com/Mieze/LucyRTL8125Ethernet SMCProcessor - Plugin for VirtualSMC - Allows to read CPU relevant data like temperatures etc.Can be found in the table of contents of VirtualSMC.SMCSuperIO - Plugin for VirtualSMC - Allows to read out CPU relevant data like fan speeds etc.Can be found in the table of contents of VirtualSMC.VirtualSMC - Apple SMC emulator including plugins - makes it possible to boot macOS https://github.com/acidanthera/VirtualSMC/releases Whatevergreen - Swiss Army Knife for GPUs, but now also includes many additional fixes https://github.com/acidanthera/WhateverGreen/releases You can download the kexts as a package here: https://www.dropbox.com/s/klfaadmfelwk937/Kext Files - MSI MEG Z490I Unify - Build.zip?dl=0 Additionally you have to download the BASIS-SSDT.aml https://www.dropbox.com/s/x8yn33yyizsnqoa/BASIS-SSDT.aml?dl=0 Installation Plug in your USB Flash Drive and open the boot menu with the F11 key.Select the USB flash drive and confirm the selection with Enter.In the OpenCore Boot Picker, select the recovery stick with the name DSM2RECBS and confirm the selection again with Enter.Once you have arrived in the installer, open the Utilities tab and start the terminal.Then enter ifconfig and confirm the entry with Enter.The terminal lists all available interfaces.lo0gif0stf0xhc20xhc0en0For us en0 is important because this is our lan port, which is currently "inactive" according to ifconfig.With the Realtek 2,5 Gbit Lan Controller it is the case that it can not automatically get the correct settings for the Lan Port.Without the correct settings, no access to the Internet is possible, and without Internet access, no Internet Recovery Install can be performed.However, we can solve the whole problem via terminal.To do so, type the following command into the terminal and confirm the input with Enter:ifconfig en0 media 1000baseT mediaopt full-duplexTo check, enter ifconfig again and confirm with Enter. Now you should see "active" instead of "inactive".Thanks to griven who helped to solve the lan problem via terminal.After that close the terminal and switch to the disk utility.First change the view to "Show all devices" and then select the hard disk you want to use for macOS in the left tab.In my case this is a Samsung 970 EVO Plus with current firmware.(without current firmware on the 970 EVO Plus, it is not possible to install macOS on it)After that click on "Delete", another window will open and here you can define the following things:Name: Can be assigned as desiredFormat: Mac OS Extended (journaled)Scheme: GUID Partition TableClick on "Delete" afterwards.Once the formatting is complete, click "Done" and close the disk utility.Back in the selection menu, select "Reinstall macOS Big Sur".Press "Continue" and accept the terms and conditions.Select the hard disk you formatted for macOS and confirm the selection with "Continue".The remaining part of the installation runs automatically and we only need to intervene again briefly when it is finished.To avoid open questions I have captured the whole installation process in full length. Copy the EFI from the Recovery Install Stick to the ESP of the hard disk Lan Fix - Realtek 8125B As with the installation you have to fix the lan port again.This time the whole thing will stay the same and not only active for the installer.Open the terminal and enter the command already mentioned above, but this time you add a "sudo" to the command.The complete command will be:sudo ifconfig en0 media 1000baseT mediaopt full-duplexPress Enter to confirmYou will then be asked to enter your password for the system,don't be surprised that the password input is not displayed.Confirm with EnterReady Thunderbolt3 The mainboard has a Thunderbolt port, which we have to bend a bit for macOS,because without this adjustment Thunderbolt Hotplug will not work.Thunderbolt is connected via PCH and is connected to the RP01 of the MSI MEG Z490I Unify.In the picture below you can see the Path and the successful Inject of the properties via SSDT.First download the following SSDT: https://www.dropbox.com/s/wxtsmopnbgwq8t8/TTRidge.aml?dl=0 Additionally you need MaciASL: https://www.dropbox.com/s/ku31d8zimw7arvs/MaciASL.zip?dl=0 As well as PlistEdit Pro to edit your config.plist: https://www.dropbox.com/s/bqradkm2pgiklep/PlistEdit Pro.zip?dl=0 Open the TTRidge.aml with MaciASL and change the Device PathFromExternal (_SB_.PCXX.RPXX, DeviceObj)External (_SB_.PCXX.RPXX.PXSX, DeviceObj)Scope (_SB.PCXX.RPXX)ToExternal (_SB_.PCI0.RP01, DeviceObj)External (_SB_.PCI0.RP01.PXSX, DeviceObj)Scope (_SB.PCI0.RP01)Afterwards you compile the file. (Point 1 in the picture)Another window will open which ideally should not contain any errors. (point 2 in the picture)If no errors are displayed, you can now save the file.To do so, click on File (point 3 in the picture) and then on Save as (point 4 in the picture)A wide window will appear, choose the place where you want to save the file.In my case this is the desktop and then click on Save.In the next step you open the terminal and mount your EFI partition.In my case the command is :sudo diskutil mountdisk disk0s1Now copy the TTRidge SSDT saved on your desktop and paste it into your EFI under EFI/OC/ACPI.Load your config.plist with PlistEdit Pro and open the property list ACPI/Add.Click on "New Sibling Element" while you have selected the Add Property.Change the type of the new sibling element from String to Dictionary.You should now have the following picture in front of youNow click 1x on "New Child Element" and then 2x on "New Sibling Element".Now rename the properties added as "New Objects".We also change the property type from String to Boolean and set it from No to Yes.The property names are :Name : Comment - Type : String - Value : TTRidgeName : Enabled - Type: Boolean - Value: YesName: Path - Type: String - Value: TTRidge.amlIn the config.plist it should look like this:If this is the case click on "File" and save the config.plist with "Save". PS: If you use this guide for another Z490 motherboard,you have to find out the device address for your Thunderbolt Port via IORegistryExplorer. USB-Ports Under macOS there is a port limit for USB ports, i.e. if more than 15 ports are available, everything beyond this limit will be ignored.USB 3.0 ports are backwards compatible and use two ports at once by definition,i.e. a USB 2.0 part and the actual USB 3.0 part.But not all listed ports under macOS are physically present,just because macOS lists them to us doesn't mean that this is true.With original Apple devices the port definition for each SMBIOS is stored, with a Hackintosh this is of course not the case.Therefore a definition of the USB ports is essential, otherwise certain functions such as sleep cannot work.To create a Custom USB Kext you need Hackintool: https://www.dropbox.com/s/f80m1ef7k5drc0s/Hackintool-3.4.9.zip?dl=0 With this tool you can create your own USB Kext under the tab USB and remove ports that are not assigned (not available).The procedure documented by @CMMChris was great and simple which I quote here:Open Hackintool and switch to the USB tab. There all USB ports are listed.Now test all ports one after the other with a USB 2 and a USB 3 device to see which ones are in use.Then delete the ones that are not in use from the list.After that you set the type of the port:- USB 2.0 part of a USB 3 port is set to USB3- USB 3.0 portion of a USB 3 port is set to USB3- Pure USB 2.0 connections on USB2- Special feature of Type-C: Same port in both directions = TypeC + SW; different port depending on direction = TypeC- Internal USB ports (e.g. internal Bluetooth) is set to InternalIf your connections exceed the port limit of 15 ports per controller, you have to disconnect ports (1 USB3 port = 2 USB ports - USB2 share and USB3 share).Then you have to decide yourself if you want to disable ports completely,remove the USB 2.0 part from a USB 3.0 port or vice versaOnce everything is configured you can export the data.Hackintool generates 5 files: SSDT-EC-USBX.aml, SSDT-EC-USBX.dsl, SSDT-UIAC.aml, SSDT-UIAC.dsl and USBPorts.kext.Usually only two of them are important, SSDT-EC-USBX.aml and USBPorts.kext.In our case only the USBPorts.kext is needed, because I have done some preliminary work in the BASIS-SSDT which is also USB related.Mount your ESP partition of your macOS disk and store the files as follows:- SSDT-EC-USBX.aml should be placed in EFI/OC/ACPI/ (if you use another Z490 board)- The USBPorts.kext should be placed in EFI/OC/Kexts/To edit the config.plist we use PlistEdit Pro: https://www.dropbox.com/s/bqradkm2pgiklep/PlistEdit Pro.zip?dl=0 Open the config.plist via PlistEdit Pro and stores the entries for the two files,so they are loaded at boot time and also disable the XhciPortLimit Quirk.After a reboot the whole things will be taken over and should work fine if you did everything right.The Singularity Computers Wraith Case has no connectors on the case itself,for this reason my USBPorts.kext differs slightly from your definition.HS01, HS03, HS04 are USB 2.0 parts of the USB 3.0 ports.In other words the counterparts of SS01, SS03,SS04. (USB 3.0 Ports)HS07, HS08 are the two pure USB 2.0 ports.HS09 is the USB 2.0 header I forked for the Bluetooth and is stored as Internal.HS13 is the Mystic Light Controller of the mainboard which I also set to Internal,so that it cannot cause a Wake from Sleep.SSP1/SSP2 is the Thunderbolt port and a standalone controller.If your setup is build one on one, you can alternatively use the Custom USB Kext I created here. https://www.dropbox.com/s/nh2qn14upwqix1b/USBPorts.kext.zip?dl=0
-
Interessate database redatto dal blogger/youtuber R3d3x in cui sono confrontate tutte le varie marche e modelli relativi a determinato chipset. Molto utile per capire al volo ad esempio che modello di LAN hanno a bordo, così come il codec audio etc... in modo da potersi fare una idea più precisa quando si pensa di assemblarsi un'hack e optare per soluzioni pienamente funzionanti. Z490 --> https://docs.google.com/spreadsheets/d/1xZNqh23lW49Jzw21UjK1j8FqNT62scA_dEueOT7OlOQ/edit#gid=0 X570 --> https://docs.google.com/spreadsheets/d/1LZKF338JX-MfrLbFKMvcUeaoBr4sIdVKVjzsLlOfaPs/edit#gid=0 B550 --> https://docs.google.com/spreadsheets/d/1XMeKXfCcqZi8Mjn1HZiVl7WdHnq29iPm3bErOSOd5_8/edit#gid=0 Z390 --> https://docs.google.com/spreadsheets/d/1Ii_T1X_LpB1EeBXYKqkVFcCm6olCmZW-64iXgdU6wO4/edit#gid=0 e altre ancora....
-
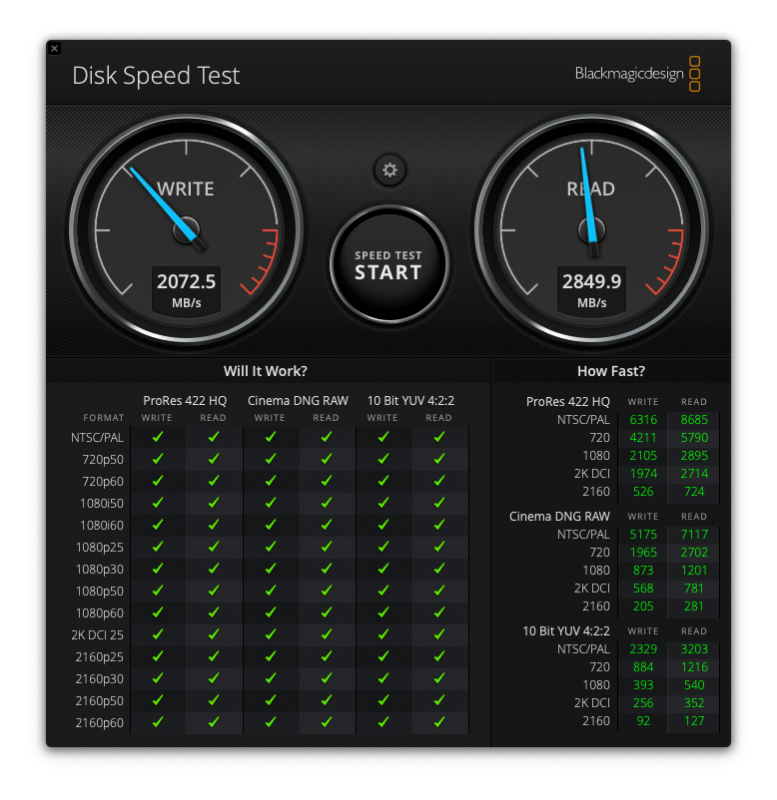
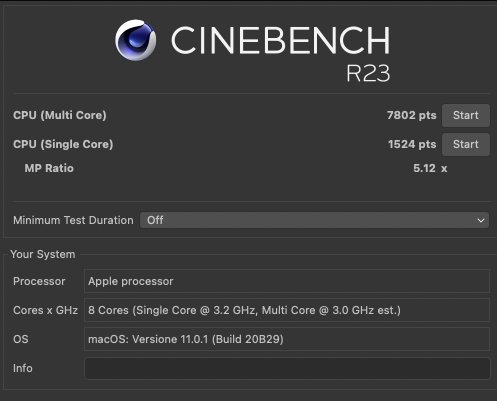
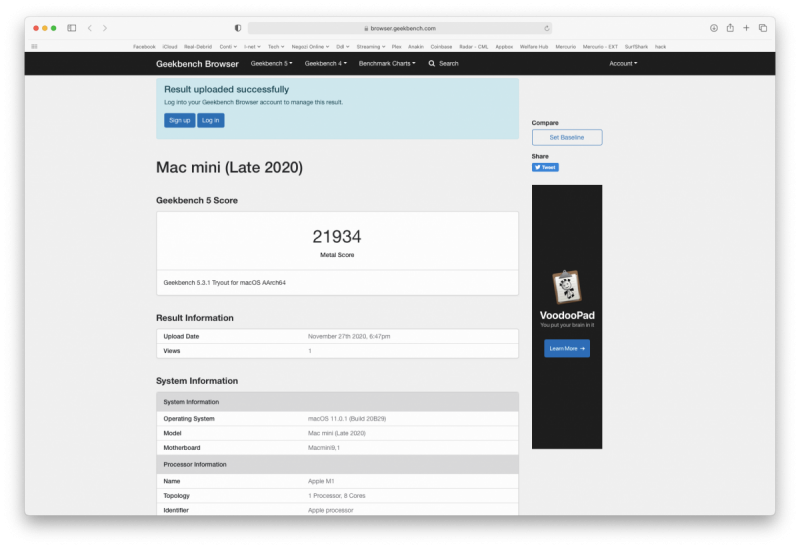
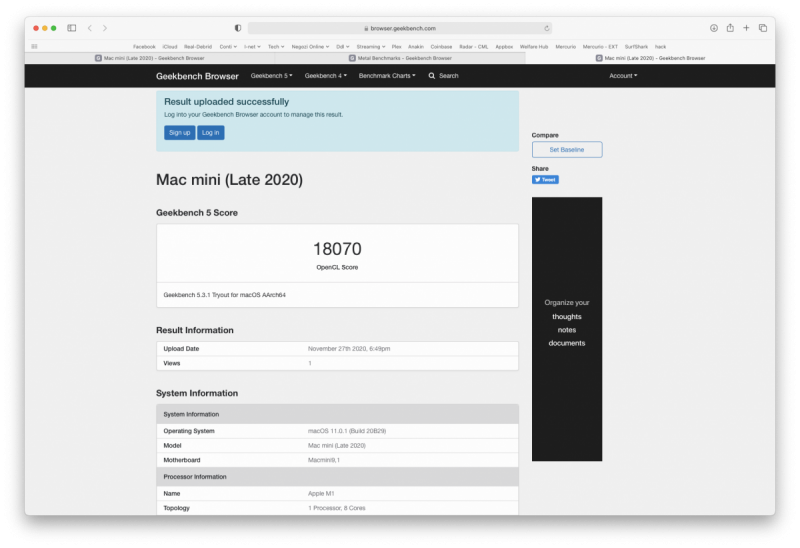
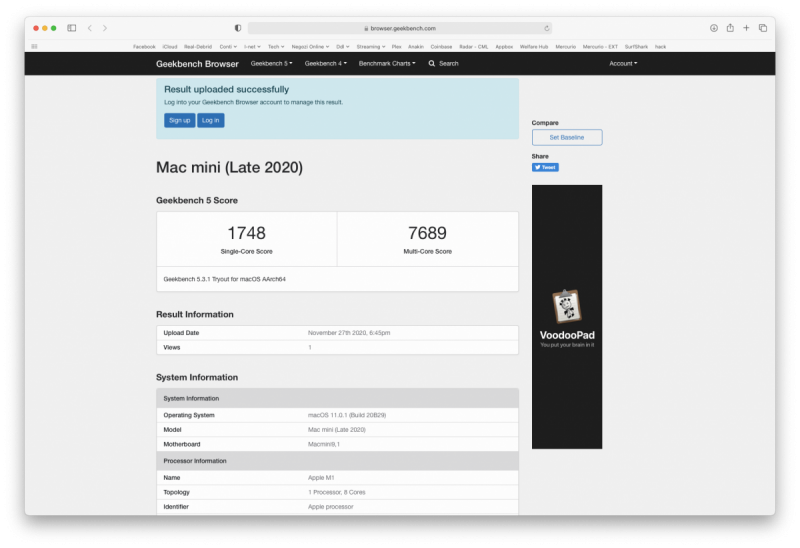
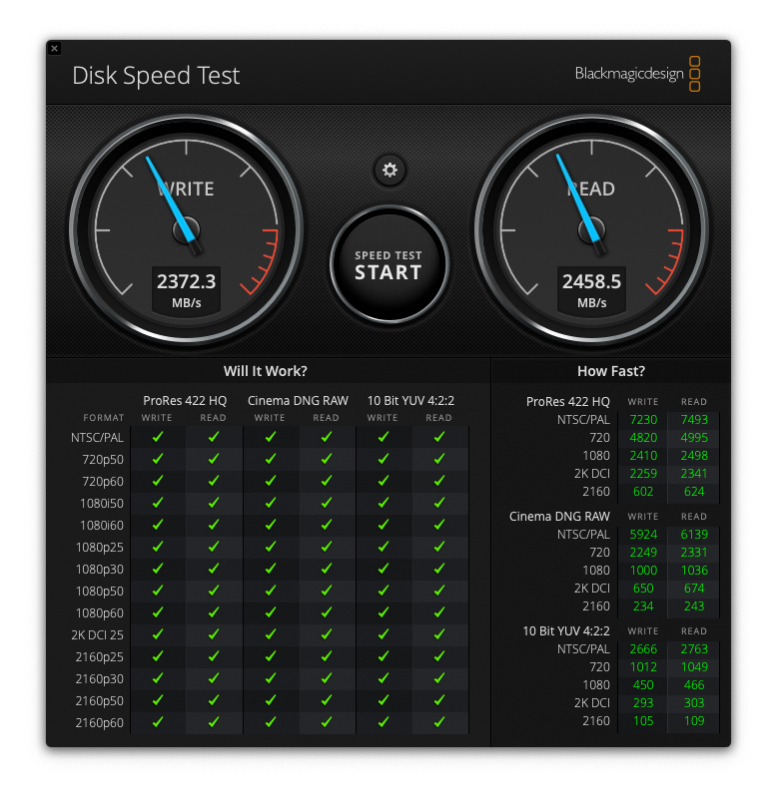
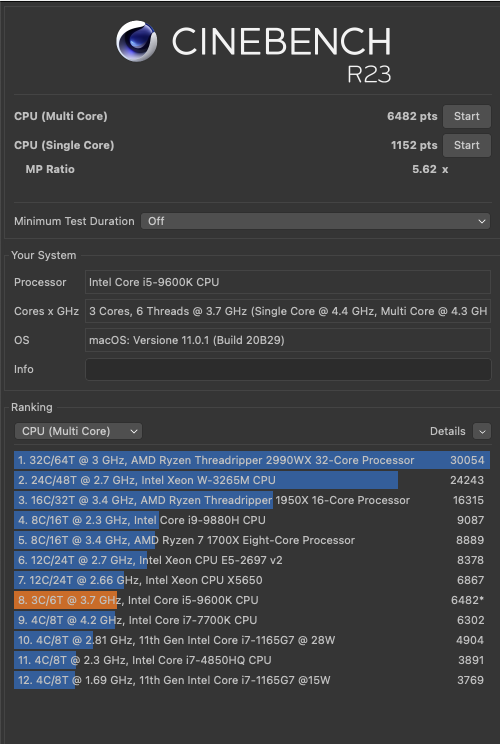
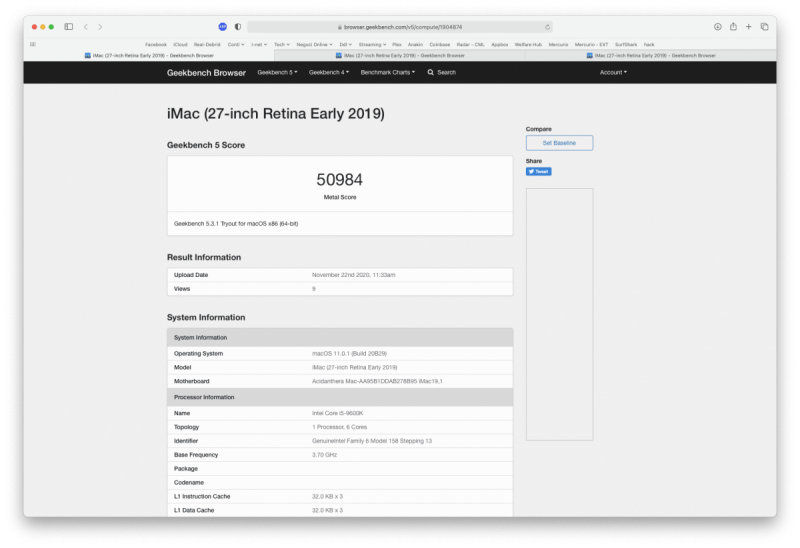
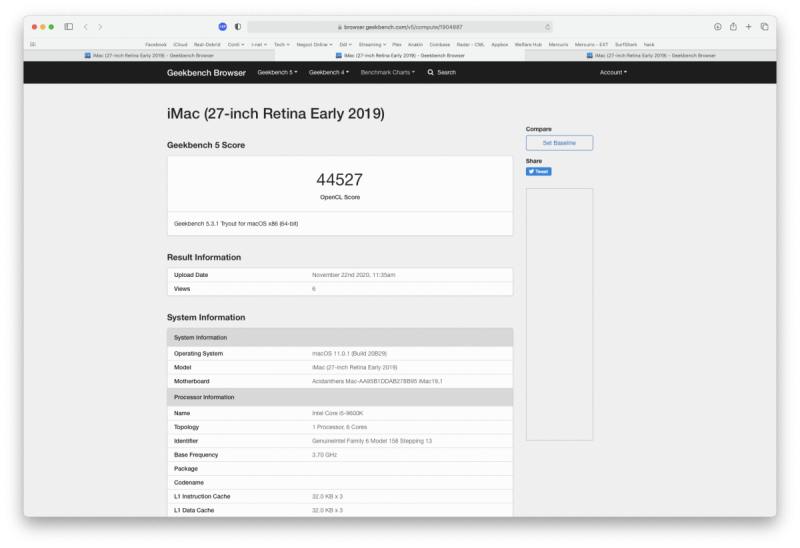
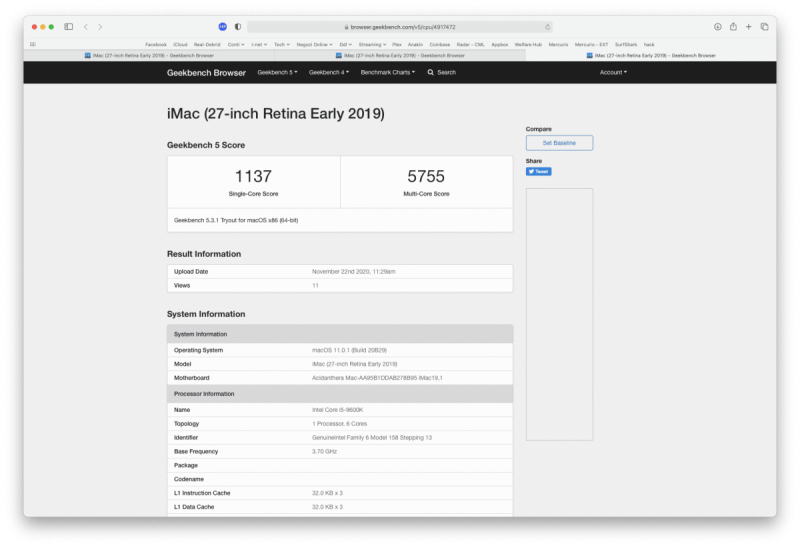
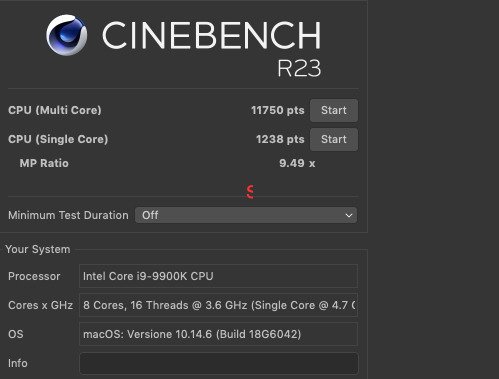
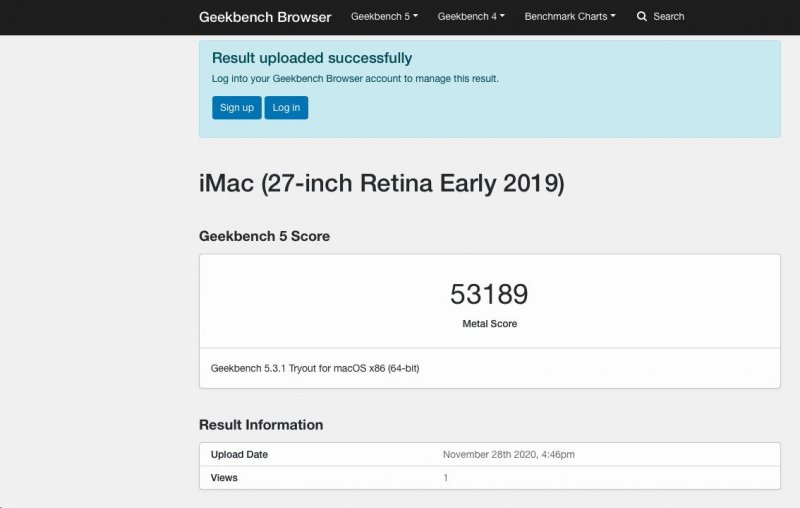
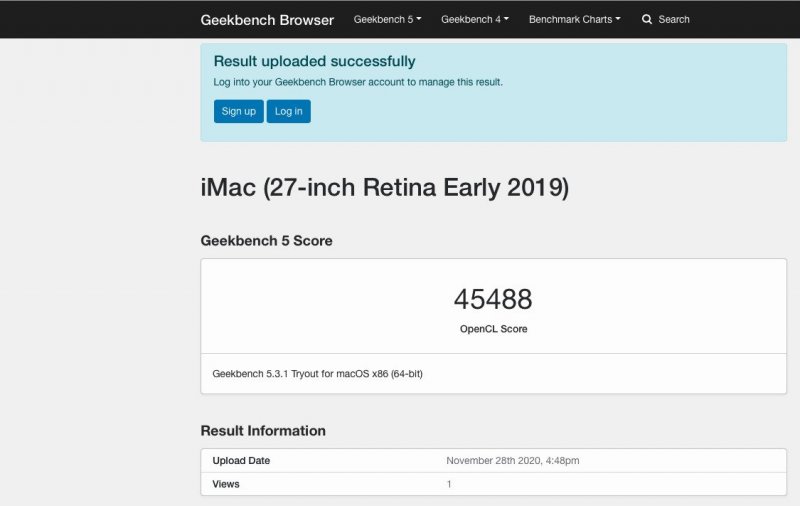
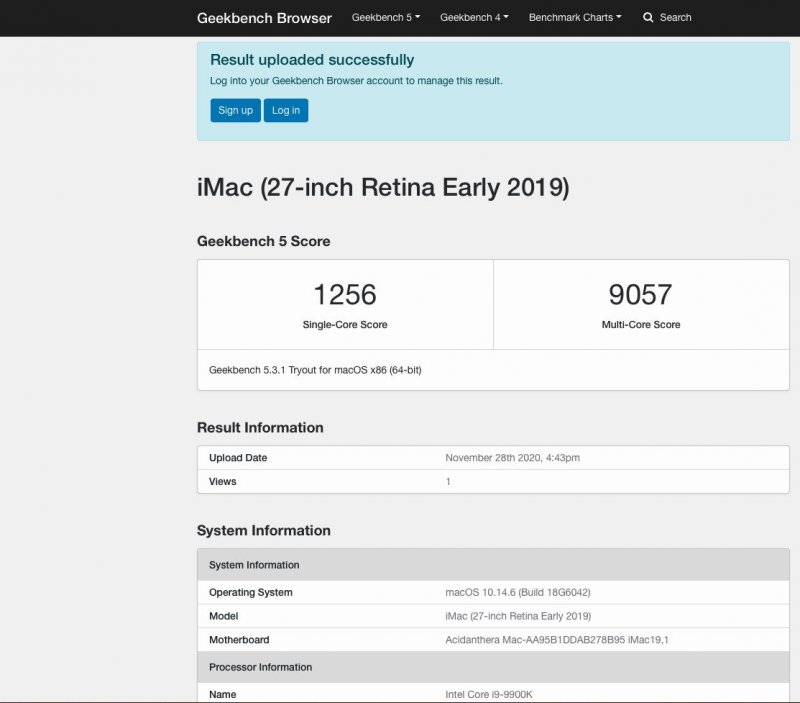
Ciao a tutti, Ho avuto la possibilità di testare un Mac Mini con Apple Silicon M1 con 8GB di memoria e 256GB di storage e condivido con voi qualche pensiero e i test comparativi che ho portato a termine. La cosa che più mi ha stupito di questa macchina è la silenziosità e le temperature: anche sotto sforzo il Mini rimane freddo al tatto e la silenziosità permette di lasciare il computer sempre acceso dimenticandosene totalmente. Una cosa che mi ha un pò deluso è il fatto che nel normale utilizzo, se già si monta un buon disco m2 sul proprio Hackintosh non si vedono differenze di velocità: il giochino di aprire tot applicazioni all'avvio da gli stessi risultati sia su Apple Silicon che su Intel; la cosa però positiva è che non si vedono differenze se un App è già nativa per M1 o gira sotto rosetta ed ho inoltre notato, durante l'update a 11.0.1 che i tempi di installazione sono nettamente inferiori rispetto ad un normale Mac. Da notare il fatto che per reinstallare il sistema operativo da Recovery, contrariamente ai Mac Intel, non si preme più cmd+alt+r o cmd+r bensì, in pieno stile iPhone bisogna spegnere il computer e riaccendere tenendo premuto il tasto di accensione, in questo modo si entra nell'interfaccia di boot e si può avviare la Recovery (sicuramente una scelta comoda, ma per chi come me è un utente di vecchia data è un po' spiazzante). Nel momento in cui scrivo non è ancora disponibile una versione compatibile con Apple Silicon di VMware Fusion (nemmeno Parallels): è possibile installare l'applicazione utilizzando rosetta, ma non è possibile configurare una VM in quando il programma restituisce errore all'apertura dei file della macchina virtuale. Sicuramente col tempo questa lacuna verrà colmata dagli sviluppatori. Passiamo al capitolo Benchmark: ho eseguito i soliti test sintetici di cinebench e Geekbench e, grazie all'aiuto di un amico un test di utilizzo di Final Cut in quanto ad oggi unico software di montaggio video ottimizzato per M1. I test sono stati effettuati su due macchine Hackintosh: i5 9600k, H370, 32GB ram, 512GB m2, AMD RX580 i9 9900k, Z390, 32GB ram, 512GB ssd sata, AMD RX580 (di questo hack non troverete il test di velocità di scrittura sul disco in quanto non essendo m2 la velocità di scrittura e lettura si attesta sui 500 MB/s ) Mac mini M1 Apple Silicon, 8GB memoria ram, 256GB Disco Di seguito i risultati dei vari test eseguiti: Mac mini M1 i5 Hack i9 Hack Di seguito invece i test cronometrici eseguiti con Finalcut: File: 03:30 min di durata, con effetti e leggera color correction applicata. Intel i9 9900K: Velocità importazione / codifica in pro-res: 02:49 min Test tempistica render: 04:55 min Export master file: 05:02 min Export codifica: 12:50 min Format Apple device 720p Codec H264 better Resolution 1920x1080 ———————————————————————————————— Intel i5 9600K: Velocità importazione / codifica in pro-res: 03:52 min Test tempistica render: 06:07 min Export master file: 12:12 min Export codifica: 20:50 min Format Apple device 720p Codec H264 better Resolution 1920x1080 ———————————————————————————————— Apple Silicon M1: Velocità importazione / codifica in pro-res: 03:08 min Test tempistica render: 13:28 min Export master file: 16:59 min Export codifica: 20:35 min Format Apple device 720p Codec H264 better Resolution 1920x1080 Le conclusioni che posso trarre è che sicuramente M1 per quanto nei test sintetici abbia un risultato migliore dell' i5 9600k, nell'utilizzo pratico di FInalCut è in linea allo stesso processore.. con i9 ancora non c'è storia. Da notare comunque che la presenza di una scheda video dedicata come la RX 580 sia un plus non da poco. Spero di avervi fatto cosa gradita con questo piccolo report e che possa stimolare le vostre meningi 🤣
- 70 replies
-
- 8
-

-

-

-
- applesilicon
- m1
-
(and 4 more)
Tagged with:
-
Buonasera a tutti. Come da titolo sto tentando di creare il mio hackintosh partendo da questi componenti che ho a disposizione. Mobo Asus P8z68 vpro Skt 1155 CPU Intel core i7 2700 16 GB RAM SSD Sandisk 250 GB Premetto che ho appena recuperato questa Mobo di Asus ad un ottimo prezzo e che è perfettamente funzionante (testata con Windows) L'ho presa in sostituzione della mia vecchia Asrock sul quale girava perfettamente fino a poche settimane fa High Sierra Detto ciò, non riesco nemmeno ad arrivare all'installazione tramite clover USB boot. La chiavetta USB è la stessa che avevo generato per la vecchia Mobo. Quello che accade è che parte la mela e dopo poco viene fuori il simbolo del divieto. In verbose mode non mi sono segnato cosa scrive prima di crashare, ma sono quasi sicuro che mi sfugga qualcosa a livello di configurazione del BIOS. Qualcuno saprebbe aiutarmi? Grazie
-
Buongiorno a tutti , ho urgentemente bisogno del vostro aiuto: inizio a descrivere il problema ... dopo aver completato l'installazione di Mojave sull'ssd di destinazione solo alcune volte riesco a avviare arrivando alla scrivania(ho provato a avviare con svariate efi, che mi sono state passate da un utente ma che non mi hanno mai permesso di riuscire sempre a avviare). Allego foto di dove si ferma quasi sempre... ogni tanto riesce a avviare ma è veramente raro). Questo errore me lo da sia avviando da ssd che da usb... con questo ragazzo che se ne intende di cui vi parlavo le abbiamo provate tutte; persino abbiamo provato a fissare i Kexts con hackintool... ma non ci sono stati segni di miglioramento. Allego qui sotto le specifiche tecniche del pc; Scheda madre: Odense Produttore: Pegatron Fattore di forma: uATX - 24 x 24 cm Chipset: H110 Socket memoria: 2 DDR3L Socket processore: LGA 1151 Slot di espansione: 1 PCI Express x16 (Gen 3.0) 1 PCI Express x1 (Gen 2.0) 1 socket M.2 1, tipo A Intel Core i5-6400 Memoria 122 GB KINGSTON LAN wireless 802.11b/g/n con tecnologia 1 x 1 2,4 GHz Audio integrato Codec audio: ALC3863-CG Supporto canale 5.1 Rilevamento jack audio SSD DA 222 gb kingston Ci tengo a precisare che la scheda madre ¨ quella di fabbrica dei fissi HP che è molto ma molto scarna di settaggi; se vi servisse posso anche allegare tutti i Setting del bios che ho impostato in modo da controllare che non ho messo cavolate. Allego anche la efi e la ioreg di una delle rare volte che sono riuscito ad arrivare alla scrivania... la cosa più strana è ¨ che NON CAMBIANDO NIENTE DALLA CONFIGURAZIONE CON LA QUALE PRIMA AVEVA avviato NON avvia più Se ci fosse qualche buon anima disposta ad aiutarmi sarebbe fantastico. Luca’s iMac AGG.ioreg
- 621 replies
-
- hackintosh
- mojave
-
(and 1 more)
Tagged with:
-
Salve, sono rimasto bloccato da giorni e non riesco ad andare avanti, specifico che sto cercando di installare Mojave e che monto sul mio pc assemblato : motherboard: asus ROG STRIK z490 a gaming cpu: Intel i7 10700K 3,80ghz ram:16 gb Corsair 3600mhz ho provato mettendo il flag darkwake=2 e provando anche a mettere il flag GraphicsEnable=1 ma con nessun risultato. Qua allego la mia cartella EFI con il mio confit.plist : https://wetransfer.com/downloads/2d2702f3f8a8a97f4860472e130c08bb20201114130257/db786a Grazie in anticipo
- 3 replies
-
- hackintosh
- mojave
-
(and 1 more)
Tagged with:
-
Ciao, volevo provare a farmi un hackintosh ma nonostante abbia letto ogni guida ognuno ha un metodo leggermente diverso o omette qualche passaggio, sono disperato.. Ho provato con Clover e sono riuscito a fare la pennina e a vedere clover all'accensione ma al lancio dell installazione con clover non vedevo la mela ma un segnale tipo di divieto. Ho riprovato usando open core e con quello dopo il lancio dal bios dalla pennina mi si spengeva il pc da solo.. Specifico che ho montato un i7 10th 10700K , motherboard asus rog strik 470 a gaming 16 gb di ram 3600Mhz e 500gb di ssd più 1 tb di HDD.. Se qualcuno sa aiutarmi gliene sarei molto grato
- 1 reply
-
- hackintosh
- clover
- (and 6 more)
-
Buongiorno a tutti, allego l'EFI definitiva con la quale sono riuscito ad installare 10.15.7 Cosa non funziona: il microfono, usando il jack audio integrato nella mobo --> Ho oviato al problema utilizzando un microfono da USB la schede di rete =( ... io personalmente uso l'ethernet ma se uno avesse 30 € da investire se ne può recuperare una compatibile. ... per il resto non mi viene in mente nulla, se non ENjOY ! Allego anche le specifiche hardware: I’ve made it on my HP PAVILLION 550-113 NL desktop. Will follow right above the specs: Intel Core i5-6400 12 GB DDR3 RADEON RX 570 ( I’ve upgraded it from the shitty GT 730 that was out of the box ) —> The RADEON needs alimentation, so I’ve also upgraded the PSU with a 550 W ones. 2 SSD + 1 HDD (Obviously dual booting it with windows ) Questo è quanto, scusate se ho scritto le specifiche in inglese ma mi sono già portato avanti per il post su reddit 😅 AH, dimenticavo, grazie mille ad @iCanaro per tutto il supporto dato. Archivio 2.zip
-
- hackintosh
- hp
-
(and 1 more)
Tagged with:
-
Ciao a tutti, sto tentando di installare Catalina su una ASUS A68MH-K, un processore AMD A8 e una GT710 della MSI. Ho provato a fare la EFI con OpenCore ma si blocca durante il boot (allego una foto del punto in cui il boot si blocca). Ho provato a controllare l'integrità del config con Sanity Check e mi dice che è tutto a posto. Premetto che la versione di OC è la 0.6.1 e che questa è la mia prima EFI con OpenCore. Sapete cosa posso provare per risolvere? EFI.zip
- 10 replies
-
- amd
- hackintosh
-
(and 2 more)
Tagged with:



.png.d492bb72567b242047689a7f31d50da0.png)
