

Ploddles
-
Posts
389 -
Joined
-
Last visited
-
Days Won
5
Content Type
Profiles
Forums
Events
Downloads
Posts posted by Ploddles
-
-
Thanks you for trying to help and all the work you put into this for the community.
This is very weird, I can't even install the early versions of Monterey. I even went as far as downgrading the BIOS to earlier versions, and old versions of my EFI, where I had no problems at all initially installing Monterey. Nothing seems to work, I always just get a reboot immediately after starting the 2nd phase.
I will keep trying various things to see if I get any luck, if not then I may have to revert to Windows and just use macOS on the TRX40 until it stops working and would benefit from a reinstall. I may try Big Sur, just to see if that will install, but that will be at a later date when I have more free time to spend on it.
Thank you again.
-
Thanks.
The 2 kexts (V0.71) solved the magic number error 👍.
I tried disabling the network cards in the BIOS and unplugged the cable but that didn't make any difference, it just reboots on the 2nd phase The strange thing is that if I try and install a new version of Monterey that is also doing the same thing, i.e just immediately rebooting on the 2nd phase. It does this even if I use my original unmodified EFI that is booting the installed version fine. This is getting stranger and stranger.
I'm thinking of downloading the earliest version of Monterey and trying that, just out of interest to see if that does the same. 🤔
-
 1
1
-
-
On 10/12/2022 at 8:08 AM, fabiosun said:
ciao @Ploddles
if you can try this, it is a debug EFI with a minilmal set of kext
Monterey and Ventura have problem with ethernet (smaltree kext)
https://mega.nz/file/9O0UCaiC#oguhLwgQxYBB6VGoSfEsoMhCZ6W3AhqurzX1_bB_gxE
Hi,
Unfortunately that doesn't work. If I boot into Monterey with it it just randomly reboots. I had already done the first part of the Ventura install with my usual EFI - where it copies the files to the destination disk and should continue after a reboot, with the old and new EFI it just reboots after a few seconds and then goes straight into a Monterey recovery console, before when the Picker usually appears.
If I delete the previous 1st part Ventura install and try and do it fresh with the new EFI, I get a continuous "find_symbol: magic number doesn't match - 0x1bcdc000", the last part 0x... changes on each try. I believe that this means that the install media is corrupt but I have tried downloading it a number of times via different methods on different machines all with the same result. The exact same media runs smoothly for the 1st part of the install if I run it from within Monterey pointing it to a new disk - tried both an SSD and NVMe drive and there is no difference.
Very strange.
I downloaded the installer with both the 'RunMe_DownloaderV3' and 'gibMacOS'.
My next test will be to do a fresh install of Monterey on another SSD and try and upgrade that to Ventura.
-
Would have thought RC/GM would be out by now.
-
 1
1
-
-
Thanks.
@fabiosununfortunately that doesn't work for me. I tried your EFI exactly as it is except for my own MIMO Whitelist, Memory details and Serial numbers. It let me boot into Monterey but when I try and boot into the Ventura setup it just immediately reboots and on next startup goes to the macOS Monterey Recovery Console.
It did the first part, copying the installer bits to the SSD from the installer USB but on the reboot to continue the setup that it where it just immediately reboots and goes to the Monterey Recovery Console.
Attached is my own EFI (updated to OC-0.8.5) that boots Monterey fine but with non of the necessary Ventura bits added. When you have a bit of spare time would you mind looking it over and adding/removing what is needed for Monterey & Ventura?
Thanks in advance.
-
1
-
-
I haven't updated OC for about 6 months nor tried any of the Ventura Betas.
As Ventura is nearing final release it is time for me to have a play with it and try all the software I use.
Are there any patches, kexts or setting that must be added, deleted or changed to successfully run Monterey and Ventura. I deleted Big Sur ages ago so don't need anything BS only related?
Cheers.
-
19 minutes ago, valmeida said:
Try running pip3 install xattr in Terminal first.
-
 1
1
-
-
9 hours ago, fabiosun said:
@iGPUa bit off topic
have you ever done a clean installation of Windows 10/11 pro in your TRX40?
From usb or DVD if you have it..
In my rig it is not possible, it is a complete failure!
I can install in different way (via OSX with an app (windows install) or with first step done in other pc)
Otherwise no joy
Sorry for my absence for the last 8 months or so, but I am back now.
My system was so out of date - still running Big Sur and Monterey Beta that I decided to wipe all my discs and start afresh.
I have just installed Windows 11 from a USB flash drive created with the MS Media Creation Utility. No problems at all, everything went smoothly and I am now installing all my apps again. After that I will install the latest Monterey on another NVMe drive (Sabrent Rocket 4.0). The only time I ever had any problems installing Windows from scratch was when I tried installing onto a Samsung 970 Evo NVMe drive. As soon as I changed to installing on the Sabrent everything went well.
-
7 hours ago, fabiosun said:
It is better use new method
old method take an old library not properly done for software in use
new method patches only necessary and original lib
ie
In PS 22.5.x or 23
only a lib and a plugin
without deleting nothing
In premiere pro 3 plugin
and so on for After Effects
@tomnic is preparing a thread to keep the instructions more simple possible
for now:
Adobe CC suite --- done
Luminar both app -*--- done
Maya 2022--- done
Mathematica--- done
MatLab---- done
all this app with their original libraries 🙂
I did see the other thread a while ago but things were changing quite often and it was hard to follow and keep uptodate. I think it would be better if the 1st or 2nd post was updated to only keep in the latest files and step by step instructions.
-
2
-
-
9 hours ago, iGPU said:
I downloaded Luminar AI from App Store but it would crash on startup. (There is a 7 day free trial.)
A search found the answer to get it working (here); it is an AMD issue. Basically enter each of the following 5 commands into Terminal as shown in Spoiler below. After these are run, Luminar AI works fine under AMD.
sudo perl -i -pe 's|\x90\x90\x90\x90\x56\xE8\x6A\x00|\x90\x90\x90\x90\x56\xE8\x3A\x00|sg' '/Applications/Luminar AI.app/Contents/Frameworks/MPCore.framework/Versions/A/Frameworks/libtbb.dylib'

sudo perl -i -pe 's|\x90\x90\x90\x90\x56\xE8\x4A\x00|\x90\x90\x90\x90\x56\xE8\x1A\x00|sg' '/Applications/Luminar AI.app/Contents/Frameworks/MPCore.framework/Versions/A/Frameworks/libtbb.dylib'

sudo perl -i -pe 's|\x90\x90\x90\x90\x56\xE8\x6A\x00|\x90\x90\x90\x90\x56\xE8\x3A\x00|sg' '/Applications/Luminar AI.app/Contents/Frameworks/MPCore.framework/Versions/A/Frameworks/libtbbmalloc.dylib'

sudo perl -i -pe 's|\x90\x90\x90\x90\x56\xE8\x4A\x00|\x90\x90\x90\x90\x56\xE8\x1A\x00|sg' '/Applications/Luminar AI.app/Contents/Frameworks/MPCore.framework/Versions/A/Frameworks/libtbbmalloc.dylib'

sudo codesign --remove-signature /Applications/Luminar\ AI.app/
This is what I have been using since January 2021.
Spoilerfor file in MMXCore FastCore TextModel libiomp5.dylib libtbb.dylib libtbbmalloc.dylib; do
find /Applications/LuminarA* -type f -name $file | while read -r FILE; do
sudo -v
echo "found $FILE"
[[ ! -f ${FILE}.back ]] && sudo cp -f $FILE ${FILE}.back || sudo cp -f ${FILE}.back $FILE
echo $FILE | grep libiomp5 >/dev/null
if [[ $? == 0 ]]; then
dir=$(dirname "$FILE")
[[ ! -f ${HOME}/libiomp5.dylib ]] && cd $HOME && curl -sO https://excellmedia.dl.sourceforge.net/project/badgui2/libs/mac64/libiomp5.dylib
echo -n "replacing " && sudo cp -vf ${HOME}/libiomp5.dylib $dir && echo
rm -f ${HOME}/libiomp5.dylib
continue
fi
echo $FILE | grep TextModel >/dev/null
[[ $? == 0 ]] && echo "emptying $FILE" && sudo echo -n >$FILE && continue
echo "patching $FILE \n"
sudo perl -i -pe 's|\x90\x90\x90\x90\x56\xE8\x6A\x00|\x90\x90\x90\x90\x56\xE8\x3A\x00|sg' $FILE
sudo perl -i -pe 's|\x90\x90\x90\x90\x56\xE8\x4A\x00|\x90\x90\x90\x90\x56\xE8\x1A\x00|sg' $FILE
done
done
-
Monterey RC2 is out. That was quick!
-
1
-
-
Is Monterey Beta 8 working for us?
Can't be long now before we see a GM.
-
Big Sur 11.6 has been released.
-
3
-
-
@valmeida, this may be a long shot but I know a few people who have trouble booting if they have Above4G enabled. I noticed in your screenshots that you do have it enabled so maybe try with it disabled.
-
@fabiosun What does the 3-SSDT-6900xt.aml do for us? I've seen it mentioned a few times but haven't seen any explanation as to what it does. Thanks.
-
Anybody else lost connection to their iPad after the Big Sur update to 11.5.2?
It shows up in the sidebar but is just displaying a blank screen now so I can no longer sync etc.

-
So who is going to try Monterey Beta 5 (21A5304g) first? 🙂
-
@fabiosun I would "Load Optimised Defaults" first and then turn CSM OFF but don't change anything else. Then try and install Windows. If you still can't install Windows, only then turn CSM ON and try again. Afterwards you should be able to change your BIOS settings back to what they need to be for macOS.
-
5 hours ago, fabiosun said:
luckily I don't have this problem with the new @trulyspinach app.
Instead, these days I discovered a serious problem that I did not know I had In the past, installing windows from scratch was quite complex on this machine
It was mandatory to disconnect all satas to be successful
In UEFI, then even worse
I wiped my Windows 10 disk to try ...
Moral of the story ...
I no longer have Windows and cannot install it in any way. 🙂
The trick to install Windows is to do it to an NVMe in slot 1 (closest to the CPU) , preferably after removing any other NVMe / Sata drives. If it is installed anywhere else them when it does a Windows Update it can/will wipe your OC EFI and replace it with a Windows/Microsoft EFI. It will also change your BIOS options to boot from the Windows disc once the install has finished, so afterwards you need to change the boot options and change it back to your OC EFI once you have put them back in.
-
On 8/6/2021 at 6:37 AM, fabiosun said:
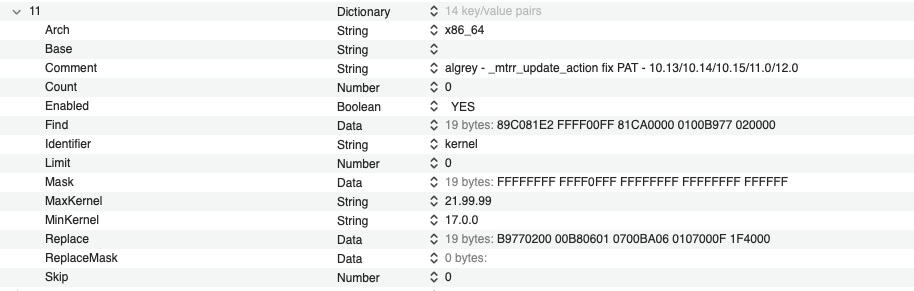
@Ploddlesin your config latest kernel patch is not needed for trx40 chipset:
And usually also in system that needs it (X370,x470,x570 and lower) , it produces worst GPU benchmark..
maybe you can try to skip it
Well spotted, I thought I had taken that one out but obviously I missed it. I have now deleted it and everything is still working. Thanks.
-
1
-
1
-
-
HERE is my OC 0.7.2 EFI.
It boots 11.5, 11.5.1 and 12.0 Beta 4 with BIOS version F4Q and F4R.
Sleep still doesn't work in Big Sur but does in Monterey.
-
2
-
-
OC 0.7.2 has landed. No mention of Shanee's pull request in the release notes as far as I could see.
-
-
1
-
-
Eureka, BS 11.4, 11.5, Monterey B3 and Monterey B4 all load/install. Patches reduced to 12 as I don't need to load anything less than BS 11.4 - which will be upgraded to 11.5.1 later this week.
-
1
-
2
-
1
-


[Discussion] - TRX40 Bare Metal - Vanilla Patches
in General
Posted
When there is a public download for it I will try again but I'm not holding much hope for my system. RunMe_DownloaderV3 still only lists the previous beta.