Leaderboard
Popular Content
Showing content with the highest reputation on 07/25/2021 in all areas
-
Thanks and I can confirm OC PR 0.7.2 working at Monterey beta3 without these 3 patches in my Ryzen 1700X hackintoshs. The reason I still kept many extra patches because I am a conservative person and try to keep compatibilities between FX-6300 and Ryzen 1700X hackintoshs from High Sierra to Monterey. It seems FX-6300 lost support from OC team since Monterey beta1. I can boot it at FX-6300 because I use previous working patches from High Sierra to Big Sur plus newer one at Ryzen 1700X. Without these experience and basic info I can not boot both now. Special thanks for your help and many excellent explanation and advice from here. In the past I can get support from insanelymac mainly and Shaneee's website sometimes. But recent 2~3 weeks your website provide the newest and excellent info and support as well as prompt reply which I could not find in any other websites. Thanks again and again you are the most wonderful person in this forum !4 points
-
2 points
-
@jsl2000 thank you so much for the tests you are doing and sharing with the forum I compiled the latest version of opencore taken from the official github and added the two useful patches for my operating systems (Big Sur 11.4, 11.5 and Monterey 12.b3 The patch for big sur works perfectly even if it does not pass the verification with OC Validate Tried the same thing with the High Sierra and Mojave patch too They do not pass the OC Validate validation, but then they work perfectly, allowing you to eliminate many of the patches related to the core logical processor and the core count. By the way, I allow myself to ask you very humbly, how come you still use all those patches if you use the new ones (0,1)?2 points
-
@jsl2000 old one: patch 0 that algrey posted on Insanely Mac is made for my processor in this example it is very easy to recreate it for other types of cpu (search on this forum new patch, below is the old one😞 PatchProvideCurrentCpuInfo set cpuid_cores_per_package f:4489EAC1 EA1A r:BA1F0000 0090 PAY ATTENTION Value 1F means 31, 3970 x has 32 cores so as stated by @algrey on IM 32 -1=31=1F IE for a 8 cores CPU : 8-1=7=07 for 3950x or 5950x 16: 16-1=15=0F and so on newer (not latest because it is not public for now...but a good one) FIND: c1 e8 1a 00 00 00 MASK : FF FD FF 00 00 00 BASE: _cpuid_set_info COUNT: 1 REPLACE high sierra to mojave: b8 XX 00 00 00 00 REPLACE from catalina to big sur : ba XX 00 00 00 00 REPLACE MASK high sierra to big sur : FF FF FF FF FF 00 REPLACE monterey : ba XX 00 00 00 90 REPLACE MASK monterey : FF FF FF FF FF FF2 points
-
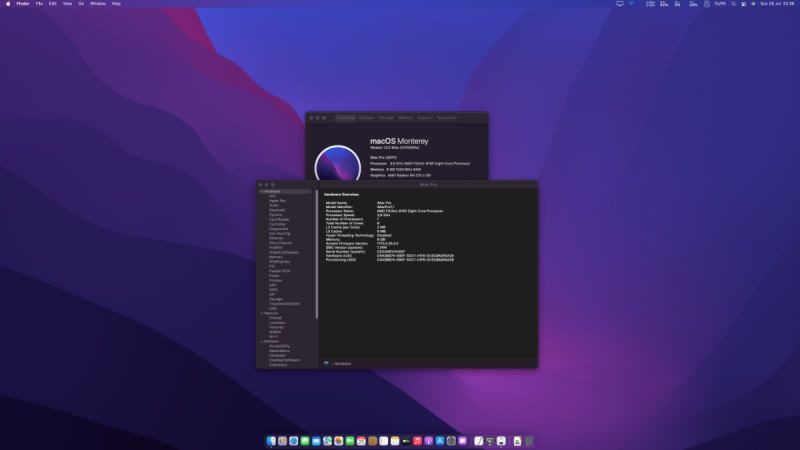
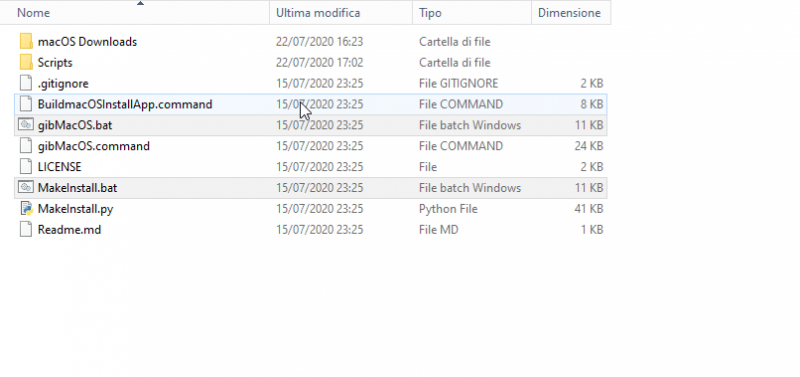
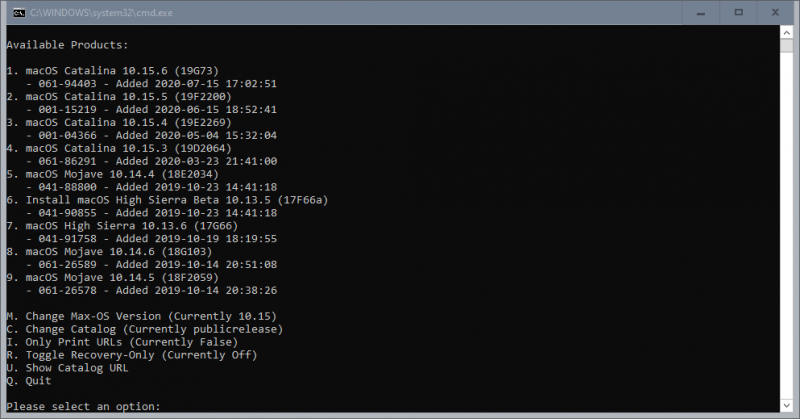
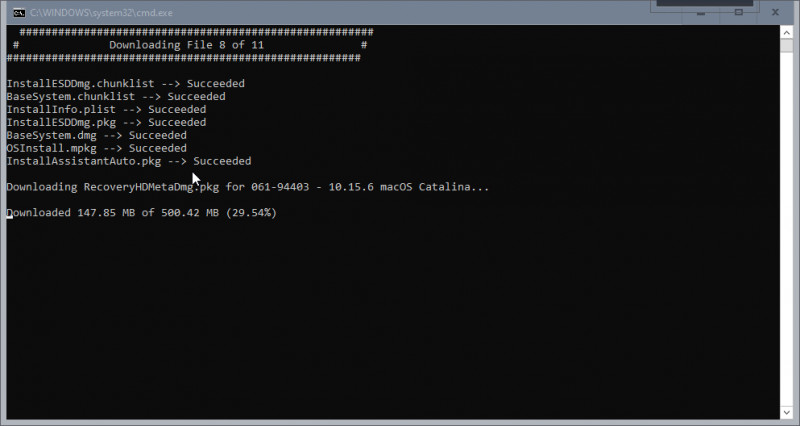
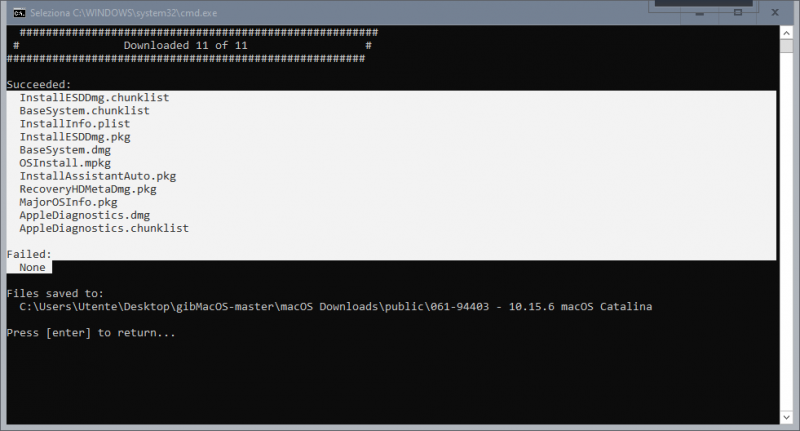
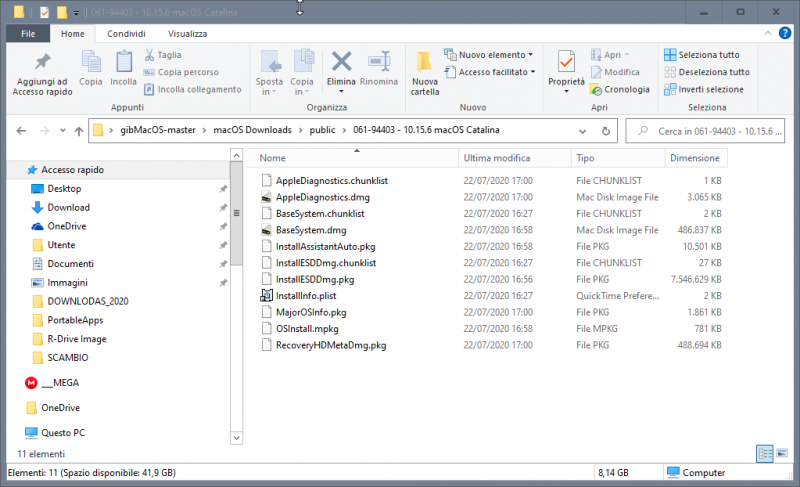
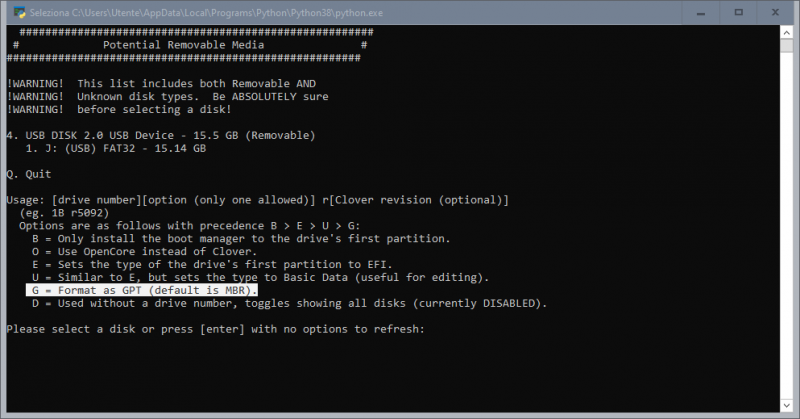
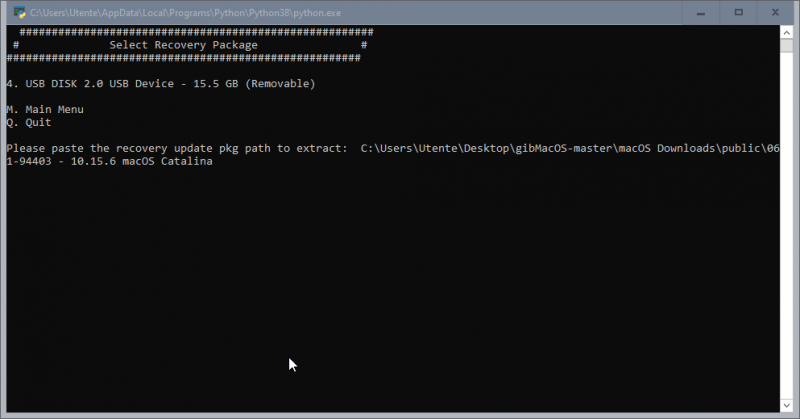
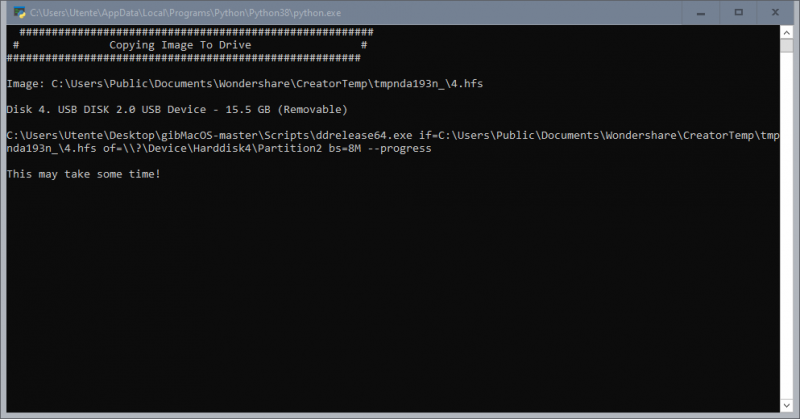
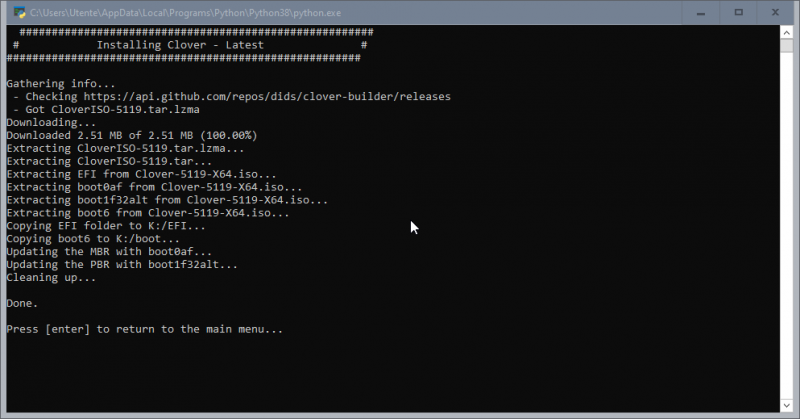
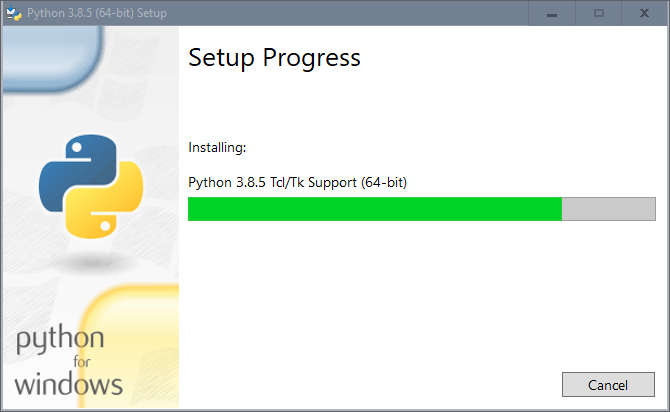
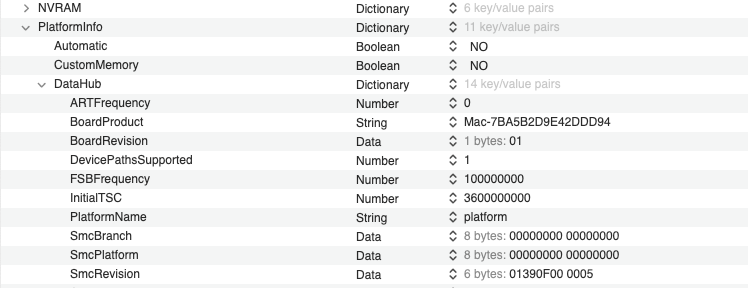
Guida sintetica Ora non ci sono più scuse, oltre alla Virtual machine, è possibile scaricare installer completo di macOS (dai server ufficiali della mela, e non distribuzioni o altra roba strampalata che si trova in giro per il web, che non supportiamo) e creare la pendrive per installazione, il tutto usando il solo windows. Il primo passo consiste nello scaricare GibMacOS https://github.com/corpnewt/gibMacOS poi si prosegue con lo scaricare ed installare python https://www.python.org/downloads/windows/ si decomprime sul desktop gibMacOS-master.zip e si esegue gibMacOS.bat normalmente dovrebbe già andare tutto bene così, ma comunque con i menù in basso è possibile cambiare impostazioni si procedede selezionando il macOS desiderato, nel mio caso ho scelto catalina 10.15.6 quindi imposto 1 in questo caso, scaricato installer completo (e non la sola recovery) e tutto proceduto regolarmente, nessuna parte fallita ora abbia in loco installer di macOS terminata questa fase, rientriamo nel menù principale, per poi uscirne. Ora prendiamo un pendrive da 16Gb e la inseriamo in una porta USB (io l'ho formattata in FAT32 ed assegnato il nome USB, ma non è importante, importante è che non vi sbagliate poi nella scelta) poi avviamo MakeInstall.bat e cosa importante, la pendrive dovrà essere formattata in GPT, quindi nel menù di scelta si dovrà inserire il numero della USB da formattare, per cui: G4 e dare invio una volta terminata formattazione, creazione EFI e partizione per installer macOS sulla pendrive, nella finestra del terminale vi verrà richiesto di incollare il path della recovery, cioè questo: selezionate il percorso copiate e incollate nel terminale poi fatto questo, dare invio, ed inizia la procedura finale ecco fatto! vediamo come si presenta da macOS la pendrive appena creata: ora abbiamo la nostra pendrive con installer completo e Clover con le impostazioni base, da windows possiamo lavorare sul config con Propertree dobbiamo inserire in EFI CLOVER KEXTS other i kext di base per installare, ovvero FakeSMC che è già presente, oppure al suo posto usare VirtualSMC, poi LILU, WathEverGreen (WEG) e USBinjectall; se notebook serve anche VoodooPS2, in ogni caso la pagina cui partire per trovare i principali kexts è questa; https://www.macos86.it/My_Utility/Kexts.html in caso di dubbi, prima di domandare è sempre meglio consultare le FAQ, che sono state scritte appositamente per i principianti: Infine se siete riusciti a creare la pendrive con installer ufficiale (non si supportano distribuzioni e bestie) avete inserito i kexts di base per installazione, ma si ha un blocco o kernel panic, nessuna paura, se non l'avete già fatto, è d'obbligo consultare come va settato il BIOS per accogliere macOS se dopo il controllo ancora non si riesce con l'installazione, aprite un thread sul forum, nella giusta sezione, per esempio se state tentando di installare catalina su AMD, la sezione sarà: Catalina Desktop AMD postate la EFI creata, appena possibile qualcuno controlla errori e dimenticanze. Magari postare anche link modello della mobo, o del notebook. Mettere in firma in modo compatto la descrizione del proprio hardware (marca modello mobo, scheda video, CPU) se in firma invece andate oltre le 4 righe, consiglio di usare lo spoiler (che sarebbe l'occhio nella barra strumenti) questo per evitare di rompere le scatole per la fruizione di una buona lettura dei thread. PS: visto che nella EFI creata con gibMacOS non è presente in EFI CLOVER la cartella ACPI origin, che è assolutamente necessaria per poter estrarre le ACPI, la allego qui, decomprimetela e copiatela dentro CLOVER nella pendrive ACPI.zip Buona divertimento novelli macachi!1 point
-
Salve a tutti... ho unito vari miei ssdt che usavo da tempo in uno unico..😀 kabylake/coffeelake per skylake oppure per Haswell Cosa fa? rinomina device, inietta proprietà, rendendo l'hack più "simile" a vero mac Con aggiunte anche del tutto cosmetiche Non servono fix acpi sul config, o rename Unica patch richiesta in ACPI/DSDT Patches è la seguente Change _DSM to ZDSM Find: 5F44534D Repl: 5A44534D NB: non è da rifare in caso di aggiornamento BIOS NOTA: Non deve essere droppata nessuna tabella ssdt OEM riguardante le usb se non in caso di uso per la disattivazione di alcune porte (dopo la mappature di quelle non in uso) NOTA 2: SSDT X hack va messo decompresso in EFI CLOVER ACPI Patched NOTA 3: con Clover è sempre meglio inserire il nome esatto compreso di estensione in sorted order presente nel config NOTA 4: tutti i fix seguenti, sono da applicare eventualmente in un secondo momento, in caso necessitino Aggiornamento: Vari Fix integrati abitabili tramite rename sul config aggiungendo anche SSDT_Usb_Sleep Fix per Shutdown/ Stop/Sleep Change PTS to ZPTS Find: 5F505453 Repl: 5A505453 Fix USB ShutDown/ Stop/ Sleep change _PRW to ZPRW Find: 5F505257 Repl: 5A505257 Fix Per usb dopo lo sleep ( Aggiuntivo: Per serie 8 & 9 ) Change XWAK to ZWAK Find: 5857414B Repl 5A57414B Change XSEL to ZSEL Find: 5853454C Repl:5A53454C Darwin: Change _OSI to XOSI Find: 5F4F5349 Repl: 584F5349 Credits: * Apple per macOS, vere acpi, ioreg etc... * Acidanthera * Pike.R Alpha * Toleda * RehabMan * bcc9 * Slice * ErmaC * Team di clover * Molti altri sviluppatori * Molte altre persone e forum che hanno contribuito per anni a migliorare la scena hackintosh Qualcuno vuole provare... e fare da cavia? nel caso allegate la vostra origin, ioreg e config dopo aver rimosso i vostri seriali SSDT-Haswell-V(1).aml.zip SSDT-Haswell_8Series.aml.zip SSDT-Haswell.aml.zip SSDT-Usb_Sleep.aml.zip SSDT-Kaby_CoffeLake.aml.zip SSDT_SkyLake.aml.zip SSDT-390series.aml.zip SSDT-Kaby_CoffeLake.aml-incluso PM.zip SSDT_SkyLake-incluso PM.aml.zip SSDT-390seriesV1-incluso PM.aml.zip SSDT-390seriesV2-incluso PM.aml.zip SSDT-390series+biosFIX.aml.zip SSDT-Kaby_CoffeLake+biosFIX.aml.zip SSDT-390series+biosFIX+Vega.aml.zip SSDT-390series+biosFIX_macMini.aml.zip SSDT-Kaby_CoffeLake.aml+Vega+BiosFix.zip ------------------------------------------------------------------------------------------------------------ SSDT 390 (V2) Differenze: spostato un device in LPCB Maggiore compatibilità e aiuto riguardo NVram Grazie anche a Acidanthera. V2_SSDT-390series.aml.zip V2_SSDT-390series.aml+BiosFix.zip V2_SSDT-390series+BiosFix_Vega-Navi.aml.zip1 point
-
Ciao a tutti cari amici Ho anche avuto esperienze di sonno. Dopodiché ho fatto clic con il mouse o la tastiera. per incoraggiarlo a svegliarsi Quando lo schermo si illumina, sembra che si blocchi nella pagina del menu di accesso. Questo problema è già un problema globale per me. Successivamente apportare modifiche con acpidsdt.aml. Senza utilizzare gli elementi corretti, eliminali tutti, dopodiché migliora gradualmente senza usarli. Inoltre sono venuto a sapere che la causa è causata dalla scheda grafica HD4600 integrata, io sono l'unico problema di Monterei, altre versioni non ho alcun problema. Ora utilizzando la scheda grafica nvdie gt 640, funziona bene, dorme bene, si sveglia su richiesta. Disabilita la scheda grafica HD4600 integrata. Ora passa a trifoglio senza fare affidamento su dsdt.aml che è stato risolto da me. che funziona molto per me Lascia che ti racconti tutte le mie esperienze, niente Problemi a dormire e svegliarsi e non svegliarsi Penso che sia probabilmente la versione beta di Monterei, proprio come stava sperimentando anche la big sur beta. nella volta precedente grazie amici1 point
-
No, in order to boot Monterey beta2 & 3 I apply newer 3 patches in both Clover 5138 and OC 0.7.1 config.plist and it worked well up to now.1 point
-
1 point
-
yes.. you can try to use old patch for it or try to verify better the schema proposed here (I will find for you if you do not find it) two kind of patches were proposed from the start one core number -1 (count 0 and other stuff) two a more articulated ones with mask and replace masking (count 1) remember..if they have not published in a clear way..a reason could be there 😉1 point
-
OC PR Patches.plist.zip to explain better (I hope in a better way I mean) attached here patches I use withOpenCore PR 072 No, only in 072 PR Patches 0,1,2 are included in that quirk1 point
-
@jsl2000OC PR does not need of any of them...they are included in OpenCore1 point
-
1 point
-
L'ho provato, ho dovuto cambiare molto, ma era ok. grazie mille amico1 point
-
@jsl2000 Lightening the number of patches in the config.plist, leaving only those that are really useful for the systems you have installed, certainly does not solve your "cosmetic" problem on the CPU name .. but it helps, maybe, to better understand any others problems imho you should do this with both clover and OpenCore1 point
-
quel problema con Monterey non ha nulla a che vedere con questo quello che va bene su BigSur è da mantenere, non farei modifiche azzardate per un beta sistema che stai usando. Questo è sempre bene ricordarlo. Comunque in caso continua sul tuo topic perchè qui saremo poi OT.1 point
-
1 point


