Leaderboard
Popular Content
Showing content with the highest reputation on 07/20/2021 in all areas
-
5 points
-
doppio click sul Background.icns e con Anteprima del mac lo esporti come png sul desktop ,dopo apri Background-Resizer (accetta solo .png .jpg) lo trascini dentro creera' altre risoluzioni , quale la risoluzione la tua risoluzione ? Create image Background 5120x2880 in 144 pixels ➤ this is for 2560x1440 screen Create image Background 3840x2400 in 144 pixels ➤ this is for 1920x1200 screen Create image Background 3360x2100 in 144 pixels ➤ this is for 1680x1050 screen Create image Background 3200x2400 in 144 pixels ➤ this is for 1600x1200 screen Create image Background 3200x1800 in 144 pixels ➤ this is for 1600x900 screen Create image Background 2880x2160 in 144 pixels ➤ this is for 1440x1080 screen Create image Background 3840x2160 in 144 pixels ➤ this is for 1920x1080 screen Create image Background 2880x1800 in 144 pixels ➤ this is for 1440x900 screen Create image Background 2732x1536 in 144 pixels ➤ this is for 1366x768 screen Create image Background 2560x1920 in 144 pixels ➤ this is for 1280x960 screen Create image Background 2560x1600 in 144 pixels ➤ this is for 1220x800 screen Create image Background 2048x1536 in 144 pixels ➤ this is for 1024x768 screen una volta scelta la risoluzione che fa per te , la riconverti nuovamente in .icns con OpenCanopy Generator ti basta poi ricopiarla dov era3 points
-
2 points
-
3 comments. Remove the TB AIC during all testing. Since not using Shaneee's EFI with internalized Patch 0, did you adjust Patch 0 for your CPU core count, as fabiosun described here? Some Patch 0 variations use core-1, the above link, no "-1"; try both.2 points
-
2 points
-
@dreamwhite potrebbe dire qualcosa a riguardo Dimenticavo che il foglio di Google con tutti gli smbios è qui, fatto sempre in collaborazione con Ivan https://docs.google.com/spreadsheets/d/1yLZeRFeONwDj1zMoONQAQ4rlodAnME1q5jFXE-q5H8s/edit?usp=sharing2 points
-
2 points
-
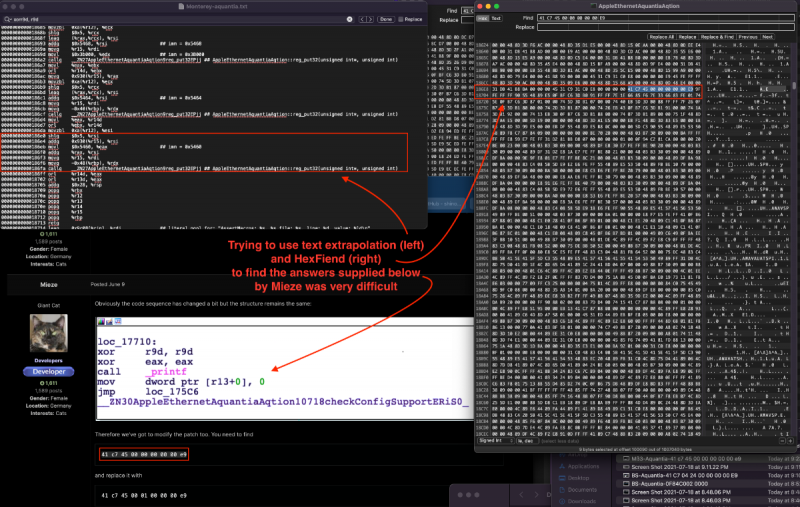
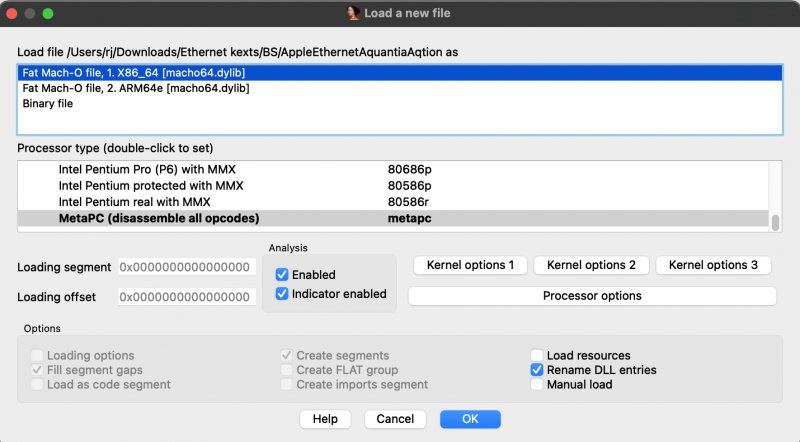
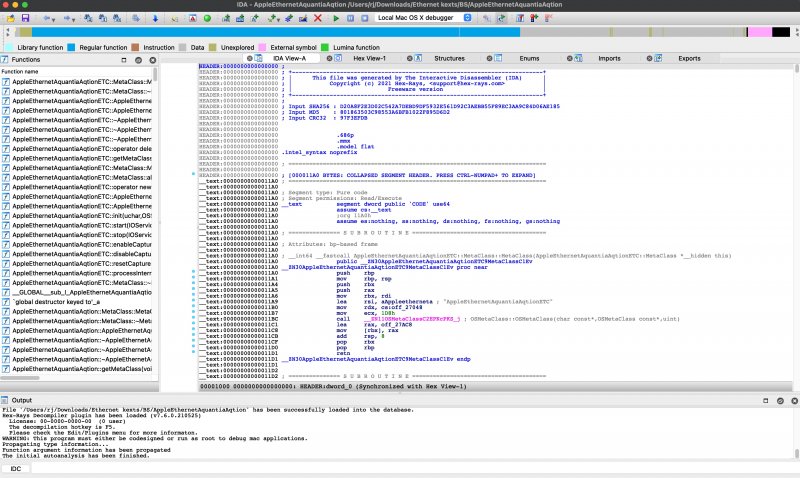
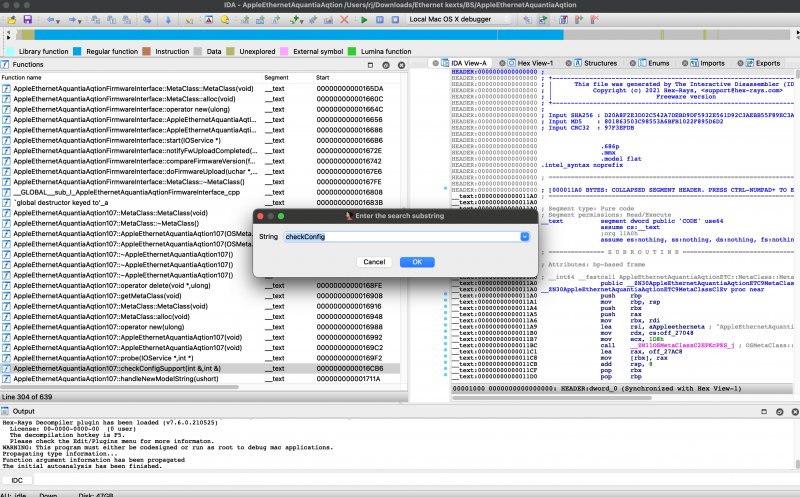
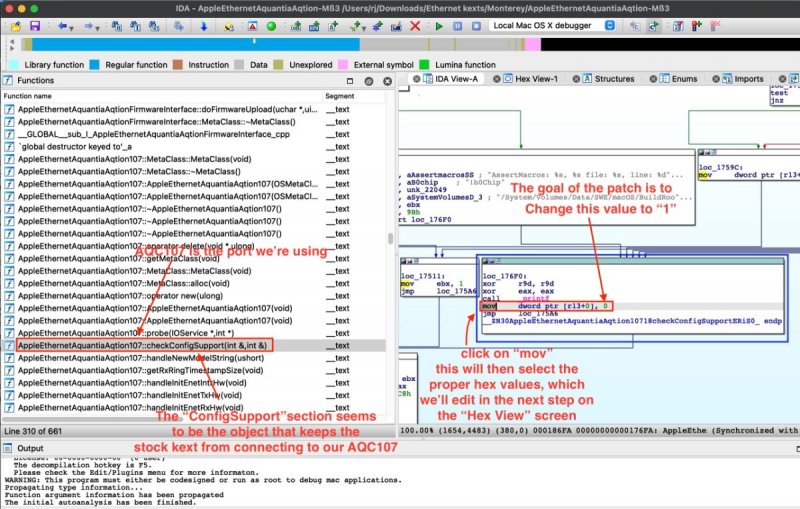
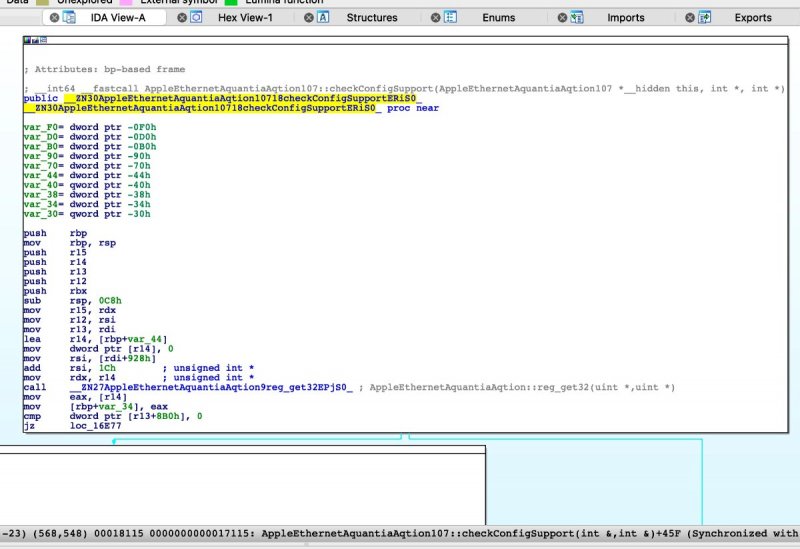
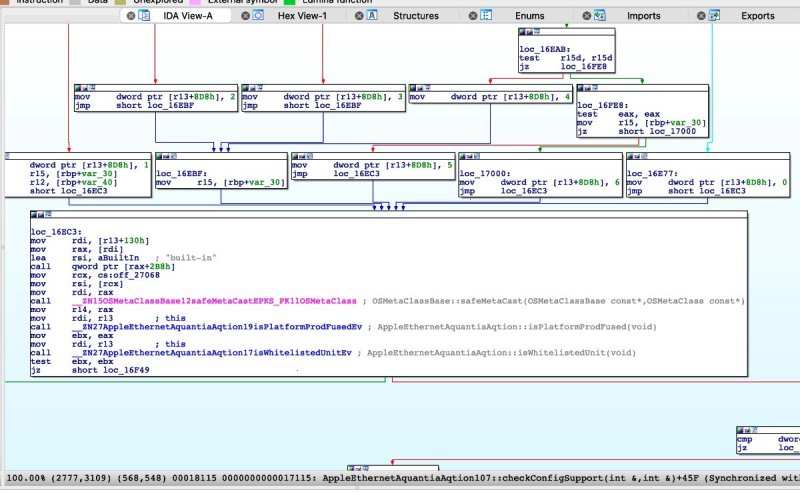
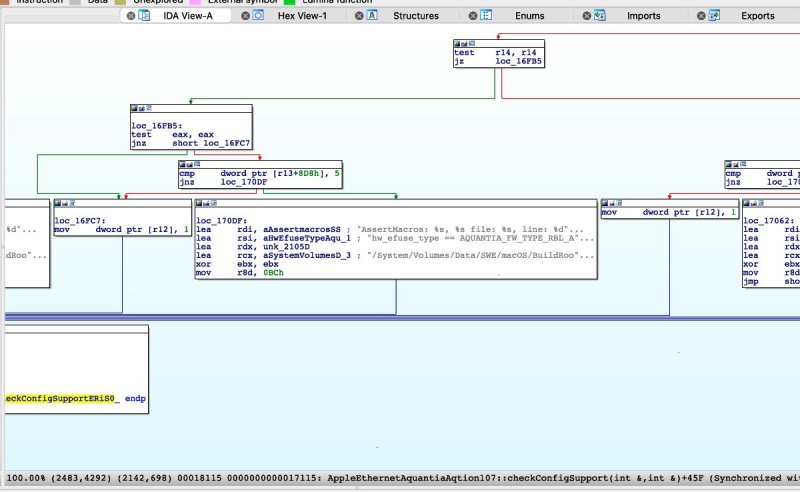
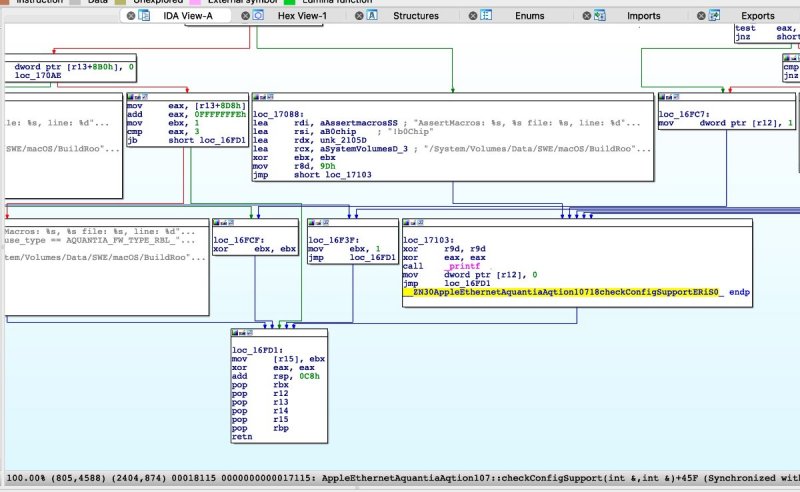
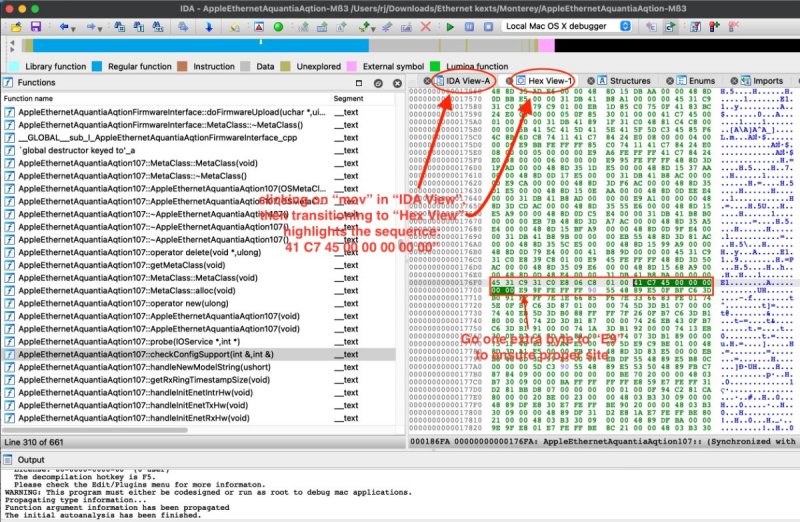
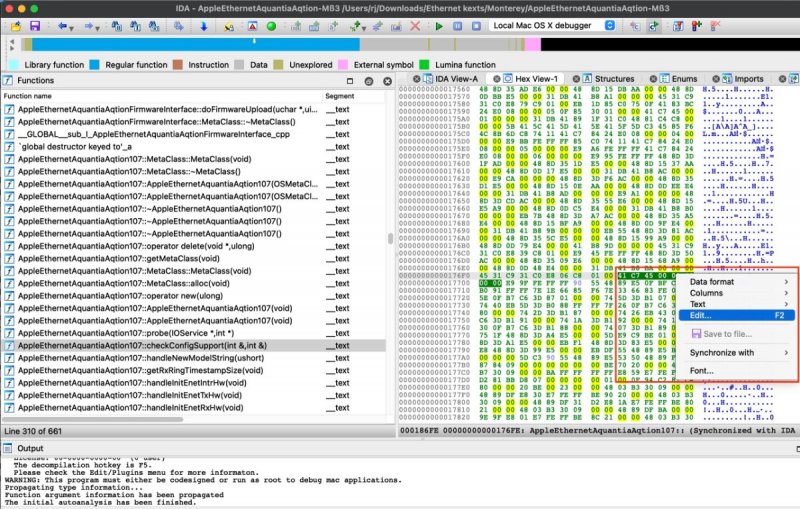
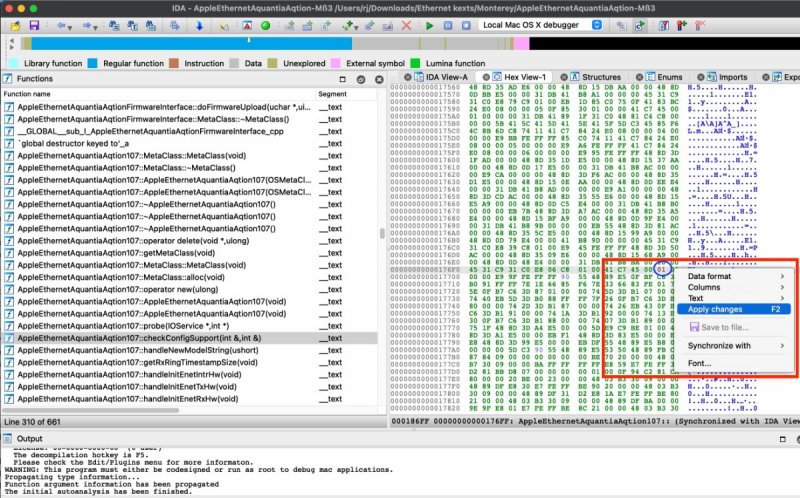
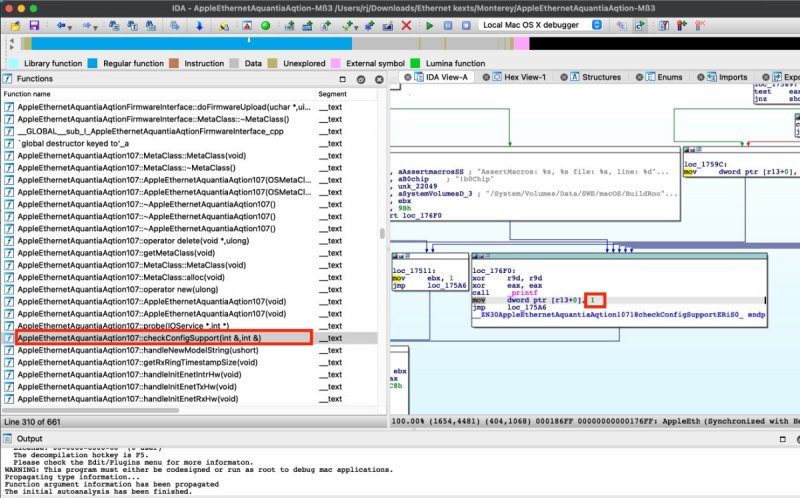
A Reverse-Reverse-Engineering Patch Tutorial For those who already know what I'm posting here and consider this simplistic: sorry. I'm presenting this information for those, who like myself, may be unaware of how patches are created. Virtually every time I've read about a new patch, the patch is presented only by itself or only with the smallest of hints as to how it was created. Recently, I've spent hours trying to get the SmallTree I211 kext to work under Monterey. I've not yet succeeded, but the attempt led me to think a patch might be necessary. SInce I didn't know how to make a patch, I thought a good way to learn might be to "reverse engineer" an existing patch. That thought led me to study patches for the Aquantia ethernet port. There is a long thread over at InsanelyMac (here) where Aquantia patches are discussed for various macOS releases. These patches seemed to have become necessary with the release of Catalina and Big Sur (Mieze and Shikumo seem to have done most of the work). Recently, a new patch for Aquantia was found to be necessary for Monterey; it was discussed in this post by Mieze (from whom I've gleaned the most about kext patches). This means there are several examples to test-out the reverse engineering process. (BTW, what's described below was also tried out on the Big Sur Aquantia patch and this process works with that patch too.) 1. Initial Attempt - OTOOL/HEX FIEND My first attempts to reverse engineer the Aquantia patch began by using the tools discussed in the first post on this thread (from Piker Alpha, using otool (part of macOS): extracting the contents of the Aquantia kext file into a text file), along with using Hex Fiend (a download). The Aquantia kext file is located inside the IONetworkingFamily kext as a plugin (you have to dig a bit to find it!): IONetworkingFamily/Contents/Plugins/AppleEthernetAquantiaAqtion/Contents/MacOS/AppleEthernetAquantiaAqtion. [Note that all editing and work below was carried out on a copy of the kext file that was transferred from "S/L/E/IONetworkingFamily" to the desktop, so nothing destructive was done to the original file.] The text file can be created with otool with the following command (drag and drop your file location in place of the "/~/~/" section): otool -tV /~/~/AppleEthernetAquantiaAqtion > ~/Documents/Aquantia.txt And this same AppleEthernetAquantiaAqtion file can be examined with Hex Fiend. The combination of otool's resulting text file (upper left) and Hex Fiend (upper right) are shown below, where they're also compared with the link from Mieze (bottom left): Unfortunately, I couldn't figure out how to derive the patch from this data. 2. Successful Attempt - IDA64 It wasn't until I did some searching and came across a tool from the Belgium company, Hex-Rays. They offer a free download (here) of the IDA64 macOS app to try out and that is what I'll present next. The idea behind using this app is to de-compile the kext file. But what I'm actually trying to do is "reverse engineer" Mieze's "reverse engineering" of the de-compiled kext file. If successful, then we can learn how to better make patches. We can start this process from some knowledge shared on that thread: we know the area in the kext to examine ("checkConfigSupport", shown in above image) and the given Find string ("41 C7 45 00 00 00 00 00 E9"). Between these two items, we can zero-in on the area that needs to be patched. The first step is in opening the file (again, the nested AppleEthernetAquantiaAqtion file contained within IONetworkingFamily from the latest Monterey ß3) with the IDA64 app. When opening, the default settings in IDA64 are best (shown in Spoiler below). Once opened, the initial screen can have the windows rearranged (initial view shown in Spoiler below). I prefer the Function View be expanded on the left as shown below (also shown is the search window which is accessed from the menu bar). This particular search item was chosen based on discussions in the InsanelyMac thread, where Mieze describes (in Spoiler): When this search is completed, and the Function View item on the left double-clicked, the following can be seen in the right pane. But the result is not obvious as the presentation is a bit complicated: the right pane must be scrolled (shown as separate images in the Spoiler below). After scrolling the right pane, we can begin the process. On the left pane, note that the Aquantia item is "107" which references the AQC107 port name. Next, even after scrolling, there are many windows in the right hand pane. Since we're reverse engineering, we already know that we're looking for something that should say "__ZN30AppleEthernetAquantiaAqtion10718checkConfigSupportERiS0". This is highlighted below on the right. As pointed out in the InsanelyMac thread, we need to change the value of "0" to "1", but first we need to find the corresponding hex code. We do this by clicking on the "mov" command (highlighted below right). Once the "mov" command is selected, the corresponding hex code will also be selected for us, but to see this, we need to change views. To see the hex code, change views by clicking on Hex View near to the top of the window. The new view switches the right pane from the IDA View above to the Hew View below. Again, since we clicked on the "mov" command in the above step, the correct hex code for this command is already highlighed in dark green. We then look for the Find string which is "41 C7 45 00 00 00 00 00 E9", but notice that the "mov" command did not contain the "E9". The next byte seems to be chosen when patching to help ensure only one site is patched. The replacement will simply over write this byte with the same value. But to change the "0" to "1", we need know which byte to change. This can easily be tested in real time by editing the hex code as shown below: right-click on the byte to change. The cursor will be in the middle of the byte to change the right least significant value as shown next. To make this change 'stick', we need to apply it. This is done by again right-clicking. This change can be verified by switching from the Hex View to the IDA View. If incorrect, switch back to the Hex View, re-edit as needed and re-apply and return to the IDA View once more to verify if now correct. If the correct byte was changed, you'll see the following: At this point, we can see that the Find value of "41 C7 45 00 00 00 00 00 E9" and the replacement value of "41 C7 45 00 01 00 00 00 E9" now all make sense and this seems to be how this patch was derived. If anyone has any comments or corrections to the above let me know and I'll edit this post. [BTW, I compared the Monterey ß3 Aquantia file to that of Monterey ß1, using Hex Fiend: there is no difference. However, this is quite a difference in this same file between Monterey and the latest release of Big Sur.] ADDENDUM - Future Approaches2 points
-
1 point
-
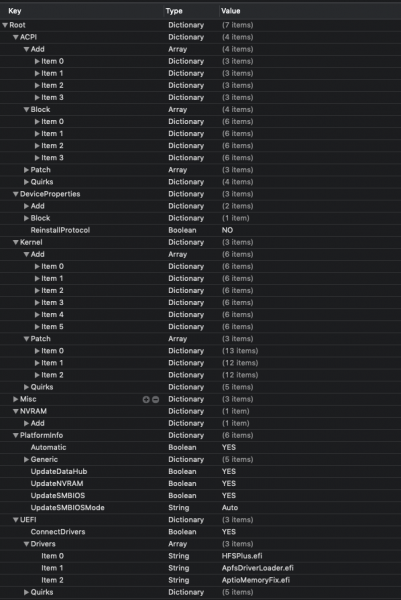
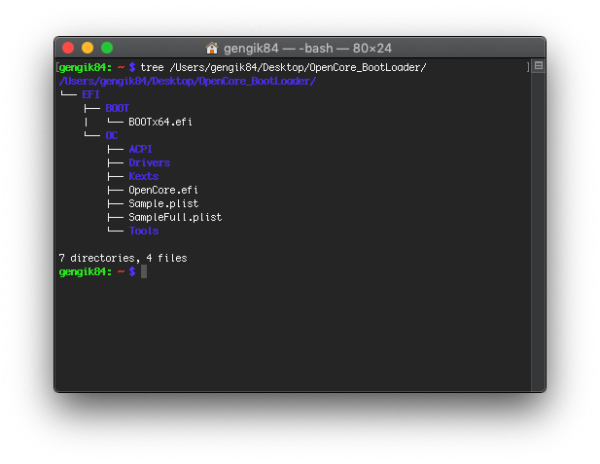
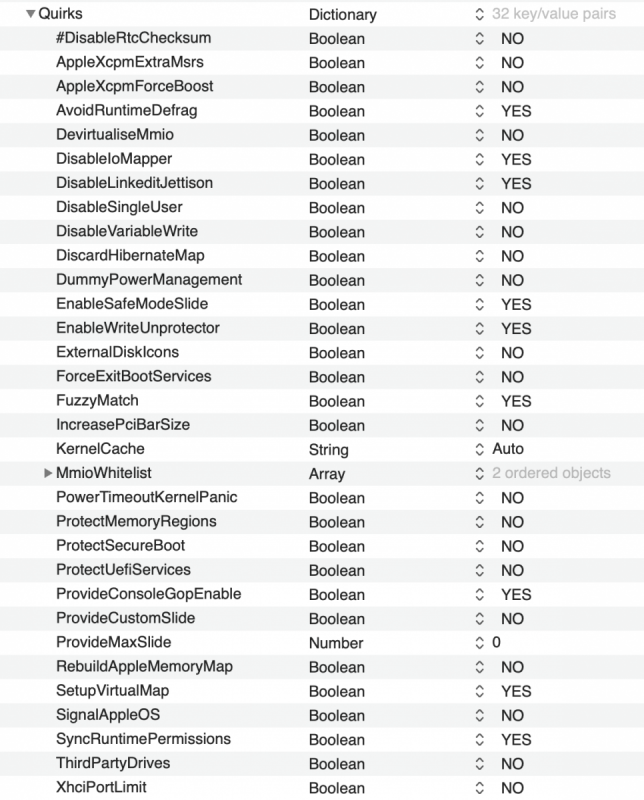
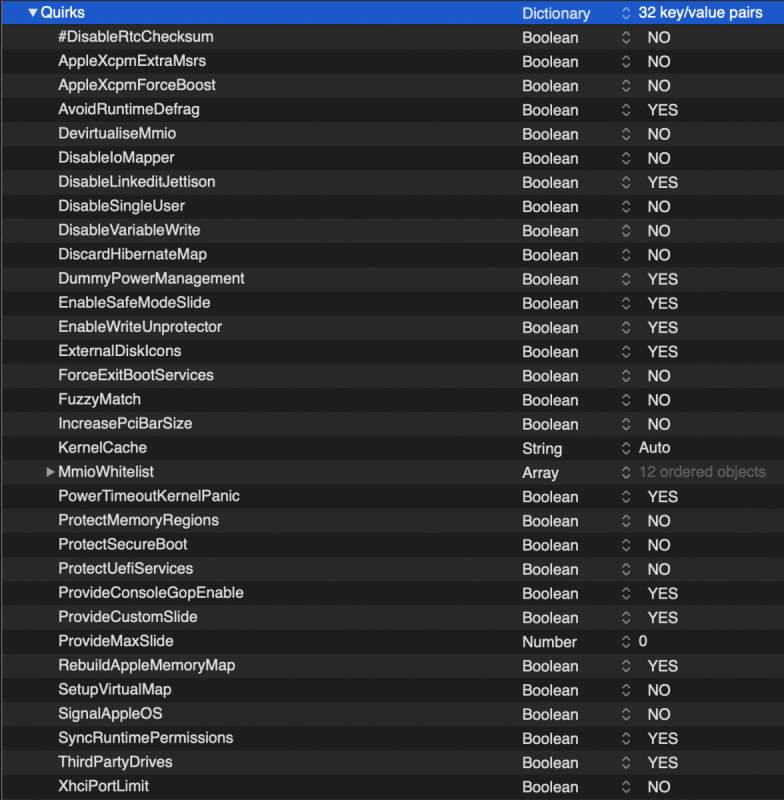
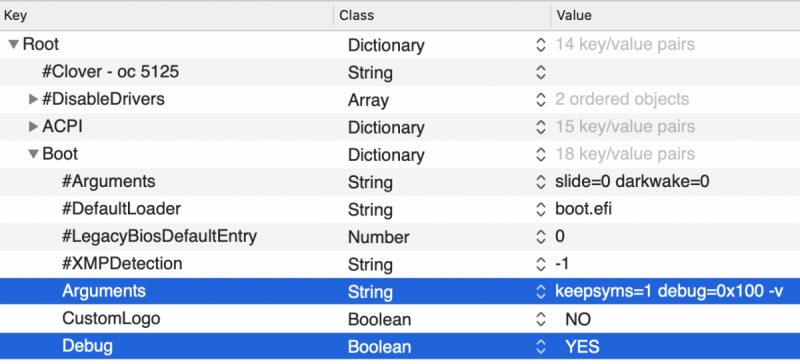
Come iniziare a muoversi con i Quirks inclusi in Clover Per stare al passo con i tempi, gli sviluppatori di Clover hanno deciso di incorporare alcune funzioni di OC, non entro in dettagli tecnici che non mi competono, basti sapere che ora nel config di Clover vi è una nuova sezione Quirks e per chi conosce OC è di facile comprensione, per chi non l'ha mai usato, potrebbe essere problematico la corretta configurazione, ed ecco il motivo di questa guida. Nella sezione Quirks di Clover sono inglobati, quasi in toto, ma non tutti (quelli che eseguivano compiti già presenti in Clover, sono stati omessi) i quirks booter e kernel di OC Altro fattore importante, ora il gestore di memoria è OpenRuntime.efiOpenRuntime.efi.zip che con installazione predefinita viene aggiunto in Clover/drivers/UEFI Sarebbe utile, per chi non si è mai cimentato, usare un plist editor tipo Propertree o PlistEDPlus Download Clover con inclusi ultimi commit, vedi qui --> https://www.macos86.it/files/file/89-clover-release-beta/ con info utili anche nei commenti CloverConfigPlistValidator CloverConfigPlistValidator_r5136.zip 01-05-2021 https://github.com/CloverHackyColor/CloverBootloader/releases/download/5134/CloverConfigPlistValidator.zip prossimamente sarà incluso in Clover Come si usa: Sezione Quirks di Clover come nel config sample config-sample-5131.plist.zipconfig-sample 5136.plist.zip Un ringraziamento alla guida di Dortania di cui screenshots ora qui mi avvalgo. Settaggi di riferimento in base alla piattaforma: PONTE SABBIOSO Clover_Quirks_Z68_Asrock.plist.zip IVY BRIDGE Clover_Quirks_Gigabyte GA-Z77-DS3H.plist.zipDELL Optiplex 7010.plist.zipClover_Quirks_Asus Z77A.plist.zipClover_Quirks_Ivy_Bidge_Samsung NP450R5E.plist.zipAsus P8Z68-V+i7 ivy bridge.plist.zipX79-Machinist.plist.zip HASWELL Clover_Quirks_Z97_Asrock.plist.zipClover_Quirks_GIGABYTE Z87X-D3H.plist.zipGigabyte GA Z87X UD7 TH.plist.zip SKYLAKE Clover_Quirks_Z170_Gigabyte.plist.zip KABYLAKE LAGO DEL CAFFÈ Clover_Quirks_Asus_Z370.plist.zipClover_Quirks_Asrock_Z370.plist.zipClover_Quirks_MSI_Z370.plist.zipClover_Quirks_Msi z390 edge ac.plist.zipClover_Quirks_Gigabyte AORUS Z370 G WIFI rev.1.plist.zip LAGO COMETA Z490_Vision_G.plist.zipAsus Rog Strix B460-H.plist.zip ZEN2 X570 stranezzeClover_Quirks_X570_MSI_Unify.plist.zipClover_Quirks_X570-Asus TUF Gaming+.plist.zip Per le piattaforme AMD 17h fare riferimento a questo thread per le patch kernel CLOVER_KernelToPatch_HS_MJ_CTL_BS.plist.zip 04-02-2021 --> patch del kernel 17h fix grande su 11.3 beta CLOVER_AMD_KPatches35_BS11.3.plist.zip CLOVER_AMD_KPatches39_BS11.3.plist.zip 21-06-2021 KernelToPatch 17H 19H per Clover: testate e funzionanti senza nessun avviso al boot e con il validatore, su mojave, catalina, big sur 11.4 e 11.5 beta3 (dovrebbero funzionare anche su high sierra, ma non ho più modo di testarle) CLOVER_AMD_17_19_H_35Patch_HS_MOJ_CAT_BSg.plist.zip Questo è la traduzione completa delle 40 patch di OC per le KernelTopatch di Clover per piattaforme AMD 17H 19H (2 serate di test prove e modifiche) Sia il validatore che Clover al boot rilasceranno 3 avvisi, ignorateli, al momento la soluzione di questi avvisi ha messo in luce uno strano bug, per cui nessun avviso ma big sur non avvia NB: appena gli sviluppatori potranno replicare in loco questo bug, allora potrebbe essere risolto 21-06-2021 CLOVER_AMD_17H_19H_40Patch.plist.zip 11-07-2021 credits @Mifjpn CLOVER_patch_17H_19H_CT_BS_Monterey-beta1.plist.zip FullPatches mia versione realizzata in base agli imput di @Mifjpn CLOVER_Full_patches_17H19H_Monterey_beta1_iCan.plist.zip NB: una cosa a cui prestare molta attenzione, dal passaggio da Clover 5122 o precedente, non è detto che tutti i kext in uso, ora funzionino perfettamente; per cui in caso di kernel panic o blocchi, usarne il minimo indispensabile, LILU, WEG, VirtualSMC o al suo posto il FakeSMC di Slice incluso in Clover.iso Nel config --> GUI --> HIde se è presente la voce Preboot và eliminata, altrimenti con il nuovo metodo di scan e impostazione voci da mostrare nella GUI il boot di Big Sur non comparirà. Risolta in Clover 5127 Altra cosa da fare attenzione, chi usa tenere i kext nelle cartelle specifiche relative a dato macOS, vi è un bug per cui con BigSur al primo riavvio in caso di aggiornamento/installazione, non legge i kexts presenti nella cartella 11: quindi il consiglio è di tenere VirtualSMC/FakeSMC, LILU e WEG nella cartella other La cartella kexts per Big Sur è denominata 11 Il MatchOS nel config.plist relativo a Big Sur è 11.x La cartella kexts per Monterey è denominata 12 Il MatchOS nel config.plist relativo a Monterey è 12.x Clover spiegazioni cambiamenti --> vedi qui Abilitare il debug.log CLOVER QUIRKS da guida pdf tradotta da russo e inglese poi traslata in italiano:1 point
-
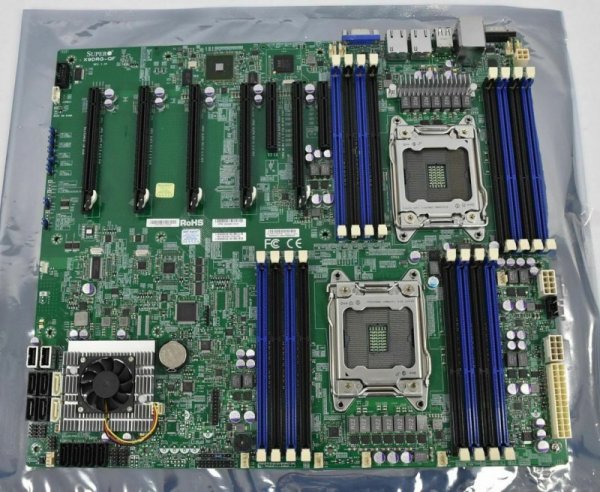
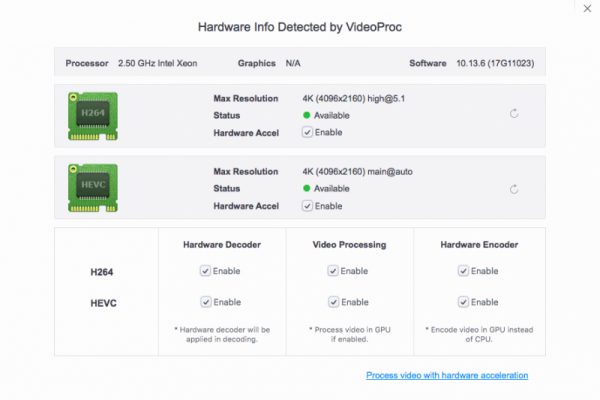
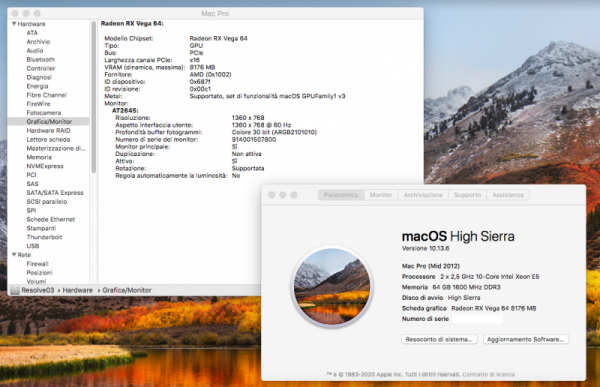
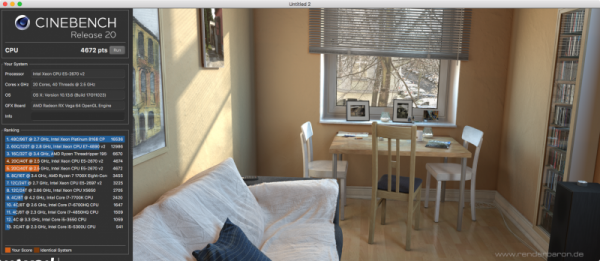
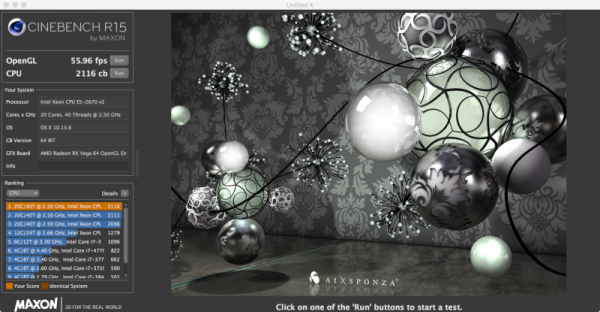
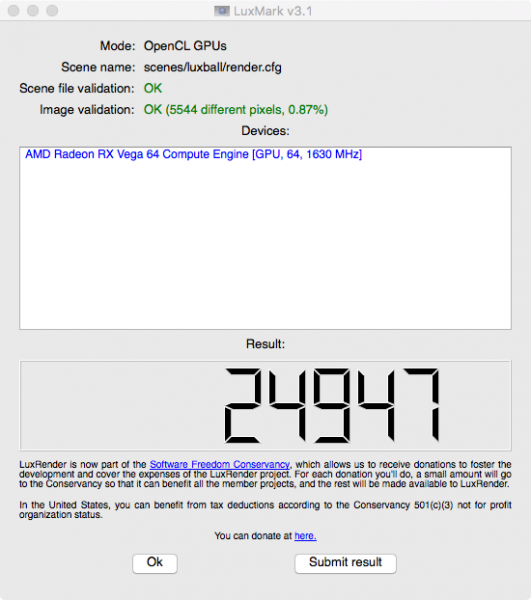
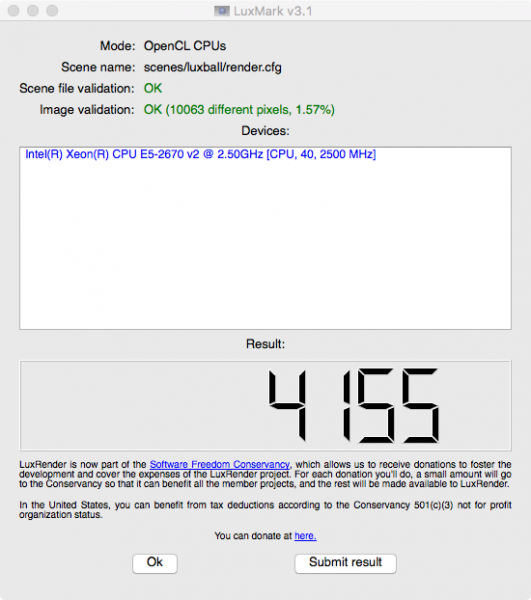
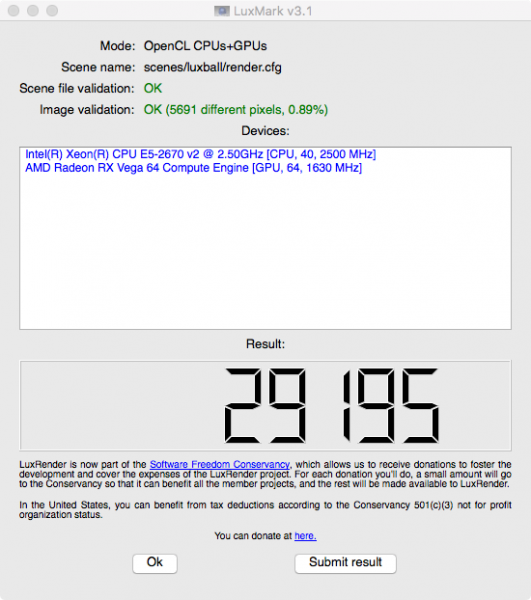
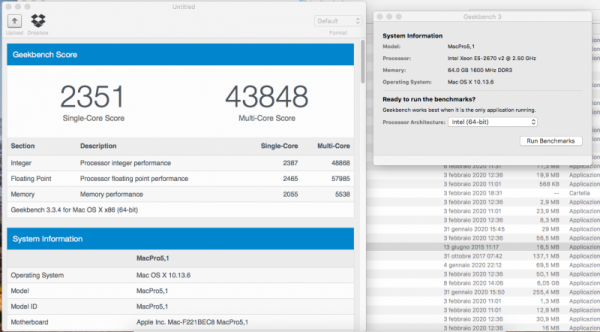
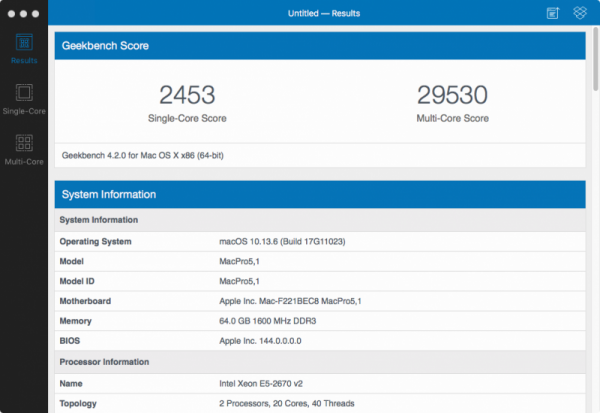
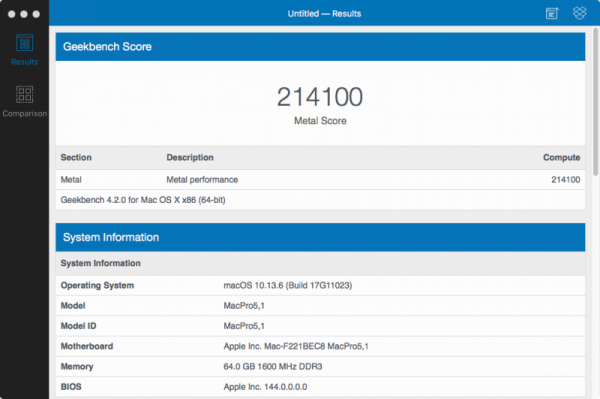
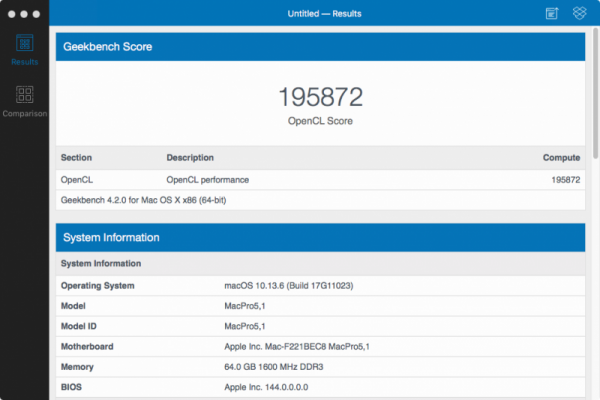
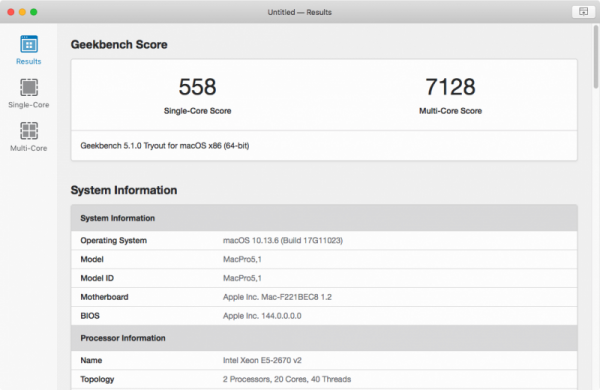
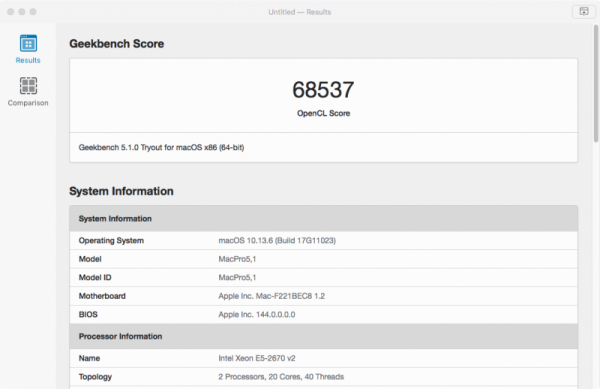
Salve a tutti 😉 Voglio sottoporvi una macchina che metterò in produzione audio/video per la ditta dove lavoro, ecco l'hardware: CPU : 2 x Xeon E5-2670 v2 2.5 GHz 10 cores ciascuno, 40 thread totali Mainboard: Supermicro X9DRG-QF Ram: 64 Gb DDR3 ECC GPU: AMD Radeon RX Vega 64 8 Gb HBM2 SSD: 512 Gb Crucial MX500 Sata 3 Addon USB 3.1 Gen2 PCIeX basata su ASMedia 2142 Scheda Fibre Channel Atto FC-82EN Dual 8Gbit attiva in multipath con Storage Xsan 150Tb Lan: Asus XG-C100C 10 Gbit RJ45 basata su chipset AQC107 Ho messo High Sierra e non Mojave per ragioni di coerenza tra le macchine qui in produzione: avendo tutte il medesimo OS speriamo di minimizzare i problemi di compatibilità ed eventuale reinstallazione. Le prestazioni a mio avviso sono molto valide pur mostrando la macchina i suoi limiti di età. Iniettando le proprietà di shikigva dell'iMacPro sono riuscito a far funzionare l'accelerazione H264 con la Vega restando con l'smbios MacPro5,1 colmando la mancanza di intel integrata... Usando direttamente iMacPro1,1 le porte usb 2.0 cessavano di funzionare, ho evitato di smanettare nell'SSDT con questa soluzione, non dovrei avere problemi anche perché ho renderizzato H264 H265 Prores DPX a go go fin'ora senza problemi di sorta. Vi lascio ai bench 😉 Il monitor HD Ready è di test del laboratorio della ditta, non scandalizzatevi! P.s.: cercherò di fargli comprare due Radeon VII anche perché la Vega è la mia e la rivorrei ahahahahah... ovviamente in quel caso passerò a Mojave, necessariamente. VideoProc Info generiche Cinebench 20 Cinebench 15 Luxmark 3.1 Geekbench 3 Geekbench 4 Geekbench 5, metal mi crashava forse a causa della versione piratesca non curata a dovere 😉 Al prossimo hack dual cpu 😄1 point
-
Prezzo decisamente spropositato per una scheda video con soli 4GB di VRAM. Inoltre quali sono i principali task che fai con il pc? Video editing? Produzione audio?1 point
-
@antuneddu @scipione dentro la cartella dei miei temi in Other icon gia cè il png in 4k basta aprirlo con anteprima e poi convertirlo come citato da te1 point
-
1 point
-
For those who might be interested in creating patches (or at least, making a relatively simple one like for the Aquantia port), I made a post on another thread on this forum on my attempts at learning the basics of patch making.1 point
-
1 point
-
1 point
-
1 point
-
1 point
-
1 point
-
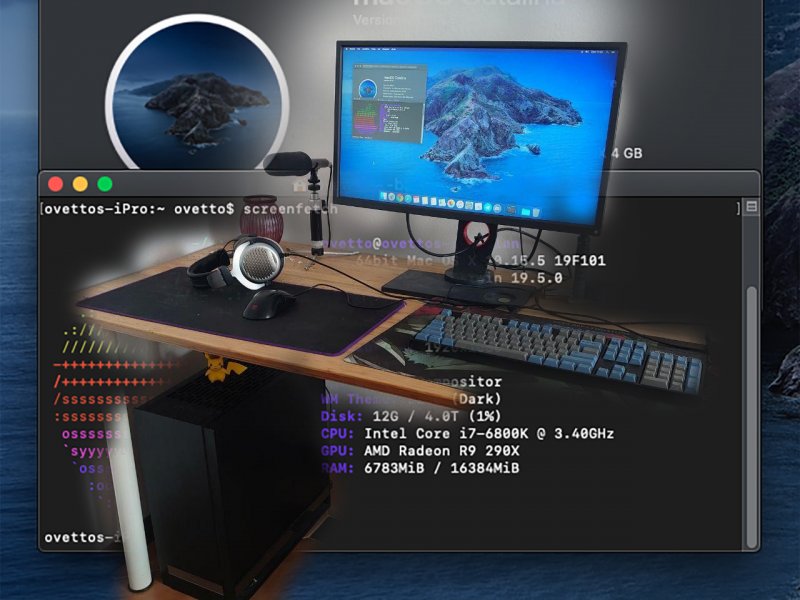
Ciao ragazzi, ma non c'era un topic così?? In questo topic, pensavo che ogni utente postasse le foto della propria postazione hackintosh, che ne dite?? scusate se magari è una copia e c'era già questo topic, nel caso lo cancellerò inizio io!!!!! le specifiche sono tutte in firma ! mouse zowie fk1 tastiera uso una leopold fc990r e come cuffie ho delle beyerdinamics dt990 !!1 point
-
1 point
-
I managed to install the Monterey B1 version from an EFI OpenCore 0.7.1. Then I tried to boot with Shanne's PR EFI OpenCore 0.7.2 without success. Even try all eGPU suggestions once again. Here I spent my day trying multiple studies of combinations to no avail. I am stopping there for the moment. I'm not even talking about attempts to upgrade Monterey B3 which each time breaks the installation of beta B1 and back to square one.😒0 points
-
new patch algrey - Force cpuid_cores_per_package: Below I hope an useful schema taken from Shaneee Opencore PR COMMENT: algrey - Force cpuid_cores_per_package FIND: c1 e8 1a 00 00 00 MASK : FF FD FF 00 00 00 BASE: _cpuid_set_info COUNT: 1 REPLACE high sierra to mojave: b8 XX 00 00 00 00 REPLACE from catalina to big sur : ba XX 00 00 00 00 REPLACE MASK high sierra to big sur : FF FF FF FF FF 00 REPLACE monterey : ba XX 00 00 00 90 REPLACE MASK monterey : FF FF FF FF FF FF 3970x --->32 cores XX=20 3960x--->24 cores XX=18 3950x--->18 cores XX=10 and so on 🙂 so for all system from high Sierra you have three different patches (common find and mask) different replace and replace mask minKernel and maxKernel do the jobs to enable proper ones for OS you use I am using an old patch posted on @jsl2000config.plist which works in BIG SUR and all Monterey Beta But latest PR uses above patching 😉0 points
-
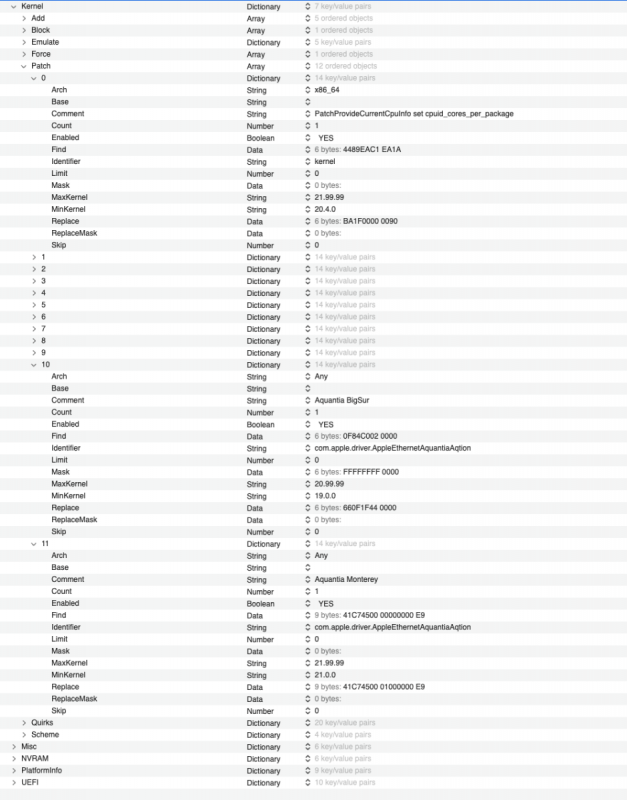
Una bella notizia per gli utenti AMD grazie ad @algrey, e come già anticipato da @Shaneeea breve sarà possibile per tutti partire con un set ridottissimo di patches: sul mio sistema ne servono ora solo 10 per far partire BigSur 11.4, 11.5 beta 4, Monterey 12 b1.....e udite udite beta 2 😂 la patch 0 che algrey ha pubblicato su Insanely Mac e' fatta per il mio processore e' molto semplice ricrearla per altri tipi di cpu: PatchProvideCurrentCpuInfo set cpuid_cores_per_package f:4489EAC1 EA1A r:BA1F0000 0090 attenzione il valore 1F significa 31, il 3970 x ha 32 cores quindi come da sue indicazioni 32 -1=31=1F A titolo di esempio per una CPU con 8 cores: 8-1=7=07 per una da 16: 16-1=15=0F e via dicendo La patch n.1 verrà fornita quando i curatori delle patches decideranno di renderle pubbliche Ringrazio di nuovo @algrey per la sua consueta disponibilità e bravura0 points











.jpg.678afc68a8bca742dc5fdfdce44bcc65.jpg)
