Leaderboard
Popular Content
Showing content with the highest reputation on 02/07/2021 in all areas
-
Quando il tuo Mac si “sbaglia”, viene spesso chiamato "crash". Questo è un termine breve, succinto, ma non molto utile a capire cosa è andato storto e come risolverlo. Comprendendo cosa è successo e cosa è stato esattamente quel "crash", otteniamo importanti indizi su cosa fare dopo. Uscita imprevista macOS ha aree protette, incluso il kernel stesso, che le app non dovrebbero essere in grado di influenzare. Ogni app viene eseguita in uno spazio separato, separato da altre app e dallo spazio di sistema protetto. Quindi il tipo più comune di "crash" dovrebbe essere un'app che morde la polvere quando ha fatto qualcosa di sbagliato. Di solito l'app si chiude improvvisamente, per questo viene spesso definita chiusura imprevista. Le uscite impreviste possono verificarsi per molti motivi, ma i più frequenti sono i bug nell'app. Se un'app si chiude ripetutamente in modo imprevisto quando provi a fare la stessa operazione, allora puoi essere abbastanza sicuro che si tratti di un bug in quell'app e dovresti segnalarlo agli sviluppatori dell'app. Naturalmente questo non è necessariamente una questione di colpa: molti di questi bug si verificano quando l'app si aspetta che macOS faccia qualcosa in un modo, e non è così. È quindi probabile che ci sia un periodo in cui gli sviluppatori dell'app danno la colpa a Apple, Apple dice poco e alla fine il problema viene risolto tranquillamente. Quando un'app si chiude inaspettatamente, macOS e tutte le altre app in esecuzione non devono essere interessate, ma a volte l'app, quando sta per uscire, lascia alcuni danni a macOS, ai file archiviati o altrove. Quindi, anche se dovresti essere sicuro di continuare a lavorare e riaprire l'app che si è chiusa, fai attenzione a eventuali segni di comportamenti strani che indicano danni residui. Il riavvio del Mac normalmente lo cancella. Esistono anche diversi motivi per cui macOS ha forzato la chiusura improvvisa della tua app. Se ciò accade quando l'app tenta di avviarsi, ad esempio, potrebbe essere perché si è verificato un errore di firma, ha tentato di accedere alle risorse protette dalla privacy a cui non aveva diritto o un problema con il codice oi file dell'app . Sfortunatamente, nella maggior parte dei casi, sia che si sia chiuso da solo, sia che sia stato forzato da macOS, tutto ciò che vedrai sarà un rapporto sugli arresti anomali, che potrebbe invitarti a riaprire l'app o a inviarlo ad Apple. La lettura dei rapporti sugli arresti anomali è un'attività piuttosto specializzata e normalmente necessita di informazioni dettagliate sul funzionamento di macOS e dell'app che si è chiusa. Se hai la possibilità di inviare il rapporto ad Apple o allo sviluppatore, ti preghiamo di farlo, poiché ciò potrebbe significare che il suo sviluppatore ha la possibilità di vederlo. Se vuoi capire i rapporti sugli arresti anomali, questa vecchia Nota tecnica li spiega e c'è un'intera sessione del WWDC 2018 dedicata all'argomento. Spinning beachball, o hang Più comuni delle uscite inaspettate sono gli “spinning beachball” (palloni da spiaggia che girano). Queste sono occasioni in cui un'app riscontra un problema e visualizza il puntatore come un beachball rotante per indicare che ci sta lavorando. Ciò potrebbe essere dovuto al fatto che hai chiesto all'app di intraprendere qualcosa di enorme: la maggior parte delle app mira a inserire attività di lunga durata in un processo in background e mostrare uno spinner o una barra di avanzamento occupati, ma ciò non è sempre possibile. Finché il pallone da spiaggia non viene visualizzato per troppo tempo, dovresti lasciare che l'app si risolva da sola. I beachball che girano non sono di per sé un'indicazione affidabile che un'app è in difficoltà: il loro significato è semplicemente che l'app in primo piano è troppo impegnata nell'elaborazione per interagire con l'utente al momento. In molte circostanze, questo è abbastanza benigno e l'app è semplicemente impegnata a fare quello che volevi. A volte un'app sembra incapace di riprendersi dal beachball re si blocca, non risponde, consuma i cicli della CPU e non arriva da nessuna parte. Dovresti essere in grado di forzare la chiusura dell'app, quindi puoi riaprirla e provare un approccio diverso. Per farlo, premi contemporaneamente Comando-Opzione + Esc per visualizzare la finestra di dialogo Uscita forzata. Seleziona l'app che si è bloccata, che di solito è contrassegnata in rosso segno che non risponde, quindi fai clic sul pulsante Uscita forzata. L'app verrà quindi chiusa e potrai riavviarla quando desideri e utilizzarla. Questo dovrebbe ripulire tutto correttamente dopo aver forzato la chiusura dell'app, ma come per le chiusure impreviste, a volte lascia macOS e altre app in una situazione instabile, che richiede un riavvio. Quando forzi la chiusura di un'app e, talvolta, in altre occasioni, macOS potrebbe generare automaticamente un rapporto "spindump"; genera anche rapporti "microstackshot" in caso di problemi di prestazioni. Sfortunatamente, interpretarli è davvero possibile solo se capisci come funziona l'app e cosa stava facendo in quel momento. I beachball rotanti ricorrenti in diverse app e il Finder sono una buona indicazione di problemi più generali con macOS piuttosto che con quelle app. Questi si verificano più comunemente quando hai appena aggiornato o aggiornato macOS e suggeriscono un aggiornamento non riuscito o un grave conflitto interno, forse con qualche prodotto di terze parti incompatibile. Una possibile soluzione è avviare in modalità provvisoria (con il tasto Maiusc tenuto premuto), lasciare il Mac per un minuto o due, quindi riavviare in modalità normale. Se ciò non risolve il problema, prova a scaricare e installare l'ultimo aggiornamento Combo o a reinstallare quella versione di macOS, magari in modalità di ripristino. Le estensioni di terze parti e altri software di livello inferiore sono disabilitati in modalità provvisoria, quindi potrresti scoprire che i beachball scompaiono in quella modalità. Tuttavia, anche molte estensioni Apple sono disabilitate e potresti non essere in grado di eseguire molte delle tue app. Kernel panic Le prime versioni di macOS spesso non proteggevano abbastanza bene il kernel e altre parti centrali del sistema e un bug pernicioso in un'app poteva far crollare l'intero sistema. È ora più probabile che ciò si verifichi a seguito di un errore hardware, come un problema di memoria o un guasto improvviso di un disco. Nella forma classica (OS X 10.7 e versioni precedenti), l'intero schermo del Mac diventa grigio e un messaggio multilingue ti informa che macOS ha riscontrato un errore e deve essere riavviato: questo è un kernel panic. Da OS X 10.8 in poi, questo comportamento è cambiato e potresti non essere nemmeno informato del kernel panic. Invece, il tuo Mac potrebbe bloccarsi per un minuto circa, quindi riavviarsi spontaneamente o semplicemente spegnersi del tutto. A meno che tu non gli abbia detto di riavviare o spegnere, questo può essere solo il risultato di un kernel panic. Se il tuo Mac ha un kernel panic, deve riavviare e caricare macOS da zero: il kernel ha subito così tanti danni che non può ripristinarsi in nessun altro modo. Puoi saperne di più su come riconoscere e gestire un panico del kernel qui. Freeze Quando il kernel di macOS e le parti centrali del sistema collassano completamente, potrebbero non essere in grado di continuare abbastanza a lungo da avvisarti con un kernel panic, né da riavviare prontamente. Invece, il tuo Mac si ferma semplicemente come un morto nell'acqua: l'orologio si ferma, non puoi navigare tra le finestre, anzi normalmente non puoi nemmeno muovere il puntatore. Un sintomo interessante che potrebbe avvisarti di un tale blocco è che un Apple Magic TrackPad 2, che è gestito dal software, perde la capacità di fare clic e si sente "morto". Se incappi in un blocco, lascia stare il Mac per un minuto o due, poiché è probabile che si riavvii automaticamente. In caso contrario, è necessario premere e tenere premuto il pulsante di accensione fino a quando non lo si è forzato a spegnersi, attendere alcuni secondi, quindi riavviarlo. Non scollegare o spegnere mai l'alimentazione di rete, tranne in caso di grave emergenza, poiché ciò comporta un alto rischio di causare danni permanenti al tuo Mac, sia al suo software che possibilmente al suo hardware. Come il kernel panic, dovresti vedere un blocco solo se hai un problema hardware. Tuttavia, le versioni successive di El Capitan (10.11.4 e successive) sono note per causare ripetuti blocchi sporadici su alcuni modelli di Mac, inclusi alcuni iMac e MacBook Pro. Questo è stato risolto correttamente solo con il nuovo kernel fornito in macOS Sierra, che per la maggior parte degli utenti è molto più robusto. Sono stati segnalati blocchi anche su alcuni modelli con determinate versioni di firmware. Problemi associati a eventi specifici L'arresto anomalo che si verifica durante l'avvio può essere particolarmente difficile da individuare, soprattutto se impedisce al tuo Mac di avviarsi completamente. Gravi problemi che lasciano il tuo Mac con uno schermo colorato uniforme, in genere nero o blu, di solito indicano un guasto hardware, come una scheda grafica difettosa. I problemi minori vengono spesso risolti riavviando in modalità provvisoria, con il tasto Maiusc tenuto premuto; questo disabilita la maggior parte del software di terze parti e può consentire di capire cosa si sta verificando e affrontarlo. Un altro momento critico in cui si verificano problemi è al “Wake from sleep” (risveglio dal sonno). Ciò normalmente richiede che macOS riattivi l'hardware e potrebbe essere necessario caricare driver e altro software di basso livello. Può provocare uno qualsiasi dei suddetti tipi di incidente. È più insolito andare in crash quando si va in Sleep, ma questo è un altro indicatore utile che può aiutare a restringere la causa. Gli indizi più importanti di tutti? La maggior parte degli eventi di cui sopra vengono registrati con informazioni dettagliate nei log del tuo Mac. In El Capitan e versioni precedenti, puoi sfogliare quelli che utilizzano Console, ma purtroppo Sierra ha introdotto un nuovo sistema di registrazione e Console ora ha un valore molto limitato. Se utilizzi Sierra o versioni successive, dovrai usare applicazioni di terze parti, ma questo è un’altro discorso. (Cit. EclecticLight)3 points
-
Quando si fanno alcune operazioni nel sistema, per completare correttamente è necessario aggiornare la cache dei DNS; i Domain Name System sono delle tabelle di associazione di dati per conversione degli indirizzi web, altrimenti raggiungibili solo tramite un IP numerico. Le operazioni più comuni dove questo necessita, usuali e frequenti sui server e molto meno sui sistemi di utenze personali, sono: - Cambiamenti nel file hosts - variazione dei DNS nell’omonimo pannello di Preferenze Network - Lentezza nel risolvere l’indirizzo web in navigazione Svuotare la cache DNS in Tiger OS X 10.4: lookupd -flushcache Svuotare la cache DNS in Leopard OS X 10.5 e Snow Leopard OS X 10.6: sudo dscacheutil -flushcache Svuotare la cache DNS in Lion OS X 10.7 e Mountain Lion OS X 10.8 sudo killall -HUP mDNSResponder Svuotare la cache DNS in Mavericks OS X 10.9: dscacheutil -flushcache; sudo killall -HUP mDNSResponder Svuotare la cache DNS in Yosemite OS X 10.10: sudo discoveryutil mdnsflushcache;sudo discoveryutil udnsflushcaches Svuotare la cache DNS in El Capitan OS X 10.11, MacOS 10.12 Sierra: sudo dscacheutil -flushcache; sudo killall -HUP mDNSResponder Svuotare la cache DNS in MacOS 10.13 High Sierra, MacOS 10.14 Mojave, MacOS 10.15 Catalina: sudo killall -HUP mDNSResponder Svuotare la cache DNS in MacOS 11 Big Sur: sudo dscacheutil -flushcache; sudo killall -HUP mDNSResponder (Cit.Faxus)3 points
-
Per ora non ci sono opzioni imminenti se non Vega o una serie 5xxx come modelli superiori alla tua attuale2 points
-
se guardi la mia firma..forse capisci che anche io ho pensato lo stesso... ed ho ripiegato su una rx 580 8 Gb poi se sarà il supporto disponibile..si prenderà di nuovo un GPU della serie RX6xxx2 points
-
Codesto vuol dire poco almeno per ora purtroppo https://www.macos86.it/topic/3511-indiscrezioni-rdna-20-big-navi/ Ci sono ID da molto tempo ma non vi è accelerazione video1 point
-
se anche quella è una porta fisica dove tu puoi collegare un dispositivo esterno allora deve essere 0x00 se fosse BT, come anche per esempio un lettore SD sul case quindi collegato a usb interna diretta sulla mobo, allora va interna 0xFF (255 in decimale)1 point
-
1 point
-
forse perché hai sbagliato qualcosa?! in _UPC devi sostituire Return (GUPC (One)) con --> Return (GENG (One, 0x00)) questo per le porte USB2 come definire le porte è spiegato nel txt e visto che come me, fare casini è un'attimo, ad ogni sostituzione, compila, così se hai sbagliato qualcosa, anche uno spazio, avrai un'errore e capisci subito dove hai cannato 😉1 point
-
No, al momento nessuno sa nulla si spera presto...ma potrebbe essere anche che non arriverà mai! Spostato in Big Sur discussioni generali...se ci sarà il supporto molto probabilmente sarà in Big Sur1 point
-
Capisco Refind è la base alla fine dei bootloader (codice disponibile, opensource), non facile nella sua configurazione almeno per tutti Bios --> boot manager = miglior opzione1 point
-
10:031 00:002 OCAK: 64-bit cata_BS_algrey - commpage_populate -remove rdmsr replace count - 1 10:032 00:000 OC: Kernel patcher result 0 for kernel (cata_BS_algrey - commpage_populate -remove rdmsr) - Success 10:034 00:002 OCAK: 64-bit cata_BS_algrey - cpuid_set_cache_info - cpuid 0x8000001D instead 4 replace count - 1 10:035 00:000 OC: Kernel patcher result 1 for kernel (cata_BS_algrey - cpuid_set_cache_info - cpuid 0x8000001D instead 4) - Success 10:037 00:002 OCAK: 64-bit cata_BS_algrey - cpuid_set_cache_info - don't set cpuid_cores_per_package replace count - 1 10:038 00:000 OC: Kernel patcher result 2 for kernel (cata_BS_algrey - cpuid_set_cache_info - don't set cpuid_cores_per_package) - Success 10:040 00:002 OCAK: 64-bit cata_BS_algrey - cpuid_set_generic_info - remove wrmsr replace count - 1 10:040 00:000 OC: Kernel patcher result 3 for kernel (cata_BS_algrey - cpuid_set_generic_info - remove wrmsr) - Success 10:042 00:002 OCAK: 64-bit cata_BS_algrey - cpuid_set_generic_info - set flag=1 replace count - 1 10:043 00:000 OC: Kernel patcher result 4 for kernel (cata_BS_algrey - cpuid_set_generic_info - set flag=1) - Success 10:047 00:004 OCAK: 64-bit cata_BS_algrey - cpuid_set_generic_info - disable check to allow leaf7 replace count - 1 10:048 00:000 OC: Kernel patcher result 5 for kernel (cata_BS_algrey - cpuid_set_generic_info - disable check to allow leaf7) - Success 10:058 00:009 OCAK: 64-bit cata_BS_algrey - cpuid_set_info - GenuineIntel to AuthenticAMD replace count - 1 10:058 00:000 OC: Kernel patcher result 6 for kernel (cata_BS_algrey - cpuid_set_info - GenuineIntel to AuthenticAMD) - Success 10:129 00:070 OCAK: 64-bit cata_BS_algrey - cpuid_set_cpufamily - force CPUFAMILY_INTEL_PENRYN replace count - 0 10:129 00:000 OC: Kernel patcher result 7 for kernel (cata_BS_algrey - cpuid_set_cpufamily - force CPUFAMILY_INTEL_PENRYN) - Not Found 10:131 00:001 OCAK: 64-bit cata_BS_algrey - cpuid_set_info - jmp to calculations and set cpuid_cores_per_package - 10.15/10.16 replace count - 1 10:131 00:000 OC: Kernel patcher result 8 for kernel (cata_BS_algrey - cpuid_set_info - jmp to calculations and set cpuid_cores_per_package - 10.15/10.16) - Success 10:133 00:001 OCAK: 64-bit cata_BS_algrey - cpuid_set_info - cores and threads calculations - 10.15/10.16 replace count - 1 10:134 00:000 OC: Kernel patcher result 9 for kernel (cata_BS_algrey - cpuid_set_info - cores and threads calculations - 10.15/10.16) - Success 10:200 00:066 OCAK: 64-bit cata_BS_algrey - i386_init - remove rdmsr (x3) replace count - 3 10:201 00:000 OC: Kernel patcher result 10 for kernel (cata_BS_algrey - i386_init - remove rdmsr (x3)) - Success 10:203 00:002 OCAK: 64-bit cata_BS_algrey - tsc_init - remove Penryn check to execute default case replace count - 1 10:204 00:000 OC: Kernel patcher result 11 for kernel (cata_BS_algrey - tsc_init - remove Penryn check to execute default case) - Success 10:206 00:002 OCAK: 64-bit cata_BS_algrey - tsc_init - grab DID and VID from MSR replace count - 1 10:207 00:000 OC: Kernel patcher result 12 for kernel (cata_BS_algrey - tsc_init - grab DID and VID from MSR) - Success 10:207 00:000 OC: Kernel patcher skips kernel (cata_algrey - lapic_init - remove version check and panic - 10.15) patch at 13 due to version 190000 <= 200400 <= 199999 10:210 00:002 OCAK: 64-bit BS_NoOne - lapic_init - remove version check and panic - 10.16 replace count - 1 10:210 00:000 OC: Kernel patcher result 14 for kernel (BS_NoOne - lapic_init - remove version check and panic - 10.16) - Success1 point
-
no and maybe CONFIRMED also kernel patches are not good by now... Pay attention1 point
-
1 point
-
however confirmed also in bare metal system Is booting with resize bar on and 4 g off obviously I can't test any performance improvement 🙂1 point
-
11.2 Release Candidate is on no Big navi2 support 😞 OSX does not work if that feature is on on your BIOS for now!1 point
-
however it is a big improvment I am ashamed and a little embarrassed to tell you that I no longer have my EFI proxmox working 🙂 I have to research it, but when I got the Vega 64 I tried to do several restarts but I don't think I had the problem, I also seem to have written it As soon as I can try again1 point
-
@meina222I have tested a little my new Vega 64 GPU in Proxmox.. I have had not reset bug problem with it without using the non-kernel module.. However good to know it Thank you1 point
-
hi, I hope you will be also useful to improve our Knowledge 🙂 however here is Proxmox (linux discussion) you can find easily bare metal discussion, many of us are there for different reasons1 point
-
Tomorrow I will upload my config however if you use passthrough of a single gpu you can assign all the resource of your system to a vm you can’t run 2 vm in this case in the same time i think problem is on Linux part also you can use host as cpu and a minimal boot args in vm it also depends to kernel patches you use in your efi config.plist if I do not misunderstood you said system works if you do not passthrough gpu? isn’t it?1 point
-
I am on my mobile but you have many not correct parameter in your vm 1)boot arg 2) number of cores 64 it is fine for 3970x 3)if you have 128gb you have to use less ram in vm config1 point
-
@meina222 I did in the past and I do not remember any particular problem I did with latest virtio drivers iso available, but to install I need in the start only of windows.iso downloaded from microsoft and a vm.conf created as usual1 point
-
Check @meina222he had success in both tasks👍👍 He has a gigabyte ex and a 3990x1 point
-
I have had to revert to old fabian 5.78.1 kernel for me this one is latest which works perfectly With 5.8.x I have an instable system. it reboots my VM in a random way I have associated this problem to my 2 10TB exsata disks or to my two 6tb data disks (not seen in osx because they are formatted in windows software raid) these disks some time appear after few minutes in desktop..and often with 5.8.x kernel produce a vm reboot with 5.78.1 this fact does not happen and system is perfect1 point
-
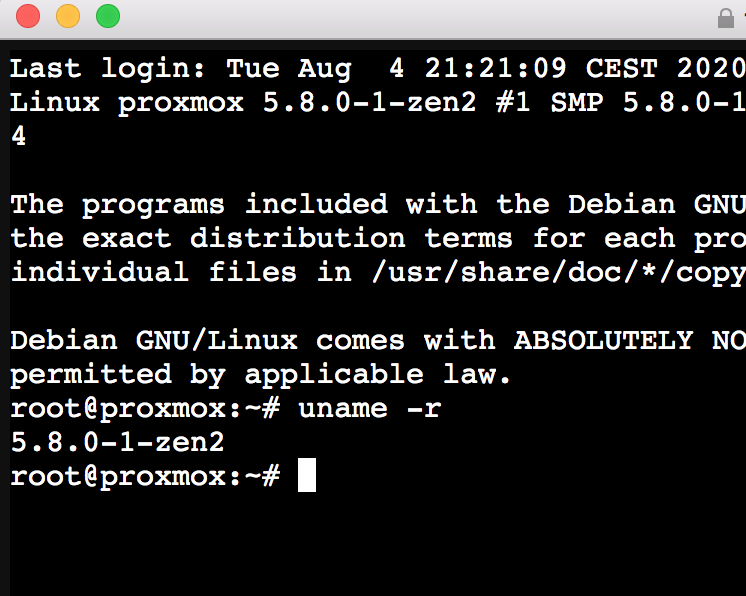
root@proxmox:~# pveversion -v proxmox-ve: 6.2-1 (running kernel: 5.8.1-1) pve-manager: 6.2-4 (running version: 6.2-4/9824574a) pve-kernel-5.4: 6.2-1 pve-kernel-helper: 6.2-1 pve-kernel-libc-dev: 5.8.1-1 pve-kernel-5.4.34-1-pve: 5.4.34-2 ceph-fuse: 12.2.11+dfsg1-2.1+b1 corosync: 3.0.3-pve1 criu: 3.11-3 glusterfs-client: 5.5-3 ifupdown: 0.8.35+pve1 ksm-control-daemon: 1.3-1 libjs-extjs: 6.0.1-10 libknet1: 1.15-pve1 libproxmox-acme-perl: 1.0.3 libpve-access-control: 6.1-1 libpve-apiclient-perl: 3.0-3 libpve-common-perl: 6.1-2 libpve-guest-common-perl: 3.0-10 libpve-http-server-perl: 3.0-5 libpve-storage-perl: 6.1-7 libqb0: 1.0.5-1 libspice-server1: 0.14.2-4~pve6+1 lvm2: 2.03.02-pve4 lxc-pve: 4.0.2-1 lxcfs: 4.0.3-pve2 novnc-pve: 1.1.0-1 proxmox-mini-journalreader: 1.1-1 proxmox-widget-toolkit: 2.2-1 pve-cluster: 6.1-8 pve-container: 3.1-5 pve-docs: 6.2-4 pve-edk2-firmware: 2.20200229-1 pve-firewall: 4.1-2 pve-firmware: 3.1-1 pve-ha-manager: 3.0-9 pve-i18n: 2.1-2 pve-qemu-kvm: 5.0.0-2 pve-xtermjs: 4.3.0-1 qemu-server: 6.2-2 smartmontools: 7.1-pve2 spiceterm: 3.1-1 vncterm: 1.6-1 zfsutils-linux: 0.8.3-pve1 root@proxmox:~# from https://github.com/fabianishere/pve-edge-kernel/releases thank you @meina222for infos about this new release1 point
-
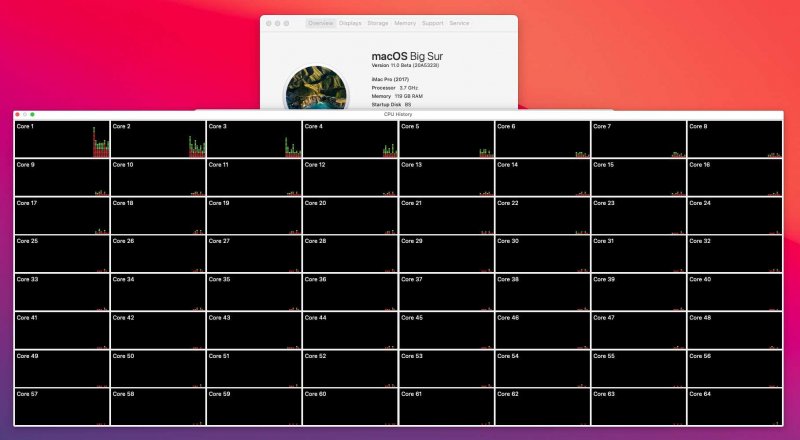
as info for all..it is possible to boot in bare metal or in Proxmox with the same bios settings Bad..very bad news..Our (mine) trx40 has not a native NVRAM For now I am not be able to activate my Nvidia Web drivers in High Sierra so I can't do a computation with GPU test CPU is the same Under load in CB20 I see 360 watt of power draw 🙂 Used AMD Per Gadget tools to monitor it this thread for Bare Metal discover or simply to talk about :91 point
-
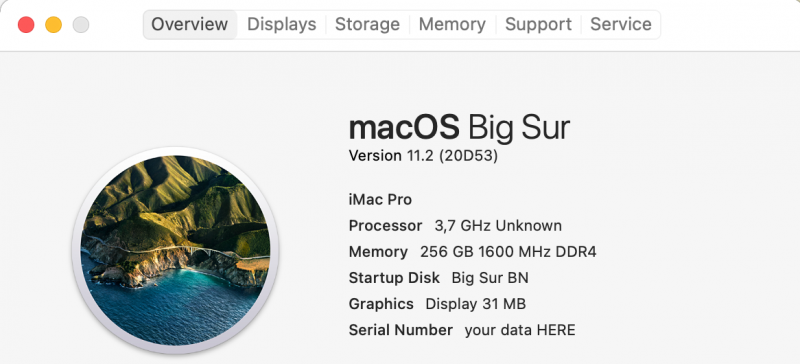
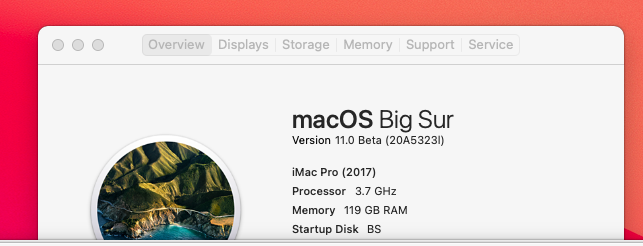
@iGPUcould you post a screenshot of about my Mac memory section? i would like to see how 32gb modules are seen in your rig i have bought four modules but there I see 8 slot full populated with 16 gb modules each also other users with 32gb modules type if possible thank you1 point
-
about 32gb ddr4 module could you post (user with 32 ddr4 module) a screen grab of about my Mac memory slot? thank you1 point
-
1 point
-
executed this installed many stuff and now I have: root@proxmox:~# dpkg-architecture DEB_BUILD_ARCH=amd64 DEB_BUILD_ARCH_ABI=base DEB_BUILD_ARCH_BITS=64 DEB_BUILD_ARCH_CPU=amd64 DEB_BUILD_ARCH_ENDIAN=little DEB_BUILD_ARCH_LIBC=gnu DEB_BUILD_ARCH_OS=linux DEB_BUILD_GNU_CPU=x86_64 DEB_BUILD_GNU_SYSTEM=linux-gnu DEB_BUILD_GNU_TYPE=x86_64-linux-gnu DEB_BUILD_MULTIARCH=x86_64-linux-gnu DEB_HOST_ARCH=amd64 DEB_HOST_ARCH_ABI=base DEB_HOST_ARCH_BITS=64 DEB_HOST_ARCH_CPU=amd64 DEB_HOST_ARCH_ENDIAN=little DEB_HOST_ARCH_LIBC=gnu DEB_HOST_ARCH_OS=linux DEB_HOST_GNU_CPU=x86_64 DEB_HOST_GNU_SYSTEM=linux-gnu DEB_HOST_GNU_TYPE=x86_64-linux-gnu DEB_HOST_MULTIARCH=x86_64-linux-gnu DEB_TARGET_ARCH=amd64 DEB_TARGET_ARCH_ABI=base DEB_TARGET_ARCH_BITS=64 DEB_TARGET_ARCH_CPU=amd64 DEB_TARGET_ARCH_ENDIAN=little DEB_TARGET_ARCH_LIBC=gnu DEB_TARGET_ARCH_OS=linux DEB_TARGET_GNU_CPU=x86_64 DEB_TARGET_GNU_SYSTEM=linux-gnu DEB_TARGET_GNU_TYPE=x86_64-linux-gnu DEB_TARGET_MULTIARCH=x86_64-linux-gnu root@proxmox:~#1 point
-
root@proxmox:~/pve-edge-kernel# nano /etc/apt/sources.list root@proxmox:~/pve-edge-kernel# apt update Hit:1 http://security.debian.org/debian-security buster/updates InRelease Hit:2 http://download.proxmox.com/debian/pve buster InRelease Hit:3 http://ftp.debian.org/debian buster InRelease Get:4 http://ftp.debian.org/debian buster-updates InRelease [51.9 kB] Fetched 51.9 kB in 1s (61.2 kB/s) Reading package lists... Done Building dependency tree Reading state information... Done 75 packages can be upgraded. Run 'apt list --upgradable' to see them. root@proxmox:~/pve-edge-kernel# then?1 point
-
Hi @meina222thank you for previous link i will try as soon I can i would like to suggest to insert in your read me also revert method to older kernel you posted here only in a worst case People have to revert Also I would like to ask if in a clean and initial proxmox installation your script downloads all dependencies we need to build new kernel Thank you again for your help To improve our discussion1 point
-
Thank you @meina222 i will try to test high Sierra with Big Sur ssd detached in the past hours 5.8 is working fine again no simple to debug where is my problem but for now it is working well1 point
-
@meina222do not worry I appreciate your work and if I was so safe with my rig..we have not a public solution for trx40 and OSX 🙂 Again thank you for your kernel I have few skill to understand where my system now is failing with it1 point
-
Post your vfio.conf also lspci -nnk but i think if you followed pavos github you block things he is blocking because he starts or started in the past his guest from web interface on another pc i can be wrong...1 point
-
I think he is blocking to much stuff it is also in Proxmox wiki..but we can do in a different way 🙂1 point
-
remove it from vfio.conf also you can try to unblacklist amdgpu from blacklist.conf in my rig I do not use any block and it works1 point
-
1 point
-
Thank you and don't worry risk is mine 🙂 I will try ands see if it boots1 point
-
1 point
-
About opencore we are talking about 060 release in Italian forum section i have installed o60 release debug version with no problem at all1 point
-
If I have understood well it is possible to use if you do not use zfs..and so..is it available a compiled kernel in this way? I would like to test if it adds some opportunity to pass bridge or pcieport.. I think it is a qemu problem than kernel..but I am not sure of this my assertion 🙂1 point
-
and also for me is not useful to block all that stuff in blacklist.conf and in vfio.conf but I can't say for sure because many of you and Proxmoxwiki advice to do that... maybe I am lucky 🙂1 point
-
to have a dedicated thread for our experimental TB3 support I have created a new thread where we can write and discuss about this subject Thank you your partecipation1 point
-
1 point
-
ah ok copy that file in your proxmox root then if there are not present other deb file execute: dpkg -i *.deb reboot and you have new kernel whale a look on that githhub to solve an AppArmor error you can have (not important to solve)1 point
-
@Rox67erto pass your sata controllers there is some trick to know? if you have all nvme controller used I mean asrock trx40 creator share those controllers in some way? @Driftwood what did you do to pass it?1 point
-
1 point


