Leaderboard


Popular Content
Showing content with the highest reputation on 11/03/2020 in all areas
-
I think this could be the famigerate AMD reset bug and it could be unresolved by now if you follow @Imanol steps you could solve, but always system could hang if you reboot it last user i know active here to use proxmox with an AMD gpu is @meina222 maybe it could share his experience with you i have now an old AMD card but i have not tested in proxmox for now sorry2 points
-
That is tomorrows project. This evening I have been getting the Adobe suite working and testing, plus various Topaz progs - Denoise, Sharpen, Mask & Gigapixel. Photoshop seems to work OK except Liquify, but as I don't use liquify that is a non issue but it would be nice to have everything working. AE (Beta) is still hanging on Tracking. Denoise is now working so installing the other Topaz progs to get them going - new NVMe so everything is being installed afresh so takes a while. I'll let you know when I have a 0.6.3 ready to go.1 point
-
Ciao, Salve, Benvenuto 🙂1 point
-
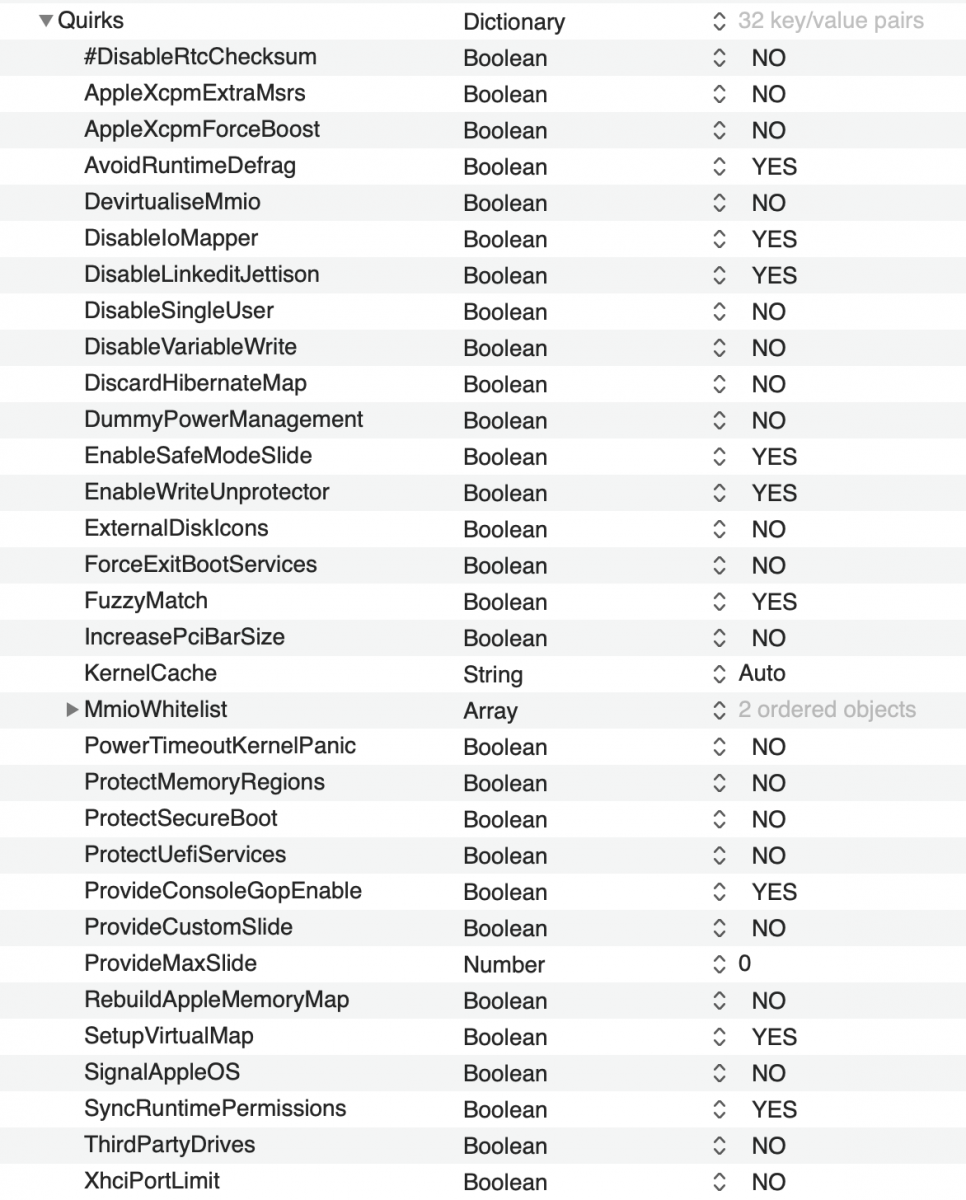
@iosengineer - getting NVRAM to work is not unique to the Designare - the procedure to get your config is the same for all boards, but the values may differ based on your board make and BIOS. So between f4h and f4l say on the Designare, the configs would be (annoyingly) different. Afaik, there are 2 main parts to getting NVRAM to work (credit goes to @iGPU for spearheading the solution and research into this, so look for his posts on the subject). 1. Set your MMIO 'whitelist' correctly. This is described in several posts on this board (and you can use the Dortania guide too) 2. Have ACPI SSDTs enabling NVRAM - Any of the working EFIs should have this, as it should be common to all TRX40 boards (this was solved by several other more knowledgeable than me members of this forum). Start by that using existing configs and this forum (you can for example take my config and disable fancy ACPI and kexts and try it with your MMIO). @Ploddles's should also be a good start. I am not surprised you did not get past the Apple logo on my EFI. I posted a few disclaimers alongside with it, that unless you use BIOS f4h, my EFI won't work on another Designare board as this BIOS has different MMIO virtual address mappings. And you're right, that this is the only BIOS I am aware of, that allows the AIC 4x4x4x4, and GPU to work with Thunderbolt in Slot 4 without D4. Thunderbolt should still work in Slot 2 for other BIOS-es, but my case is such that routing the cables there is a royal pain, hence I bitched to Gigabyte about it, till they "fixed" it in f4h (but not in later official bios-es for reasons known to them only). Will be offline till later tonight, so will check then if there is anything else I can share to help with. Cheers.1 point
-
I think..for us those quirks are not so related to your problem And I repeat..Dortania guide is not so accurate.. (imho)1 point
-
if you have both configured well it works the same Opencore devs group is more solid in my opinion. But, with clover you can test at bootmenu level many stuff you can't testin OpenCore without booting and changing options
 1 point
 -
Ho aggiornato il config.plist al nuovo OpenCore 0.6.3, aggiornato kext e driver: Tra le kext (7 in totale) -AppleALC (1.5.4) -Lilu (1.4.9) -IntelMausi (1.0.4) -Aggiunto NVMeFix (1.0.4) per avere il PM sugli NVMe perché sono pignolo -VirtualSMC e i due Plugin, SMCSuperIO e SMCProcessor (1.1.8) -WhateverGreen (1.4.4) Tra i driver ci sta solo: -ApfsDriverLoader (v 2.1.5) integrato già da tempo in OC -Dentro OC/Drivers nuovo FwRuntimeservices integrato in OC Nessun problema riscontrato, anche con Big Sur Beta 10 con ApECID on + SecureBootmodel (sistemato nell'ultima release di OpenCore 0.6.3)1 point
-
per la patch ACPI non importa fai niente, se non la usi (serve principalmente quando si usa SSDT x hack di gengik) la puoi anche eliminare per le altre 3 basta che editi il config con un plist editor e commenti le voci inserendogli davanti il cancelletto #
1 point
-
1 point
-
Welcome here1 point
-
OC 0.6.3 released.1 point
-
Ciao @Ramirez71 per l'avvio diretto su opencore non serve nascondere nessun volume, timing o altri strani magheggi. Apri il tuo config.plist ed alla voce misc/boot setta la voce "showpicker" su NO e salva il tutto. Apri preferenze di sistema sul mac, disco di avvio e seleziona la partizione dove è installato macos che vuoi avviare. Fatto!! Ora avrai un avvio diretto di macos. Nel caso avessi bisogno nuovamente di avviare la gui di opencore premi opt+cmd+P+R durante la schermata di bios. N.B. In presenza di altri s.o operativi installati ad esempio windows, passa sempre dalla gui di opencore per la selezione. Nel caso avviassi dal classico selettore del bios andresti a corrompere la NVRAM e la perdita dei settaggi per l'avvio diretto1 point
-
perché il fruttivendolo vuole che da ora innanzi l'hack si avvii passando da preboot (hanno già trovato dei sistemi per avviare direttamente da root, ma secondo me è roba che hai più serve a niente) l'ho scritto diverse volte, ma lo ripeto, ora nel config di Clover non bisogna più mettere in GUI hide il Preboot fai una prova, quando sei nella GUI di Clover al boot, pigia F3 ed avvia Catalina dal preboot 😉1 point
-
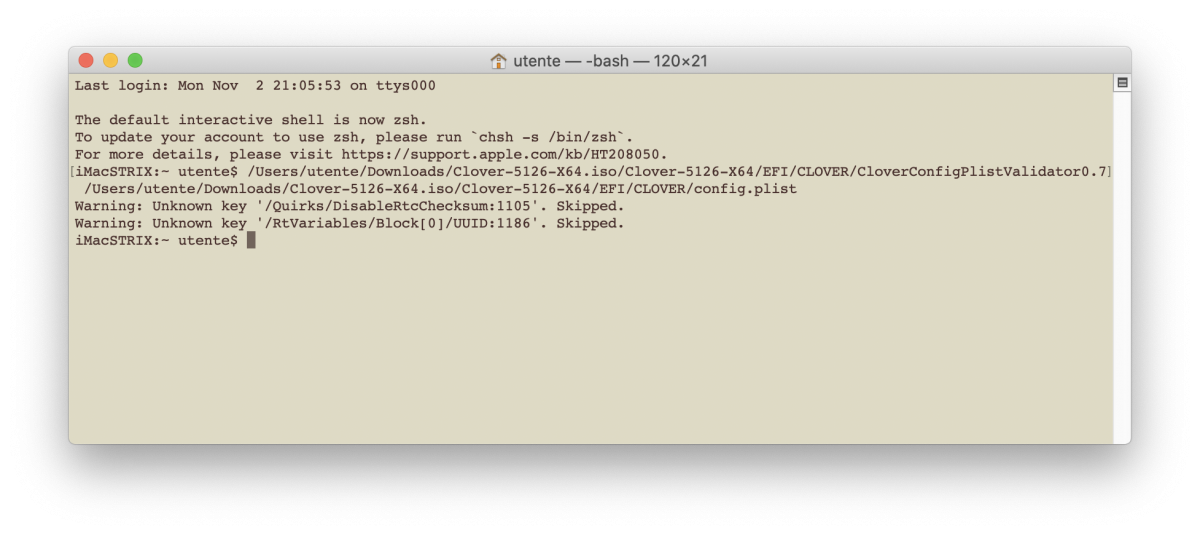
CCPV 0.7 CloverConfigPlistValidator_0.7.zip
1 point
-
Welcome!1 point
-
Mio cognato ha una macchinetta, mi pare che venga fuori un troiaio :), forse è meglio tagliarla a mano, oppure faccio un altra SIM o aggiorno questa, in un negozio TIM dovrebbero farlo subito...1 point
-
Prima di chiedere aiuto controllate sempre i topic inerenti: Guide Generali Preparazione installer -> MacOS -> Clover -> USB Installazione Diretta Catalina Mojave Mojave/Generale/informazioni Mojave/Hack su hardware AMD High Sierra Info Varie Database Non avete trovato info, oppure avete dubbi o malfunzionamenti? Per chiedere aiuto attenetevi ai seguenti punti: Se avete ancora da installare eseguite questi primi due punti: 1 Mettete il vostro hardware in firma, elencando i componenti in maniera dettagliata: Scheda madre/modello pc se di marca, Cpu, Gpu, Audio, Lan/wifi, Monitor specificando se FullHD o 2/4K, ma in modo compatto; occorre avere rispetto per chi legge da tablet o smartphone Firma Video Guida Grazie a @antuneddu per il video. 2 Allegare la propria cartella EFI (priva della cartella Apple e Microsoft se presenti) e la cartella themes con l'essenziale senza la presenza di temi particolarmente ingombranti in Mb Se avete invece già installato, oltre ai punti precedenti eseguite anche i sottostanti: 3 Allegare sul topic report di Hack_Info che troverete come zip sul desktop. (per eseguirlo tasto dx sopra, apri e poi apri..attendete il completamento del tutto) 4 Foto/screenshots di DPCIManager (la finestra è ridimensionabile) alla parte Status e Pci List, in caso abbiate connessione funzionante premere prima su update Seed e IDs, altrimenti omettere questo passaggio. 5 Output di IORegistryexplorer, per farlo scaricatelo, apritelo, andate su file >> save as e salvate. L'occorrente per allegare il tutto (Hack_Info - IORegistryexplorer - DPCIManager) lo trovate scaricabile da >> Supporto All-In-One << HACK CHECK nuovo tool AIO ai principianti non sarà immediatamente tutto chiaro, ma nel tempo se ne comprenderà e apprezzerà l'uso. Nota 1- cosa non dire mai quando si chiede aiuto: si avvia ma si blocca sulla mela con successivo divieto Questo non serve a nulla, non porta alcuna informazione utile per capire il problema, quindi si dovrà avviare in verbose (boot arguments -v) e postare la foto del blocco, oppure video del kernel panic. Tutto questo serve per potervi aiutare con semplicità e in modo mirato, inoltre mantiene il forum più ordinato e privo di solite e ripetitive richieste: Nota 2 - estrarre e postare le ACPI Spesso viene fatta questa richiesta, ecco come fare: CLOVER: riavviare l'hack e fermarsi nella GUI (dall'inglese Graphical User Interface) di Clover, premere il tasto F4 e aspettare 30/40 secondi (a monitor non succede assolutamente niente) poi avviare regolarmente, montare la EFI, comprimere e uplodare la cartella origin che si trova nel percorso EFI --> CLOVER --> ACPI OPENCORE: scaricare dal repository Acidanthera la versione debug della release di OC in uso https://github.com/acidanthera/OpenCorePkg/releases sostituire bootx64.efi e opencore.efi nel config Misc --> Debug abilitare/impostare su yes/true la voce SysReport riavviare e al desktop montare EFI e nella root sarà presente una nuova cartella SysReport con all'interno una cartella ACPI, comprimere e allegare sul forum quando richiesto e ripristinare versioni release dei file sostituiti. Nota 3 - dump chip audio: opzione per rilevare il modello del chip/codec audio presente, occorre avere in drivers >> UEFI il driver Audiodxe.efi dopodiché sempre dalla GUI (dall'inglese Graphical User Interface) di Clover si preme il tasto F8 si aspetta 30/40 secondi e si avvia, poi si monta la EFI e in EFI --> CLOVER --> misc saranno presenti i file necessari per analisi. Nota 4 - Mappature delle USB: per eseguire tale operazione occorre che il sistema abbia tutte le USB attive con USBIjectall + Port Limit Patch (per i notebook solitamente basta USBInjectall) poi armati di pendrive USB 2 e 3 si avvia ioreg e una alla volta si infila ed espellono entrambe le pendrive in tutte le porte presenti, si prosegue con ioreg -> file -> save as si salva, si comprime e si posta nel proprio thread o in quello dedicato assieme alle ACPI estratte ed eventualmente la EFI senza all'interno la cartella APPLE o Microsoft che appesantiscono il tutto e non servono a niente. Nota 5 - Ottimizzare BIOS: controllare sempre che il BIOS sia ottimizzato per accogliere macOS Nota 6 - CLOVER: studiare le potenzialità e innumerevoli opzioni possibili della GUI di Clover, come ad esempio caricare un config diverso da quello predefinito, modificare SIP, aggiungere/togliere boot arguments etc... F1 = Help Nota 7 - NON supportato: installazioni da distribuzioni e bestie by TonyManero non sono ammessi. NON installare kext a caso nel sistema, recuperare EFI dal web con DSDT di altro hardware (il DSDT è strettamente legato a modello e BIOS della scheda madre, l'uso improprio può arrecare danni all'hardware). Nota 8 - Allegati: i file che si allegano nel forum devono essere in formato zip (NO rar e altri metodi compressione non nativi in macOS) e gli screenshots in png o jpeg Per un aiuto rapido e flessibile, partire da configurazioni minimali con tutti i kext in EFI >> CLOVER >> Kexts >> Other Regolamento generale Lo staff ringrazia…1 point