Leaderboard
Popular Content
Showing content with the highest reputation on 07/23/2020 in all areas
-
no niente di particolare puoi installare sia con i settori a 512 che a 4k2 points
-
@tuxy sul T-RyZo terminata da poco installazione pulita dopo aver ranzato via tutto usato kexts e OC che trovate in download https://www.macos86.it/files/file/20-opencore-efi-maker/?do=findReview&review=32 eseguito installazione con il minimo sindacale dei kexts LILU, WEG, VirtualSMC, RTL8111 La cosa che mi ha fatto perdere tempo è stato il non aver usato subito il boot-arg vsmcgen=1 e la RTL8111 che se anche la disabilitavo, comunque BS la vedeva, interferiva ed entrava in loop; invece usando la versione 230d10 compilata al momento, è tutto filato poi liscio 4 riavvi e non è nemmeno stata tanto lunga come installazione su SSD a parte il Preboot al posto del nome dato al disco, che si vede nella GUI al boot, finalmente si inizia a vedere qualcosa di interessante... sistema fluido e reattivo sin da subito, grafica finalmente definita e non quell'obbrobrio delle prime due beta2 points
-
2 points
-
Version 1.1.0
1,117 downloads
Semplice e piccola app per creare la usb per installare macOS Il tutto è basato sul metodo ufficiale Apple --> createinstallmedia L'app nella prima parte fornisce il comando da usare, quindi chiunque voglia può prenderlo e copiarlo direttamente sul terminale. Vi è anche la possibilità di creare la usb direttamente. Credits: Apple per macOS Thx @fabiosun per l'icona 🙂 ---- This simple and tiny app is very useful to build an USB installer for OSX It is based on Apple's official installation method (createinstallmedia) It is very simple to use , it is possible to drag and drop OSX installer and USB you have to use. Another great utility by macOS86.it1 point -
1 point
-
1 point
-
Più tardi provo. ho da sottoporti anche altre cose, mi organizzo mentalmente per essere sintetico e chiaro. Abbi pazienza con me sono solo uno smanettino... (GRAZIE per il like e per avermi ammesso nei junior) continua a sostenermi con il tuo aiuto ma soprattutto GRAZIE per l tua disponibilità1 point
-
Come scusa? vai nella relativa sezione, esempio Catalina poi desktop e apri un topic https://www.macos86.it/forum/98-desktop/ clicchi su "Nuova Discussione" metti il titolo etc1 point
-
Quindi insomma via non usiamolo se non vogliamo più usarlo, ma questi ragazzi vanno solo ringraziati.1 point
-
Mi sa che si sta perdendo i lavori in atto ;) Non possiamo improvvisamente denigrare un Bootloader che ha fatto e farà ancora la storia dell'Hackintosh ...1 point
-
Buongiorno,dopo aver imparato in silenzio da tutti voi, super esperti, mi permetto di postare una mia esperienza con pc notebook in firma (HP 850 G1 Haswell Open Core 0.60 e terza beta Big Sur), eseguendo un aggiornamento, andato a buon fine,ho sostituito nei Kext:"FakeSmC" al posto di" VirtualSMC"(nel mio caso ho portato a termine l'aggiornamento brillantemente).Spero di aver contribuito ad aiutare gli utenti di questo utilissimo forum.Un saluto ai miei amici Hackintonshiani.1 point
-
1 point
-
Ho modificato le voci presenti nel Plist dei Kext precedenti con quelle contrassegnate nel file allegato, dopo una attenta ricerca dell'hardware. Schermata 2020-07-23 alle 14.12.14.zip1 point
-
1 point
-
@netgear e a chi serve, ho messo OC e kexts ora compilati, qui: https://www.macos86.it/files/file/20-opencore-efi-maker/?do=findReview&review=321 point
-
1 point
-
@fabiosun ho uppato ora il pacchetto LILU e pargoli con i kexts aggiornati da poche ore... non ho letto i commit, ma magari aiuta1 point
-
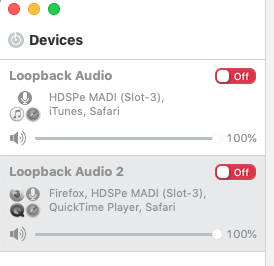
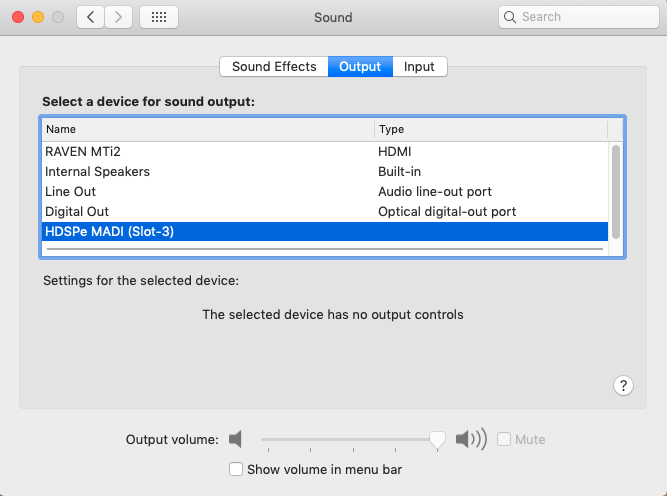
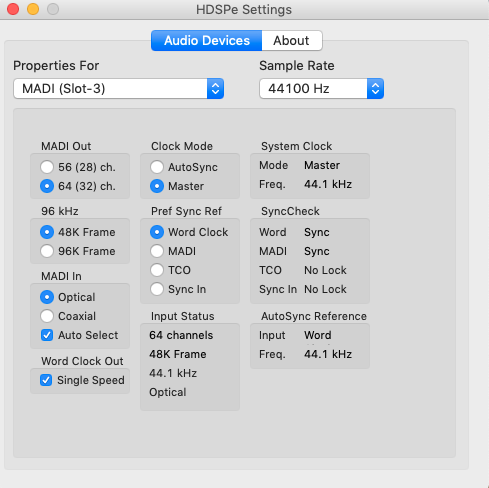
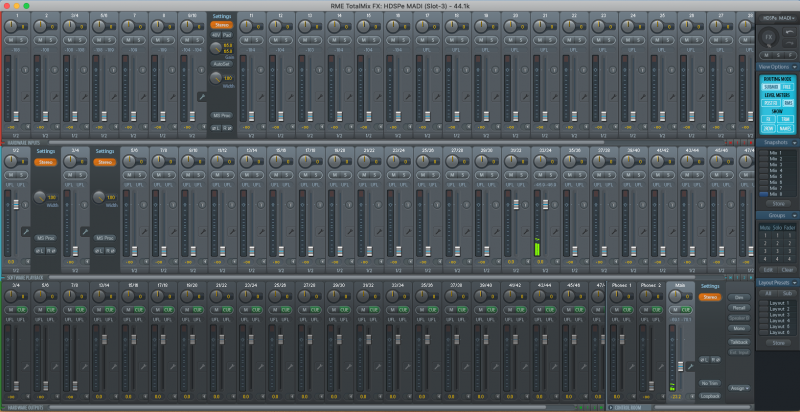
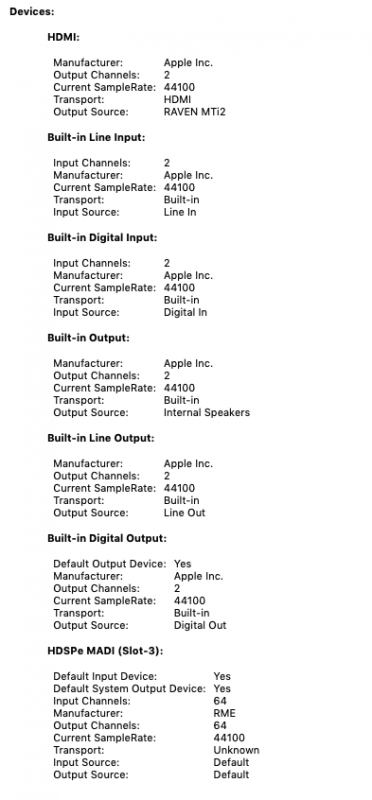
Don't panic yet as it could be a simple fix. RME can be a bit tricky at times, with their driver installs. If you're getting intermittent audio, that's actually promising in my 'glass half full world'. This is really important I personally see you get this working, as it all hinges on me deciding to leap into a brave new world, with VM Proxmox/AMD, using my RME MADI audio setup. RME only give you 30 minutes to enable the driver after download/ install, otherwise the driver is blocked and you have to re-install a fresh driver again. Why they do that, god knows. I'm sure you've already done the 'Captain obvious' stuff, given your level of expertise, but I'll repeat it for the sake of other 'noobs' reading the thread in future times. Straight after a fresh RME AIO driver download, also make sure it is authorised as a 3rd party app, after you un-lock the "Security and Privacy" settings in System Preferences. I see your running Rogue Amoeba Loopback same as myself, (great app.) which in itself can sometimes cause routing issues, or even double up causing echo with Mac internal audio routing, if you're not careful. I'll post screenshots so you can see my basic settings to enable my RME Madi card to output any audio that's being played, firstly without Loopback enabled. Start by disabling Loopback completely, with all the input set to Off/Red on the left 'Devices' side. Then go to System Preferences and open "Sound". At the top, click on 'Output' and in the list click on RME HDSPe AIO. Both options should be highlighted Blue. Your audio interface should not be in 'class compliant' mode. This can also cause issues with the new AIO driver install. Open your RME DSP Hammerfall, and make sure everything matches your audio sample/ clock/ frame with your RME Audio Interface, with say firstly starting with something simple, like running 44.1 Khz sample rate audio from say music from itunes, or audio from youtube. You should have no flashing LED's on your audio interface if everything is matching. Open Totalmix, which you're already totally familiar with. With my Madi card, I seem to get an audio 'green' level on stereo channel 33/34 in the middle section for software playback. As per normal, select the bottom hardware outputs row (Highlight Main output or Phones), and increase the level accordingly. As far as the 'transport' unknown issue, that's the same as what my RME Madi Card also shows in System Preferences, on my normal Mac Pro 5.1 running Mojave? Hope that helps. If it doesn't, I can also show how I use Rogue Amoeba Loopback settings instead, which I sometimes use to route audio into Logic Pro X, as an input.1 point
-
da IM: http://swcdn.apple.com/content/downloads/34/37/001-26097-A_OYW4Z0U99Z/gdas3ubse9fasb0217grmmyplfd6o7mqfp/InstallAssistant.pkg installer completo quando si esegue il pkg estrae installer Big Purge 3 in applicazioni1 point
-
Ci sono riuscito. Come al solito bastava fare attenzione e leggere la documentazione ufficiale. Perdonatemi ma sono mancato 2 anni dal mondo Hackintosh e come ben potete immaginare sono 2 ere in questo mondo.1 point
-
1 point
-
1 point
-
1 point
-
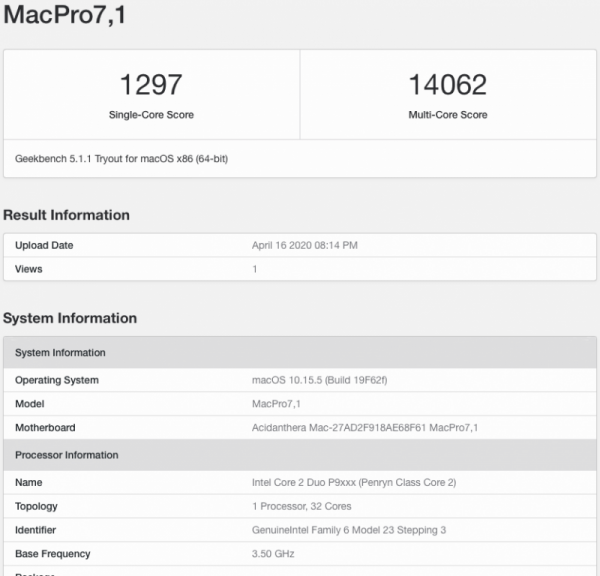
Current cpu features passed through args: -device isa-applesmc,osk="ourhardworkbythesewordsguardedpleasedontsteal(c)AppleComputerInc" -smbios type=2 -cpu Penryn,kvm=on,vendor=GenuineIntel,+kvm_pv_unhalt,+kvm_pv_eoi,+invtsc,vmware-cpuid-freq=on,+fpu,+vme,+de,+pse,+tsc,+msr,+pae,+mce,+cx8,+apic,+sep,+mtrr,+pge,+mca,+cmov,+pat,+pse36,+clflush,+mmx,+fxsr,+sse,+sse2,+ht,+syscall,+nx,+mmxext,+fxsr_opt,+pdpe1gb,+rdtscp,+lm,+pni,+pclmulqdq,+monitor,+ssse3,+fma,+cx16,+sse4_1,+sse4_2,+movbe,+popcnt,+aes,+xsave,+avx,+f16c,+rdrand,+lahf_lm,+cmp_legacy,+extapic,+abm,+sse4a,+misalignsse,+3dnowprefetch,+osvw,+ibs,+skinit,+wdt,+tce,+topoext,+perfctr_core,+perfctr_nb,+ssbd,+ibpb,+stibp,+fsgsbase,+bmi1,+avx2,+smep,+bmi2,+rdseed,+adx,+smap,+clflushopt,+clwb,+xsaveopt,+xsavec,+xgetbv1,+xsaves,+wbnoinvd,+arat,+npt,+lbrv,+nrip_save,+tsc_scale,+vmcb_clean,+flushbyasid,+decodeassists,+pfthreshold,+umip Current cpu features seen by macOS: machdep.cpu.features: FPU VME DE PSE TSC MSR PAE MCE CX8 APIC SEP MTRR PGE MCA CMOV PAT PSE36 CLFSH MMX FXSR SSE SSE2 HTT SSE3 PCLMULQDQ SSSE3 FMA CX16 SSE4.1 SSE4.2 x2APIC MOVBE POPCNT AES VMM XSAVE AVX1.0 RDRAND F16C machdep.cpu.leaf7_features: RDWRFSGS BMI1 AVX2 SMEP BMI2 RDSEED ADX SMAP CLFSOPT CLWB UMIP STIBP SSBD machdep.cpu.extfeatures: SYSCALL XD 1GBPAGE EM64T LAHF LZCNT PREFETCHW RDTSCP TSCI1 point
-
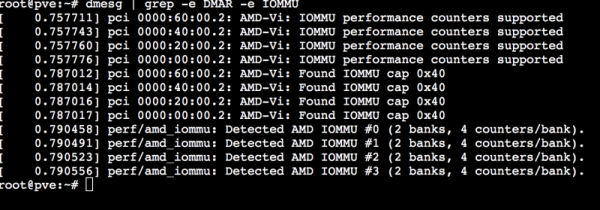
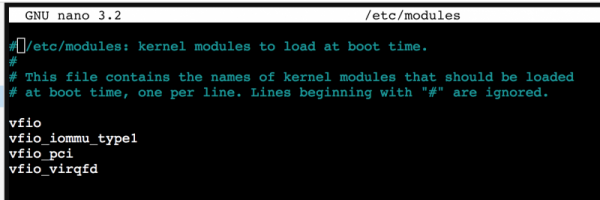
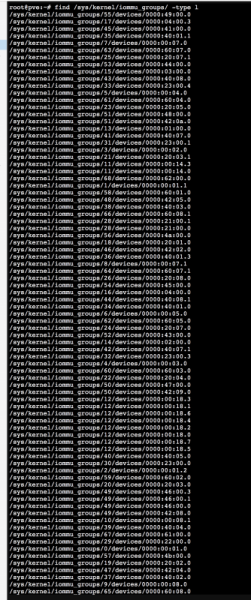
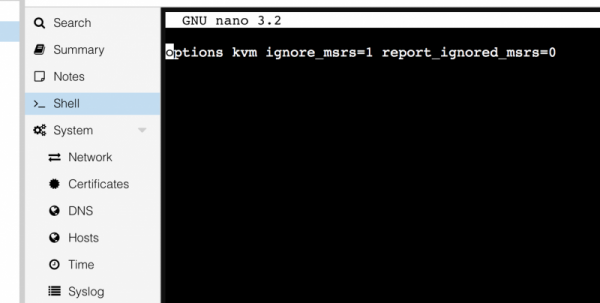
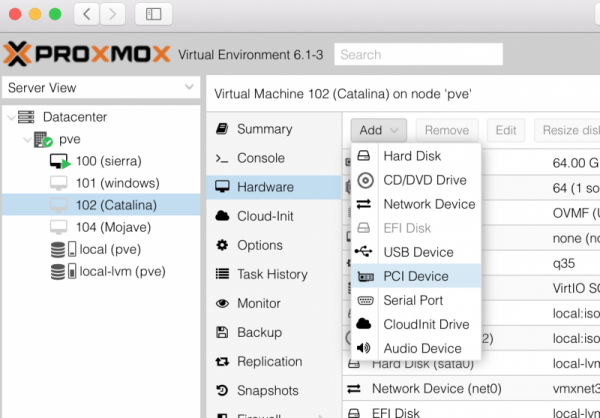
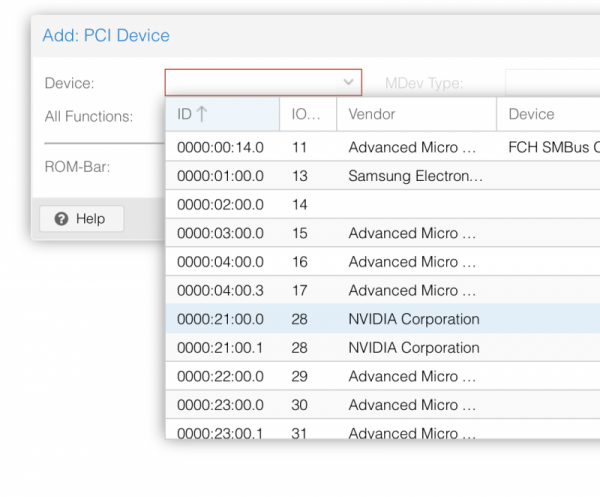
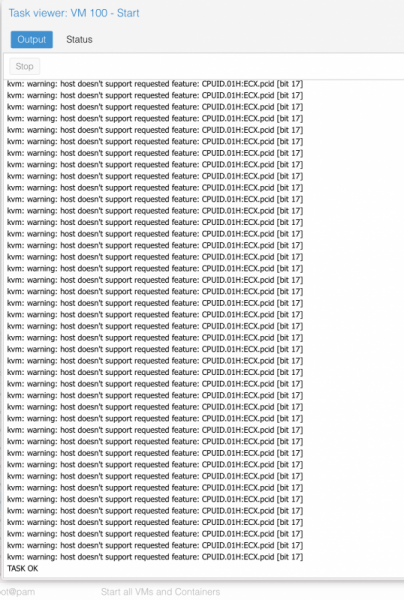
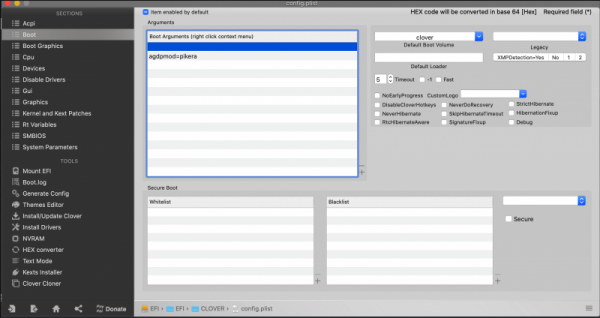
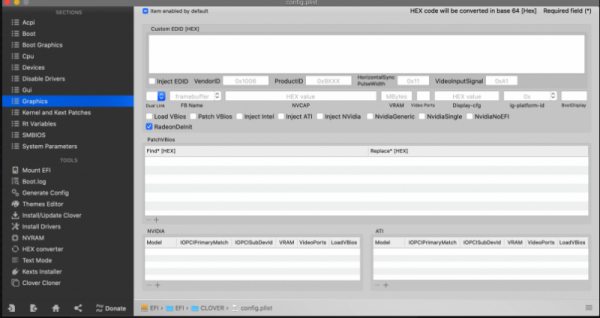
Useful link. Proxmox wiki In this site you can find a tons of useful informations. So read it to clear doubts you can have. Now some useful informations to start thinking to PCI Passthrough. from Proxmod wiki site: Modify grub for your cpu: first step enable the IOMMU. to do this open a shell from Your Proxmox's web interface: type nano /etc/default/grub insert in it "amd_iommu=on" without quote as you see here: ctrl x then Y to save then do not launch upgrade-grub but pve-efiboot-tool refresh then reboot, to verify all is fine, open shell again and type: dmesg | grep -e DMAR -e IOMMU you have a pretty similar output if all is fine..otherwise repeat step above: you can add also iommu=pt to improve some performances in PCI device not in use by your VM. Now another very important part. We need some modules to load, by default they are not loaded: type: nano /etc/modules and add these modules: "Verify also IOMMU isolation (follow Proxmox wiki just in case) (follow my situation which may differ from your)" "To have separate IOMMU groups, your processor needs to have support for a feature called ACS (Access Control Services)." now the tricky thing: Determinate your GPU address: in shell type: lspci and check for your graphic card address: this is my GFX address, then type: lspci -n -s 21:00 you will see: root@pve:~# lspci -n -s 21:00 21:00.0 0300: 10de:1b02 (rev a1) 21:00.1 0403: 10de:10ef (rev a1) root@pve:~# Create a file in etc/modprobe.d/ named vfio.conf: echo "options vfio-pci ids=10de:1b02,10de:10ef" > /etc/modprobe.d/vfio.conf and add on it: options vfio-pci ids=10de:1b02,10de:10ef disable_vga=1 (ctrl x then y) then you have to blacklist the drivers.. PAY ATTENTION and save it , when you reboot after this step it could be possible to have to operate exclusively from Web Pc interface: so type: echo "blacklist radeon" >> /etc/modprobe.d/blacklist.conf echo "blacklist nouveau" >> /etc/modprobe.d/blacklist.conf echo "blacklist nvidia" >> /etc/modprobe.d/blacklist.conf reboot your pc Note.. remember..we have set our VM bios in this way: bios: ovmf GFX need to be UEFI supported visit this link to understand other important stuff just in case: http://vfio.blogspot.fr/2014/08/does-my-graphics-card-rom-support-efi.html then to avoid some crashes add this line in kvm.conf: echo "options kvm ignore_msrs=1" > /etc/modprobe.d/kvm.conf also useful to avoid warning messages in your system log this: echo "options kvm ignore_msrs=1 report_ignored_msrs=0" > /etc/modprobe.d/kvm.conf as advice check always that command went fine in this way ie: for now this is an important step, now we have to access to our previously vm created and add "The passthrough" add PCI Device and choose your GFX: in my case it adds this: and this is enough 😉 to summarize..before rebooting check this files: grub.cfg blacklist.conf kvm.conf vfio.conf and see if all stuff is there. After reboot in your Threadripper you will see initial Proxmox VE Boot menu (blue one page) and the only two lines (loading stuff) If not check again all steps above. Remember some Mandatory parameter: 1) mce=off in grub 2) all conf files set properly for your system/GPU and so on 😛 If you see only those two lines..launch your vm in your Web interface or via terminal command : qm start 100 and see the log: this is good 🙂 (warning message disappear if you do no t use +pcid in VM conf boot args) this no 😛 Any different case could be possible... remember to check Proxmox wiki if some different problems appear! For now is enough..I will check this guide and if you find some incongruence fill free to declare. added 24-04-2020 The above GPU configuration is perfectly calibrate for my system and my Nvidia TitanXp GPU I have asked @Imanol to describe procedure for a different GPU (AMD 5700XT). He had success following this guide and now he is helping me to show you how he did with his Navi card. this is working in his system, maybe you have to adapt it for your system. ------- I'll share some tips to get the 5700XT GPU passthrough working. This can be helpful for other people using AMD GPUS. I had to do some extra things: The default GPU BIOS doesn't have UEFI enabled. Instead of updating the firmware, which is risky (or non existent tools) , you can download a ROM with UEFI support and let proxmox load/expose it when starting the VM. In my case I downloaded this rom (https://www.techpowerup.com/vgabios/212439/gigabyte-rx5700xt-8192-190616). You have to copy it to: /usr/share/kvm/5700xtcustom.rom and specify the ROM file in the GPU pcie passthrough line vm conf: hostpci1: 03:00,pcie=1,x-vga=1,romfile=5700xtref.rom Additionally, I had to enable some extra flags in clover or it didn't boot correctly. Make sure that you pass the agpmod=pikera boot argument. In graphics settings enable RadeonDeinit. Make sure that InjectATI is correctly disabled. If you are using clover configurator press the checkbox twice, otherwise it's enabled by default. I forgot to mention that to make my 5700XT passthrough work I needed to unbind some system drivers and framebuffers before launching the GPU. Just blacklisting the GPU drivers, enabling nomodeset in Grub or setting GRUB_GFXMODE_LINUX=text in grub didn't work for me. Those unbinds need to be done each time you restart the computer, before launching the VM. I automated it using the linux crontab utility. First open crontab config using this command in a proxmox terminal: crontab -e Add this line into the document and save it: @reboot /root/unbind.sh Create a script in the specified path: nano /root/unbind.sh Add those unbind command (Change 03:00 with the PCI address of your GPU): #!/bin/bash echo "0000:03:00.0" > /sys/bus/pci/drivers/vfio-pci/unbind echo 0 > /sys/class/vtconsole/vtcon0/bind echo efi-framebuffer.0 > /sys/bus/platform/drivers/efi-framebuffer/unbind Don't forget to set the correct permissions for the script after saving: chmod 755 /root/unbind.sh Now, each time you restart the computer proxmox will run this script and the guest mac VM will launch without any conflict. ------- Important stuff: macOS86.it is a free site and people here are helpful if tone remain in a calm way..Any different approach will not be tolerate . Now some kudos: to algrey and @Shaneee for their work to understand if there is a way to have this new chip booting in a real hack (for now not possible at all) best people here @Gengik84 to host this and solving many problem for us @Ciro82, @carlo_67 @iCanarofor their invaluable passion and help @tomnic who is corresponsible of this "success"..we can define this hack..."The first AMD Hack fast then ever" Have a nice life1 point
-
l'hardware sulla carta è tutto molto compatibile; ammettendo che non stai sbagliando nulla, devi fare delle prove per capire quale possa essere il motivo dei problemi te le elenco: - downgrade alla release precedente del BIOS - del sabrent esiste un'utility per definire le dimensioni dei Cluster @fabiosun tu sul tuo sabrent hai installato macOS e se si, hai dovuto fare qualcosa di particolare? io nel mio sulla Z370, che io ricordi, niente di particolare - se hai la RAM settata con XMP, cambia impostazione e settala su auto o manualmente - controlla che SSD e NVMe abbiano l'ultima release del firmware - recupera qui sul forum qualche altra EFI di una Z370 e provala così alla brutta per vedere se superi l'errore che ora hai0 points
-
Anche io caddi nella trappola delle sponsorizzazioni gigabyte. Infatti il mio primo hack fu su una gigabyte. 😁0 points
-
0 points
-
0 points


