Leaderboard
Popular Content
Showing content with the highest reputation on 07/19/2020 in all areas
-
2 points
-
1 point
-
Version 1.0.18
366 downloads
Script che scarica BaseSystem.dmg regolarmente dal catalogo Apple e una volta terminato crea una ISO. Utile per VM E' stato creato su richiesta e quindi per aiutare @fabiosun Attualmente supporta Catalina Mojave High Sierra In ultima Release disponibile. This script allows us to download from Apple catalog BaseSystem.dmg file, when this task is complete it create an ISO. Creation was done to simplify a process to download and install macOS on a VM created with Proxmox VE With 1.03 release is also possible to pass some terminal command to create a full installer iso if you have previously downloaded one from Apple Store or to download it directly (useful for a fast installation) It is also possible to download latest OSX (Big Sur) and a proper EFI to upload in Proxmox and to use to boot in all OSX system available1 point -
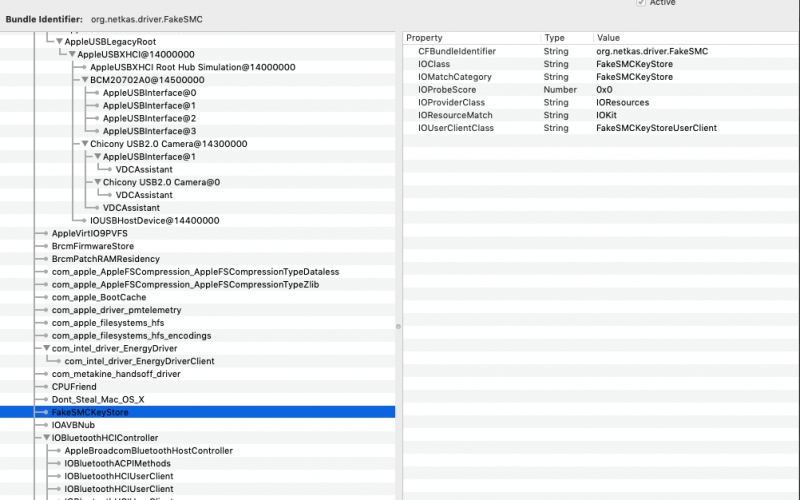
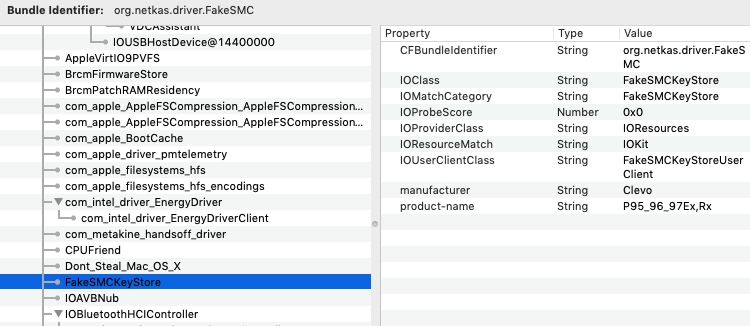
Se utilizzate FakeSMC v.6.26-357.1800 (RehabMan-kozlek) e OpenCore 0.60 (0.5.9), dando un'occhiata al boot-log probabilmente avrete occasionalmente (o sempre) FakeSMC in backtrace e alcuni di voi potrebbero sperimentare anche un crash durante il boot (non sempre...). Storia breve: questo è causato da un'incompatibilità tra FakeSMC (un po' vecchietto, ma valido...) e OpenCore. Ecco quello che potreste trovare: Inoltre, utilizzando IORegistryExplorer, se controllate nella risorsa FakeSMCKeyStore risultano mancanti le proprietà "manufacturer" e "product-name", in alcuni casi utili e normalmente caricate da Clover. come potete vedere nell'immagine sopra. Ho modificato il kext in modo tale da eliminare il backtrace che potrebbe rendere critico il boot e caricare le due properties. Per caricare le properties indicate, è necessario attivare nel file config.plist di OpenCore ExposeSensitiveData->Expose OEM information as a set of UEFI variables = true, in Misc->Security. Sostituite FakeSMC.kext con la versione modificata e riavviate. Dopo il boot, controllate il log e troverete la stringa "Trying OpenCore OEM properties..." e con IORegistryExplorer verificate la risorsa FakeSMCKeyStore e troverete il "manufacturer" e il "product-name": che nel mio caso è "Clevo", le vostre saranno, ovviamente, diverse. NON è necessario sostituire i kext di supporto ACPISensors.kext, CPUSensors.kext, ... E sufficiente sostituire FakeSMC.kext Per chi vuole compilare (ricordarsi prima il versioning): https://github.com/FreeJHack/OS-X-FakeSMC-kozlek in alternativa, allego il kext già compilato. Spero possa essere d'aiuto... FakeSMC.kext.zip1 point
-
I wasn't the only one with issues getting access to Big Sur by enrolling via website. After running: sudo /System/Library/PrivateFrameworks/Seeding.framework/Versions/A/Resources/seedutil sudo /System/Library/PrivateFrameworks/Seeding.framework/Versions/A/Resources/seedutil unenroll sudo /System/Library/PrivateFrameworks/Seeding.framework/Versions/A/Resources/seedutil enroll DeveloperSeed I can now download the update. I will try to install it tonight. Credit: https://mrmacintosh.com/big-sur-beta-not-showing-up-in-software-update-troubleshooting/ @fabiosun - thank you for the tip. I managed to fix it with the above steps before I saw your post. I will check on the tools you recommend. @Driftwood: My setup is Mobo GB sTRX40 Designare BIOS 4c 3990X 256G Ram at 3200MHZ PCIE1x16: Asus Stock 5700XT (no longer made, got for MacOS compatibility, unfortunately suffers from reset) PCIE2x8: Titan Ridge TB (packed w mobo, currently unused other than for charging, keeping so I could passthrough eGPUs in the future as all my other slots are populated) PCIE3 (4x4x4x4): Aorus Expander Card w x4 1G XPG Gammix PCIE4 NVMEs (zfs software RAID10 - this is the VMs storage pool including MacOS VM boot and installation data) PCIE4x8 @1: Old Nvidia 240GT I use for host. GB sTRX40 rev 1.0 mobos don't like this slot if all others are populated - seems to be either a lane sharing or BIOS constraint but since I only need a host GPU, it's OK. 2 Sabrenets PCIE4 1TB - One used as passthrough to MacOS - currently a destination of Carbon Copy Cloner and extra storage, the other is my Ubuntu 20.04 boot drive PCIE1x1: https://www.amazon.com/gp/product/B082X8MBMD/ (used as my wireless and bluetooth card as it comes w Apple firmware and supports all features such as air drop, continuity etc. out of the box). No overclocking besides memory 1 onboard Ethernet passed to VMs (including MacOS) and 1 is used by host The GB sTRX40 Designare is a tricky motherboard to make all the above work due to some PCIE lane issues - it's very sensitive to PCIE slot configuration, but the extra value from the expansion card and the TB make it worthwhile as everything else is quite stable once you figure its quirks. The only issues I have with this setup is: AMD reset. No existing patches would work for MacOS, though the power patch should be ok w Windows. This issue is hopeless and can only be fixed in future Linux kernels if AMD decides to cooperate or hopefully future iterations of AMD cards. Sleep/Wake doesn't work on neither the host nor the guest. Not an issue in Ubuntu, haven't debugged Proxmox or MacOS yet.1 point
-
orbene sior e sdore, sono lieto di annunciare, che Clover 5120 che ho compilato poco fa, grazie agli ultimi commit, finalmente avvia i miei macOS sulla Z97 ovviamente va inserita nel proprio config, prendendola dal config sample, l'intera nuova sezione OcQuirks e va usato OcQuirks e OpenRuntime allegati in Clover 5120 per chi ha voglia di fare un po' il criceto, lascio il materiale CloverISO-5120_20_07_0005.zip1 point
-
1 point
-
Could you do last try for me?😊 Download with vm assistant oc efi I use and try with it from terminal vm assistant -doc it will download an uploadable iso for proxmox i hope with this you can solve1 point
-
la parte Boot dopo ACPI non deve esserci, cancella.. nell'ordine dei kext metti VirtualSMC subito dopo Lilu poi prova il boot1 point
-
esatto, devi lasciare solo Generic quindi cancella anche SMbios CAVS -> HDEF ci pensa già WEG/appleALC se non ricordo male questo non ti serve change H_EC to EC__1 point
-
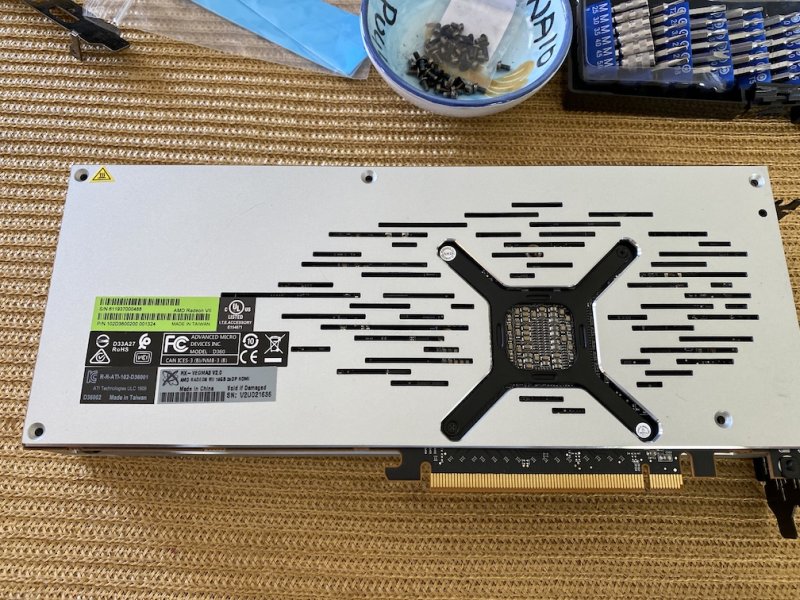
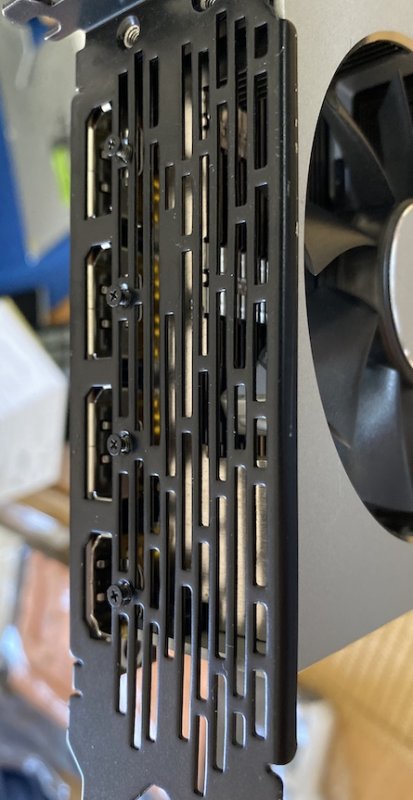
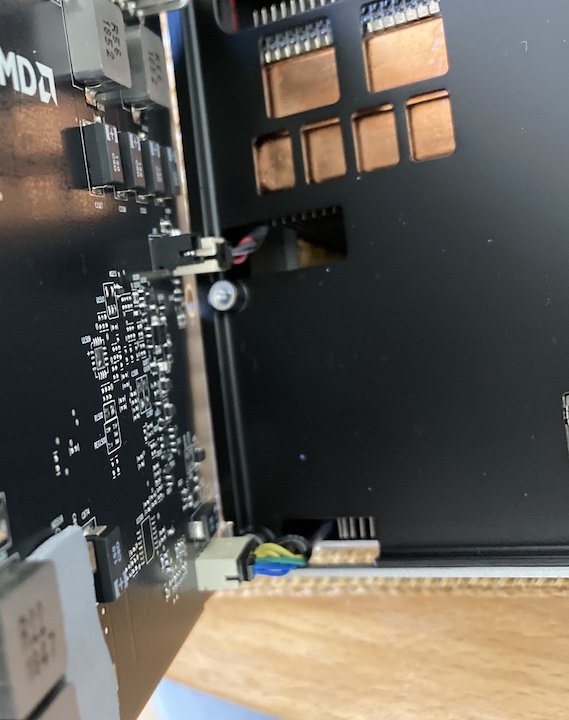
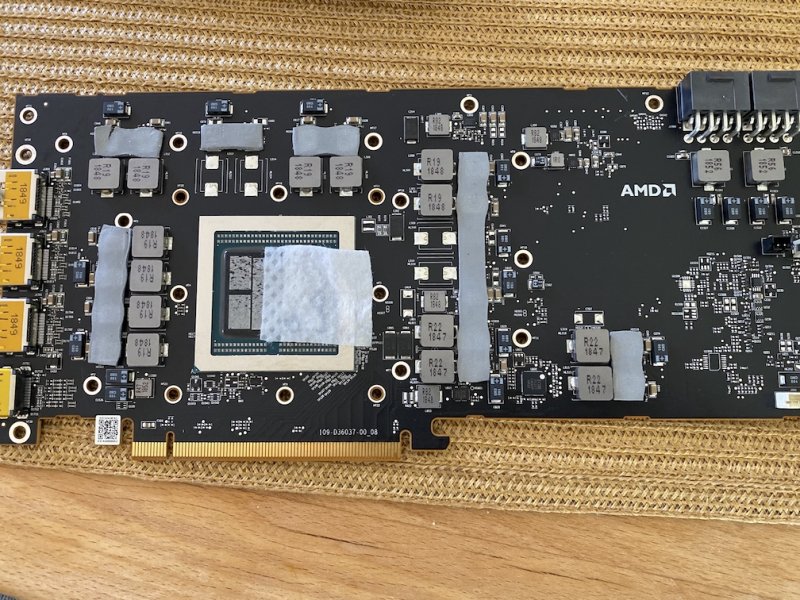
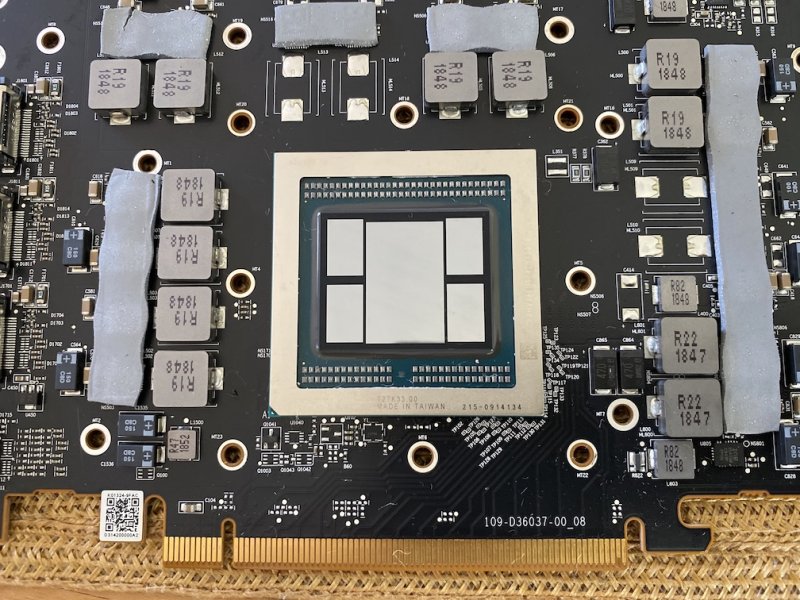
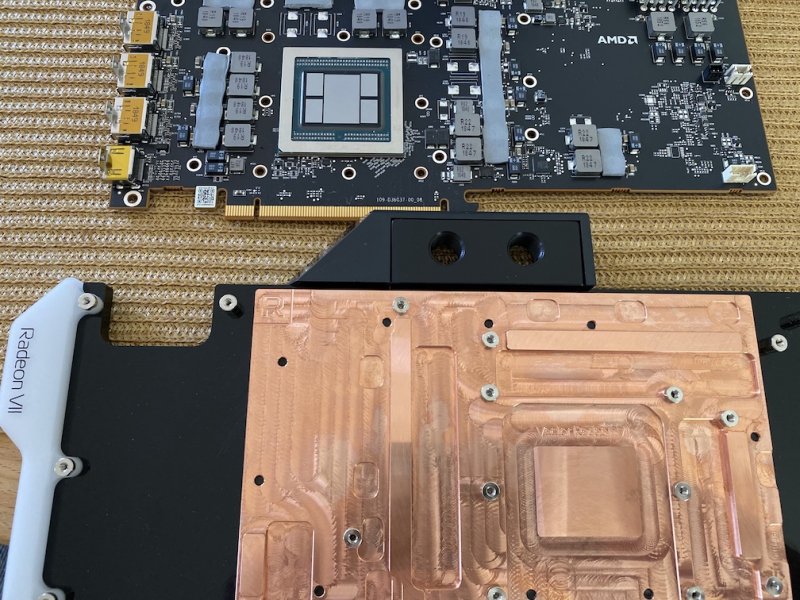
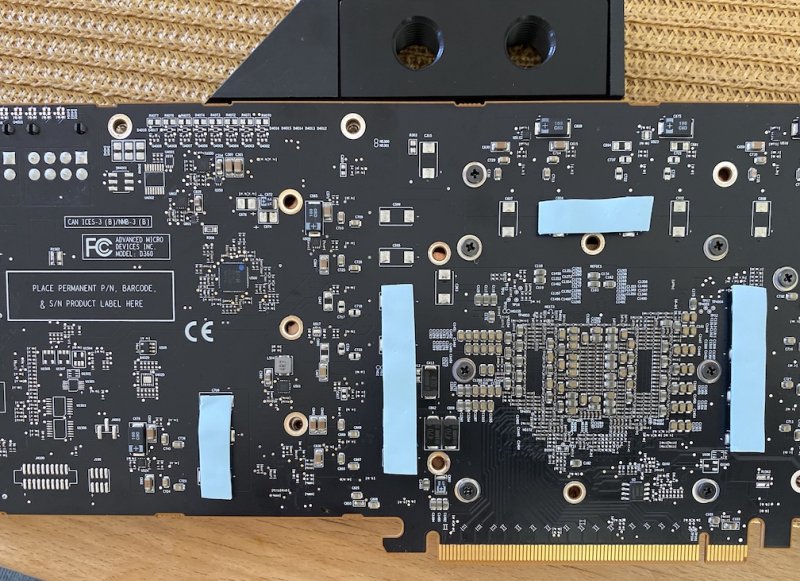
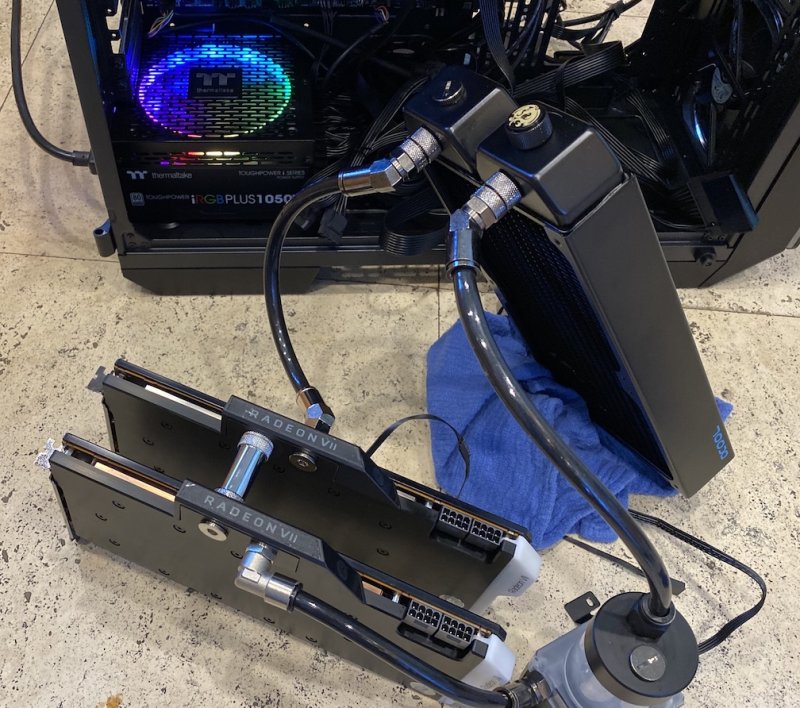
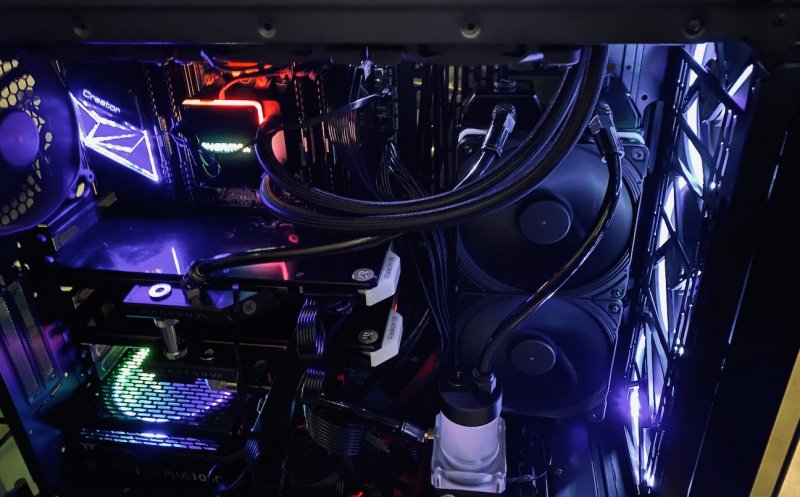
Yes, I used EKWB. They're no longer being made, but I found 2 (one two months ago and the 2nd last week; unfortunately this one has no LED connections). [I actually have another cooler plate for a Radeon VII made by BYKSKI (who has also stopped making them). I wanted to have both GPUs with same plates, so I waited a before doing the conversion until I found a 2nd EKWB. I will re-sell the BYKSKI plate on eBay at a later date; it is NIB.] I'm attaching photos of the set-up. First, assembly of the GPU plates, then the water loop connection with external testing and finally the internal placement. Two GPU cooling is a little trickier as a coupling is needed between the two GPUs and a third hand would have been helpful during the install. Initial photos show take-down of GPU from back side: back plate removal, removal internal screws, removal of mounting bracket screws, and disconnecting cables. Next, the GPU chips need to be cleaned and heatpads positioned for connection to new copper frontplate. Finally, comes addition of a back plate. This is optional but provides better heat transfer: After assembly of each GPU water-cooling plates, they were connected with a sliding coupler (BYKSKI X41; 41mm allows connection for GPUs in slots 1 & 3). I use slip-on, quick connectors for ease of assembly. The tubing is 8mm ID and 10mm OD (purchased from UK). Below the entire loop is filled and then run to test for leaks. Nothing leaked from the start! The radiator is a thick 280mm (alpha-COOL) that uses two 140mm Noctua fans. This stage ran for a couple of hours. (A cheater plug is connected to the main PS connector; this prevents mobo from powering up). After the above is completed, only then is the cooling loop placed inside the chassis. However, it was leaked tested again and after another hour or so of testing, the mobo was finally powered up as shown below. The LED cable for the top GPU has not yet been connected (an extension is needed). It will light up. As mentioned, the other GPU cooler had no cables, so I don't think it will ever light up). The CPU cooler has its radiator (360mm) on the top, the GPU's on the side. The front three 140mm fans are for intake. On the rear is a 140mm exhaust fan. All radiators have their fans pushing air out of the case, so as not to internalize any hot air. (I purposefully chose a case in which I could maximize use of 140mm fans for their greater air flow while using reduced speeds with less noise.)1 point
-
mmmm hai fatto da utility disco giusto.... prova a eseguire il reset NVRAM1 point
-
1 point
-
se non si hanno mac tra le mani o hack, si parte da virtual machine tutte le principali guide le trovi in firma da me e gengik altrimenti il cerca del forum funziona molto bene1 point
-
molti rename che hai messo non servono a nulla, già ci pensa automaticamente WEG e AppleALC. altre patch sono doppie. SSDT-X299-USBX.aml questo rimuovilo... ne hai doppio... meglio mantenere l'altro idem per SSDT-X299-HDEF.aml, completamente e solo estetica. in properties avrai da definire l'audio ma puoi farlo anche tramite boot-arg : alcid="layout-id" hai una parte SMBIOS vagante, rimuovila, deve stare in PlatformInfo, inoltre ti basta compilare solo la parte Generic, mettere automatic YES e cancellare: smbios,datahub,platformInfo come è di fatto il Sample.plist.1 point
-
stai usando un installer scaricato da poco o roba vecchia? se vecchia, è capace che abbia i certificati scaduti, porta indietro di 1 anno la data nel BIOS il giorno che installi BigPurge, prima fatti una camomilla è come installare vista in un Pentium 1331 point
-
controllando su acidanthera: For UHD620 (Whiskey Lake) fake device-id A53E0000 for IGPU per esperienza avendo già fatto lo scorso anno per una amica un dell con UHD620, basta flaggare inject intel nel config e LILU + WEG fanno tutto loro in questo caso va bene SMBIOS che stai usando MacBookPro15,2 PS: nei boot-args aggiungi -igfxvesa -wegnoegpu e CF 🤞1 point
-
si ma devi svuotare il campo ssdt patch del config, non ne serve nessuna, come hai lasciato, non va bene il flag ad AppleIntelCPUPM non serve non sono sicuro vada bene SMBIOS, ma devo verificare1 point
-
si tutto OK, al limite per installare AppleALC mettilo in OFF e ci pensi poi dopo avere eseguito il dump del codec per attivare l'audio ti aggiungo solo, visto che il boss oltre a prepararlo l'ha reso pubblico per tutti, di aggiungere SSDT-Basic, lui da solo senza altri ssdt vedi in download e di definirlo in sortedorder nel config1 point
-
1 point
-
Si e no principalmente si usa per scopo estetico, ma nulla vieta di poter usare iniezioni da device properties per funzioni più avanzate per esempio vedi sulla vega56 che attivo framebuffer smu per aumentare le prestazioni grafiche, direttamente senza usare nessun ssdt o kext per tale scopo1 point
-
è andato tutto a posto da clover adesso vede pure la ethernet come direbbe il fasu si vedono tutti i cazzi Grazie infinite iCanaro scusa ci perché sono le volte delle volte che più ci crediamo che non le volte delle che non ci crediamo insomma quella cosa la 😂🤣1 point
-
I have been running both the Zen 2 and General 5.7.8 versions of these for the past week. They won't solve the reset bug. As you know, the power on/off patch also doesn't work for MacOS VFIO and 5.7.8 is unlikely to change that (although I did not try to patch in 5.7.8). The problem with the reset issue is that AMD is unwilling to share details on how to bypass on current generation GPUs, but fingers crossed they will address that with next. The pve-edge-kernel should be buildable against 5.8 too, if you change the submodule repo. If there's any chance on solving the reset bug, 5.8 may have a slim one, but I'm doubtful. I built 5.7.8.1 myself, so if anyone's interested I could try to build against the 5.8 rc5 sha. Re: my earlier note on trying Big Sur on 3990x. For some reason I couldn't download it from Apple with my developer account. Does anyone know how to enroll in the beta? Since others are running 3970x (which is a perfectly fine CPU for this setup), here are my stock (I can't overclock as I run air cooling) 3990x Geekbench numbers under 5.44-1/2 mainline. Curiously, 5.7.8 would consistently score a 1000 points lower in multicore, but same or marginally better single core. Not sure what to make of it, but bottom line is don't expect 5.7.8 to improve performance for you VM CPU-wise. Unless you have an issue with your current hardware, I wouldn't recommend it. https://browser.geekbench.com/v5/cpu/29748751 point
-
try this one only putting there platform data , kext and ssdt you use I have tested your posted config above and with that oneI can't boot in recovery with the same your error config.plist.zip1 point
-
1 point
-
1 point
-
no dai che la CPU casca al contrario e poi ti piega tutti i piedini basta che quando installi un OS lasci il solo disco di destinazione collegato1 point
-
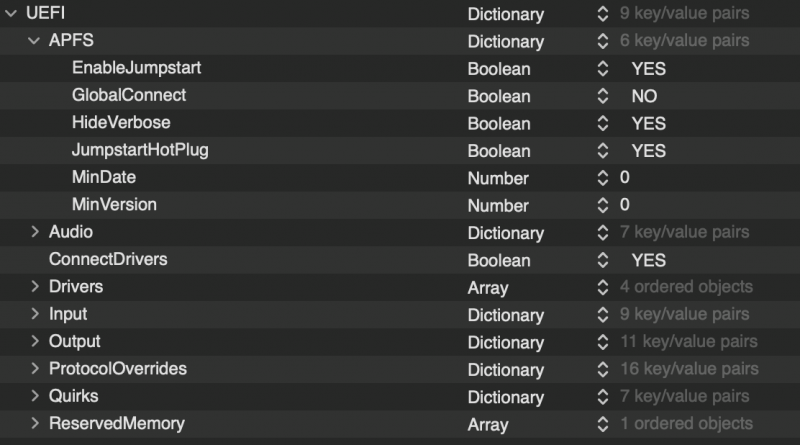
che clover stai usando? dalle dimensioni pare il 5120, l'hanno ritirato, non va bene usa Clover 5119 e come gestore memoria usa questa mia mod OcQuirks_rev23_Z370mod.zip (NB: vanno inseriti in UEFI tutti e 3 i file) SSDT-Basic lo devi definire in sortedorder nel config, altrimenti potrebbe non essere caricato non usare il FakeSMC di rehabman, usa quello di Slice incluso nel Clover.iso da 106Kb o virtualsmc usa IntelMausi di acidanthera togli flag da AppleIntelCPUPM definisci SMBIOS se usi la integrata iMac19,2 se invece usi da dedicata, iMac19,1 nei boot-args per installazione aggiungi -igfxvesa -radvesa in system parametres, lo vogliamo mettere inject kexts su YES ieri hanno aggiornato Clover Configurator, introducendo la sezione quirks: al momento non toccare niente, si userà quando i prossimi Clover funzioneranno bene0 points
-
https://tse1.mm.bing.net/th?id=OGC.b818a5f4590a6449279e3dc1e8b72385&pid=Api&rurl=https%3a%2f%2fmedia.giphy.com%2fmedia%2fyoJC2Olx0ekMy2nX7W%2fgiphy.gif&ehk=EsRZaf88BOCmsU6QJRXYeIexHUAbmWDwjfTtQoU3520%3d0 points


.thumb.jpg.8aeb3e9b2b9b16fadcdec6d3fbac9d42.jpg)

