Leaderboard


Popular Content
Showing content with the highest reputation on 05/13/2020 in all areas
-
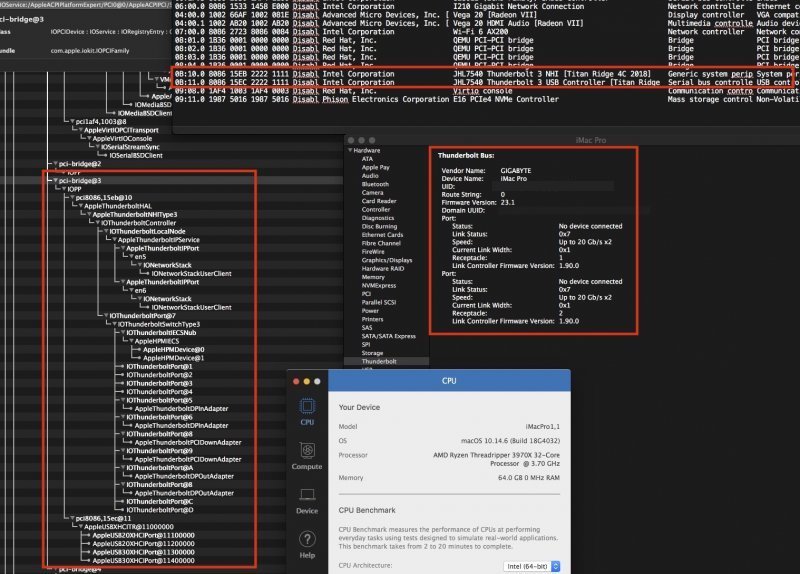
I've got TB3 tree working in this build! More things to work out; details to follow. The teaser is the tree below with details appearing in the PCI/Thunderbolt section. This card was previously flashed with firmware. (I also inserted the GB4 window to show that it is indeed the 3970X CPU.) Interestingly, I only passed 15eb and 15ec. The other TB3 sections I did not even try to pass-thru. The card is in slot-4 and has the TB header connected, the USB-2 connection and the power jacks applied. I think I was blocking the appearance of the TB device while re-naming USB devices, and each part was appearing on the PCI0 tree. Now, the entire TB tree is appearing within SB0, which contains the NVMe (M2M slot) drive located at 1:00.0. This drive contains macOS Mojave. Next, I'll work on the SSDT; once this is working TB3 should become functional. Unfortunately, after I made the image below with passed-thru Radeon VII, I made many changes to config.plist file and now I cannot boot into macOS while passing the GPU. (Nuts.) Also, my water cooler pump is making a loud racket and I think I'll need to replace with an air-cooler. BTW, fabiosun, how to you monitor temps; the usual SMCAMDProcessor kext doesn't work on the TRX40?
 2 points
 -
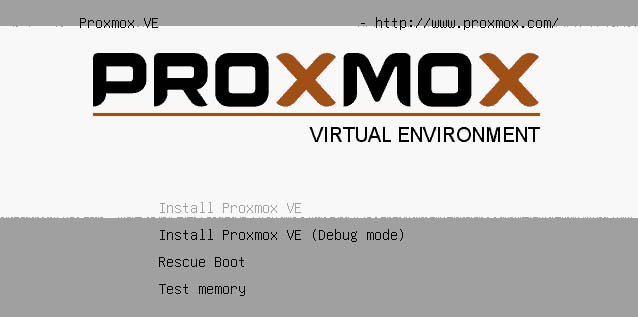
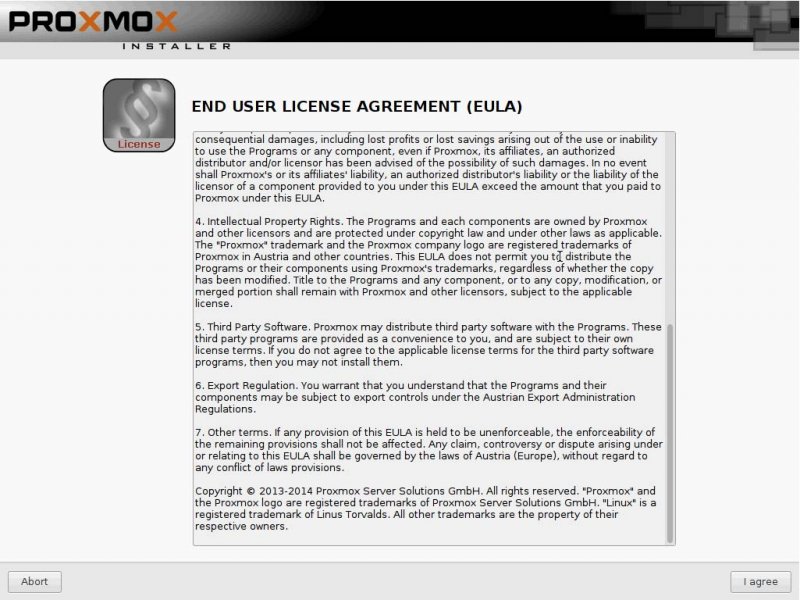
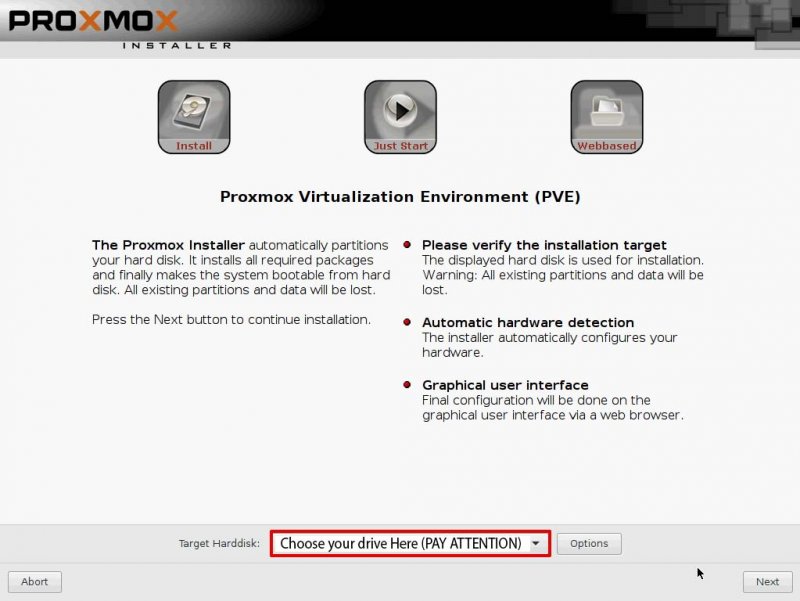
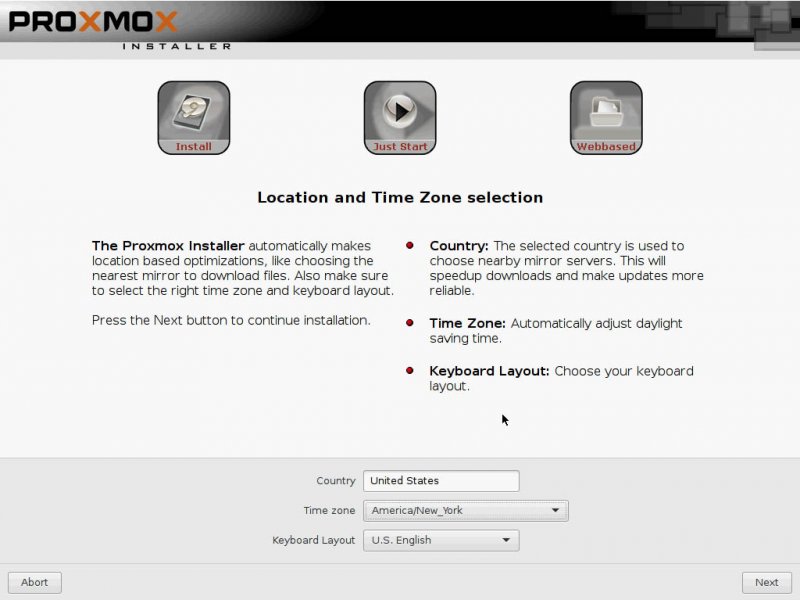
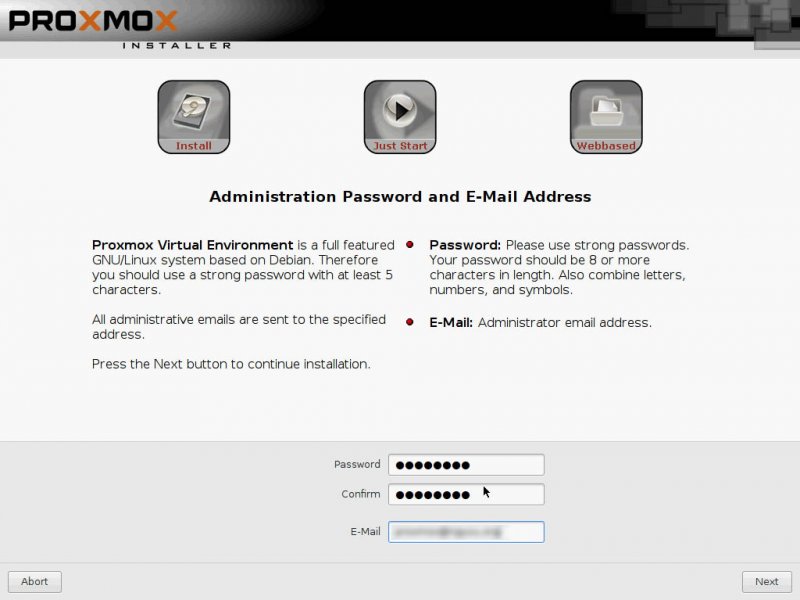
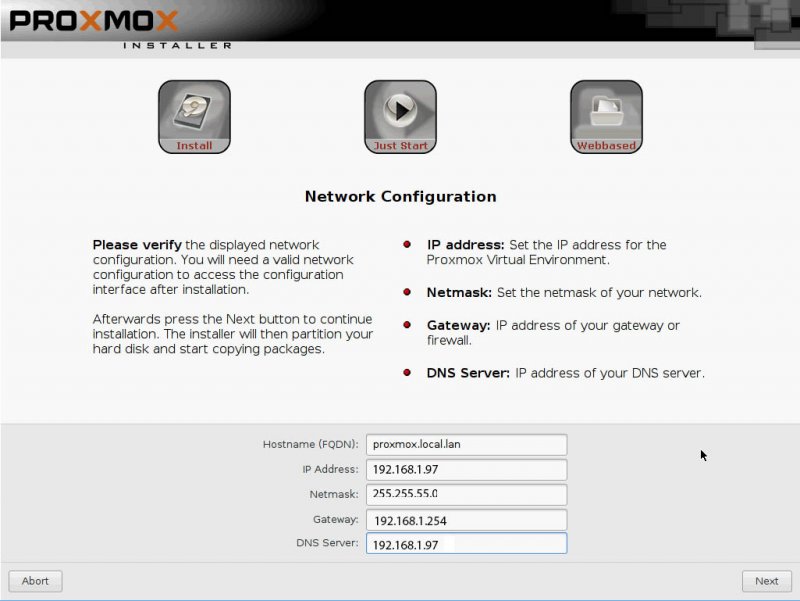
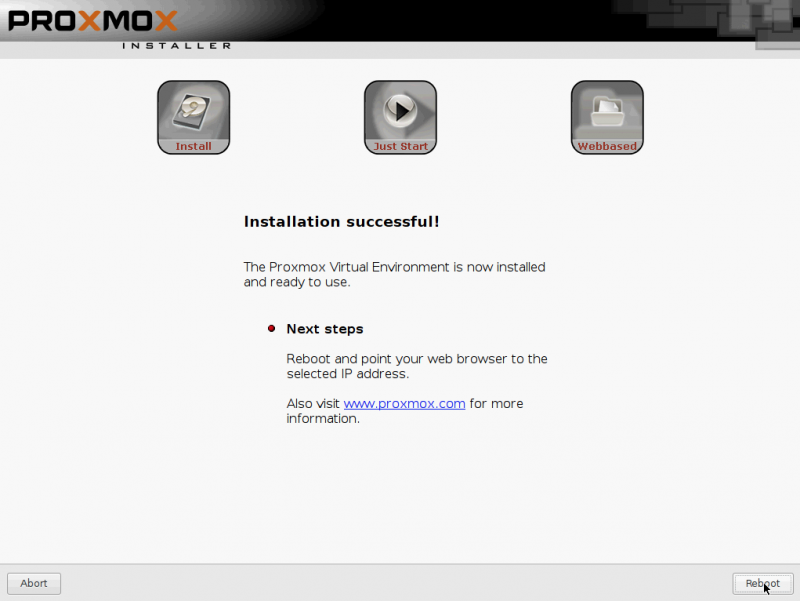
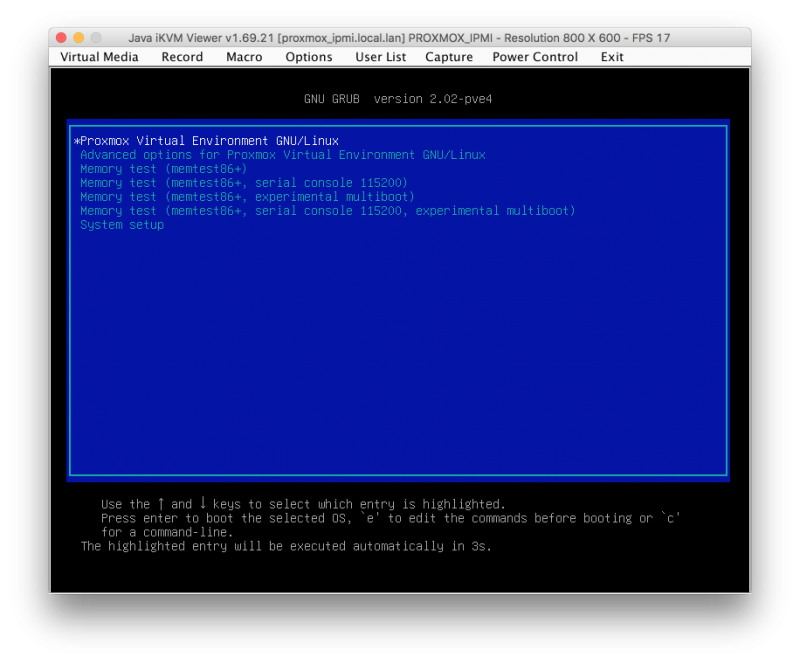
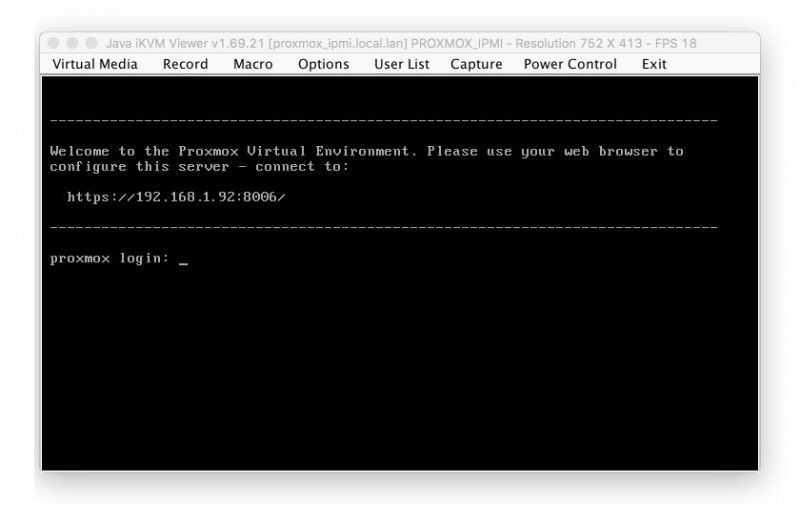
Preface: Inspired by the lack of patches for this new ThreadRipper CPU series , I have started to find a way to have "the fast Amd hack ever". Hard task was to setup a pretty bare machine inside an OSX linux vm. Many solutions were evaluated to reach this important goal. Ubuntu, CentOS, UnRaid and so on Tested many VM and found many interesting stuff on the net. Kholia's or foxlet's GitHub guide for example or nicksherlock's guide more Proxmox like. With these guide is possible to start our job and to have a working OSX..but I need more! 😉 I want to use my single Nvidia Gpu on it and for it I need a different approach. Single GPU usually is a pain because when we passthrough* it to the guest PC..we will loose it. So, we have to use another PC to connect in it or a simple Android or iOS tablet (now I am use my iPhone for this task 🙂 ) So, after some days of brainstorming with @tomnic we choose to start with Proxmox VE. It seemed the most flexible linux distro to reach my goal. macOS High Sierra and Nvidia web driver installed with no compromise. Proxmox Ve allows to build a bare metal system with Gpu passthrough, and, most important thing it has a web interface to control guest PC * Passthrough is a technique to "pass" hardware to a virtual machine loosing only a minimal part of hardware performance More difficult and critical task is passthrough our hardware to VM in a way which will allow me to have a pretty similar performance as a real hack and overall to have GPU at its best in this system. Prequisites: A minimal linux experience (I have had no idea before about linux and this was the main difficulty for me) To know what to search usefull for my need! A OSX, linux or windows system to collect some files (I have used used linux and OSX, with latest one preferred. System configured is in my signature, summarized here: MSI Trx40 10G Pro AMD 3970x Threadripper 32 cores / 64 threads (this guide is also useful for 3960x and maybe for 3990x (capping cores not supported by OSX kernel) 1Tb Nvme Sabrent and so on... Let's start! Mandatory Elements: 0) Proxmox VE (Proxmox Ve's wiki link) 1) a working OSX. Linux, Windows ( in this guide we use OSX High Sierra 10.13.6 2) download Vm_assistant's script, an exclusive script by macOS86.it and @Gengik84 VM assistant From this link a simple guide: Promox VE installation procedure: In this guide I will not do a detailed guide to install this linux release, you can find useful information on: link to Proxmox link to iso installer Use your favorite Iso installer to produce a bootable USB pen drive (8gb or more is fine) In this guide I have used Balena Etcher: link Balena Etcher Warning for initial installation part! * Due a problem with new TRX40 motherboard , ProxMox 6.1 and lower will hang on early booting stage. To avoid this you have to modify grub.cfg file in this way: find this line: linux /boot/vmlinuz-5.3.10-1-pve root=/dev/mapper/pve-root ro quiet with this linux /boot/vmlinuz-5.3.10-1-pve root=/dev/mapper/pve-root ro quiet mce=off adding mce=off allows us to start this exciting journey.... Alternatively you can modify this line directly on boot menu selection before selecting your choice (press E and add mce=off as shown before) thanks @KTC for pointing me in the right direction * this problem could be resolved with a future Proxmox update SOLVED in Proxmox 6.1-3 and greater step 1: boot from your ProxMox Ve USB pen drive, you will have: select Install Proxmox VE and then follow indication you can see below. Note Fill your network data with your (setup should do it for you except for Domain and your email) Installation is done! 😛 Reboot and choose your usb pen drive and boot from it. In a few second you will see: Now pay attention..if you have not modified grub.cfg...you MUST do it now pressing E on keyboard and adding manually mce=off as previously shown. You have also to remember to do it permanently when we start in Proxmox VE first time. At login user is root password (your previous choice during Proxmox installation) now it is possible to be a bit worried..if you are (as I was) not confident with linux command)..but I will try to stay more simple I can. Start to find googling how to read or to modify some files in linux (text configuration file I mean). I have used nano command..you can also use vim or similar command. Now, take note of link you can see in this picture: https://192.16.1.92:8006 (yours could be different) and the magic starts : )
1 point
-
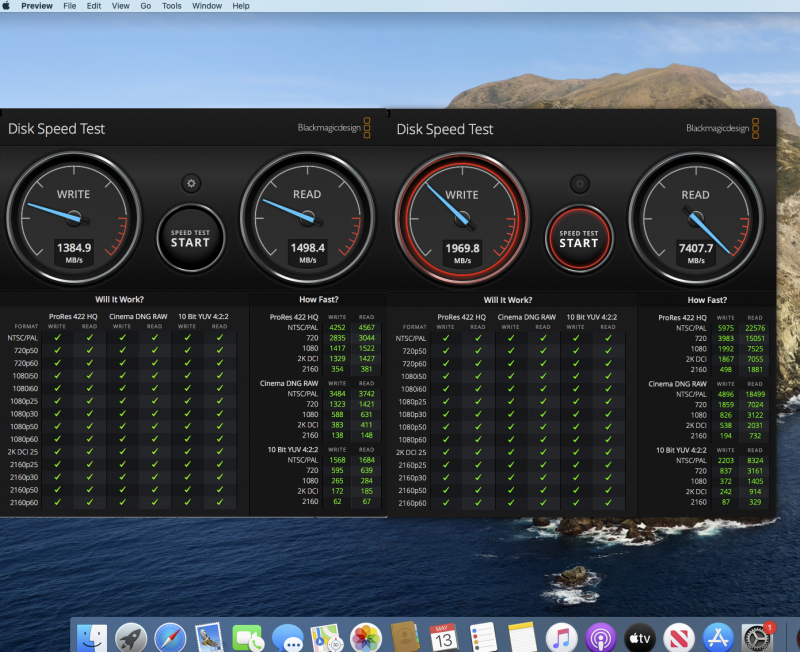
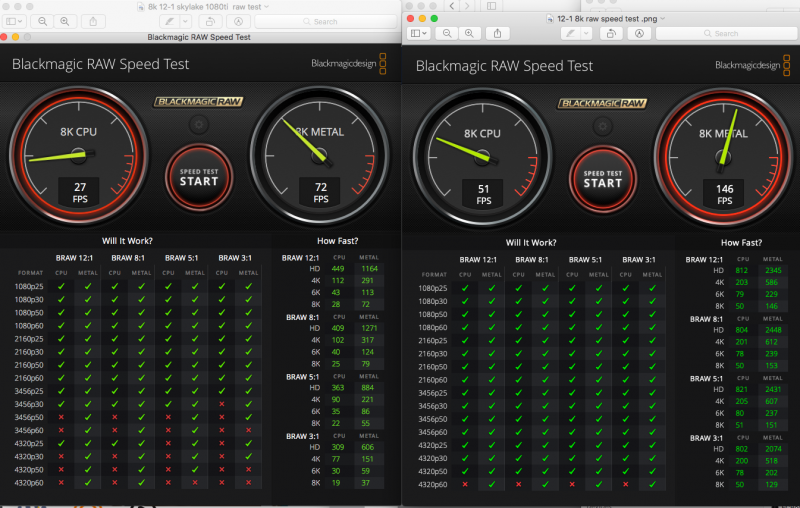
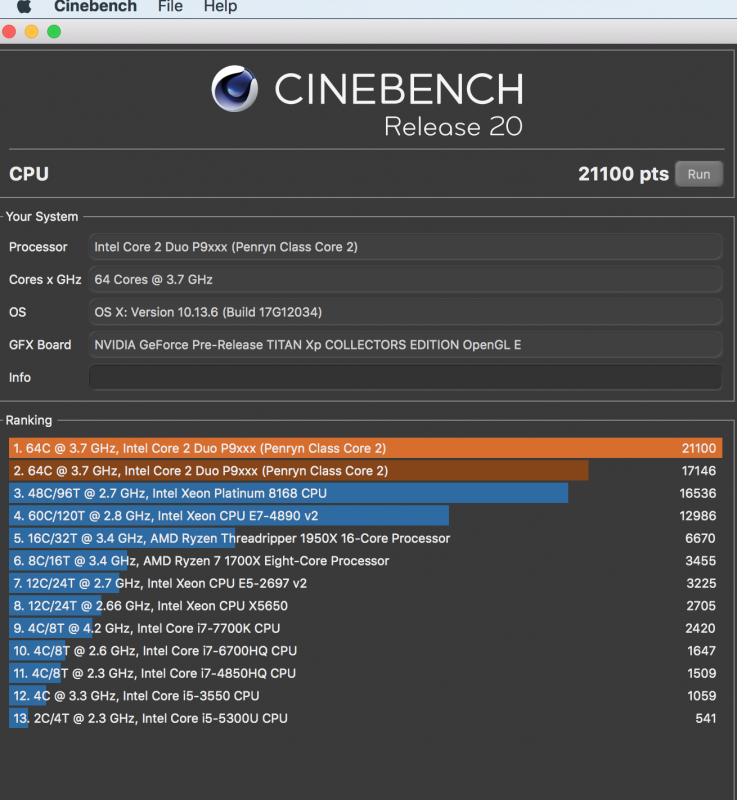
Skylake 1080 ti vs the dual Radeon VII cards + Threadripper 3970X. I havent passed thru the cpu, nvme yet and USBs etc... just the GPUs. Looking on track though in initial tests - here Skylake versus Threadripper Ryzen 3970x. Disk SPeed plus 8K 12:1 RAW tests.
1 point
-
No, devi scaricare la versione Inglese, poi gli SVF Italiani e li monti con svfx e hai le ISO in Italiano. - svfx.zip1 point
-
Ma sono queste scaricale https://cloud.mail.ru/public/5vGY/4W8NPiu9w/ 😂, in due balletti le tiri giù... - https://www.deskmodder.de/blog/2020/05/13/windows-10-2004-msdn-mvs-19041-208-isos-stehen-zum-download-bereit/1 point
-
Ottimo! Ora mi manca solo l'accesso MSDN 😂 O che qualche anima buona le "esca" 😎 K.1 point
-
Ed Eccole come mamma le ha fatte 😀: -
1 point
-
Official 19041.208 MVS ISOs - https://cloud.mail.ru/public/5vGY/4W8NPiu9w/1 point
-
Fabio, That’s great news on plugin/ DAW stability, and heard similar good reports from VM users vs Vanilla patches. As long as I can rely on using my RME PCIE MADI card connected to a RME UFX+ interface, for audio, I should be fine. I don’t need to use a 3.5mm Audio Jack, DP/HDMI/USB ports for sound, video only. Similarly, I don’t require thunderbolt, but still like the idea of it, and looking forward to iGPU writing a SSDT, as it’s another milestone on the journey.1 point
-
@tsenglabs apri tuo thread per il tuo hack, che ne discutiamo li e posta la EFI che stai usando le Z390 per chi non è pratico, sono problematiche, se non si mette a punto prima alcune cose, è dura1 point
-
Ciao Benvenuto1 point
-
comunque se ti fà piacere è successo anche a me, a 13 minuti si bloccava era l'installer, non scarichi bene i pacchetti , quindi non ti fossilizzare su SSDT il basic basta e avanza , prova a scaricare un altro OS magari Catalina1 point
-
@paulthesparkywelcome here yep I did test you said without screen software recording I have 580 tracks as I said in this thread or in the main guide thread 🙂 take a look if you want also in this channel: FYI we have here this system working from first days of February 🙂 so a bit first of Theresa 😛 we did a free guide to build from yourself if you have one 🙂 🙂1 point
-
No i Driver vengono integrati nell'istaller stesso, install.wim e boot.wim a seconda del Driver: - https://www.macos86.it/topic/1324-integrazione-permanente-drivers-nellinstaller/ - Ho rifatto oggi la ISO, ma quelli AMD alla fine non li ho integrati, non sono sicuro che il Pacchetto Gigabyte sia completo...1 point
-
Thanks fabiosun. Yeah I did a those arguments & settings first time round. The problem is I tried two full installs - one I originally downloaded from app store with my macbook pro and the other with the VM Assistant but both wouldn't work with OC but did with Clover. The 2gb base DMG did work with OC. Also option 3 on VM Assistant menu return an error for Catalina server querying, where as the VMA command line help variables work. Options 1 HS and 2 for mojave seem to work fine. Maybe (@gengik84) will take a look. Good app though. Anyways, I'm in now and analysing devices to pass thru and configs... BTW I'm very grateful for your guide, Sherlock's guide, Pavos stuff and all the thread members here. It's an amazing resource.1 point
-
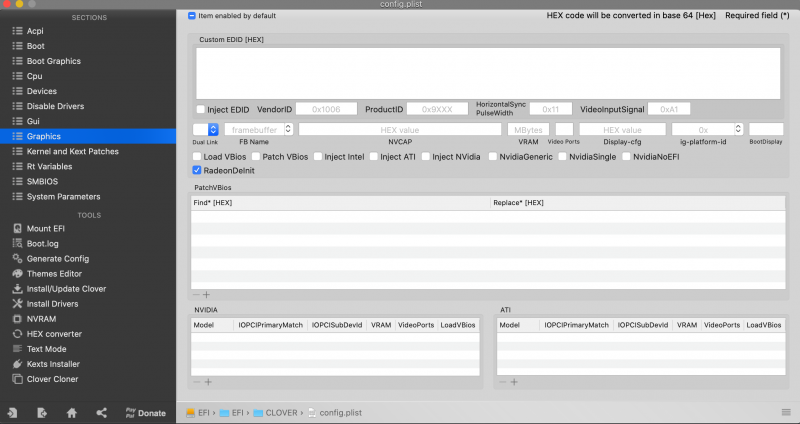
@Driftwood, @AllubzV take a look to below image..it could solve your missing full ISO icon:
1 point
-
@Driftwood - I'm responding here rather than in PM, as it hopefully adds something useful for future people. I was having a breeze the first install following only fabiosun's post(s) initially, but it soon became clear solutions to stuff I was looking for meant editing parts of that initial work. Their great writeup and development of ideas is very useful to read through, as a primary resource. Now, looking at Pavo's repository for quick patches, and Nick Sherlock's fine guides you'll find OpenCore.iso, use that for now it should work fine to start the VM. You will want to grab the Base_System.iso (conver .dmg file) which is 2GB in size. I never got the 9GB installer image to work, only the net download. Make sure you have some LAN connected via VM, because you're missing .kext support right now in OpenCore to passthrough use the LAN ports, probably.I can't tell any other problems looking at your 1##.conf. You can compare your VM config to mine, as I posted above. Just ignore all the hostpci parts for now. If you have the option you can also install macOS on a disk before you use this setup. It's much easier that way it seems to me, as you can skip all the virtual disks if you want, and straight-up passthrough the SATA / NVME drive, and have OpenCore.iso boot into it for you. Then, you can mount the EFI partitions and copy over the OpenCore.iso config, so you can edit and boot from your actual drive, and comment out the OpenCore.iso even, as a fallback if you mess up your editable EFI partition on the drive.1 point
-
@AllubzV Sure it is about TSC, I am insisting because it is real that cinebench and geekbench benchmark are "faked" from this missing..but Candle scene test in DaVinci Resolve no..so I am investigating on this and I hope also some of you will do the same 😉 traditional TSC kext are not useful..and in my case never was also in a x299 system Args subject: I Know, and many guide stated this is mandatory as OSK key ie...not true here Patch for seeing TR as it is 🙂 Here I can not understand well why it is working...two kernel patches used to by pass "host" hang are Penryn topology related... Broadwell subject: maybe you know I am involved from December in trying to have working patches with vanilla method..involved means I have helped maintainers of AMD patches to find a solution.. I have tested all solutions proposed by algrey..then he gave up, because no solutions available tested were working. Many chit chat people answer at his name saying nice things as: "Send a trx40 chip to algrey" and so on In the past developer have had all CPU in the world to produce patches for OSX? NO! 🙂 Algrey is a serious man (I think) and he never asked this..he was trying to do a serial output debugging with me and I have bought all things he could think useful for this task(serial cable and poi to serial adapter). No way to have it working for me...and I think also for other users if no results at this moment! 😛 For this I have spent my time to build this guide as a sort of working progress. Now I am happy and I think we have a better method to have a Hack..without historical problems vanilla method has.. Sure it is not simple...but it is here for free..and here we are not asking to send a trx40 chip to solve users problems 😂😂1 point
-
Thanks for your help. I'm slowly getting things to work. (I'll attack the monitor last.) i've had the kernel modules and grub.cfg files properly filled out. There are 2 files for one of the kernel modules that I've seen used, but I think I only need one of them since they both contain same thing. And these are the files named "/etc/modprobe.d/vfio.conf" and "/etc/modprobe.d/vfio-pci.conf". I think I don't need the latter. You were correct with the Audio being a problem. It was causing some of the crashes. Even after doing 'mod' described below for hostpciX, trying to pass-thru the 23:00:4 audio section results in a freeze (and adding in adjacent USB @ 23:00:3 did not help either). It turns out that I cannot get error free pass-thru with Intel I210 Ethernet device if I use "hostpci3: 44:00.0,pcie=1". This gives an error on Proxnox monitor of "Invalid PCI ROM header signature". Instead, the better way for my mobo is using "hostpci3: 44:00.0,pcie=1,rombar=0". This 'rombar=0' made all the difference. It also allowed finally passing BT... and so I've now got native BT (Intel WiFi 6 AX200; probably same on most of our mobos) working (but no WiFi) using pass-thru BT! This is native mobo BT, not an add-on card! Native BT requires 4 things: a) the above 'rombar=0' addition in VM config file. b) USB power pass-thru (described below). c) Most important: two special kexts (a work in progress; see GitHub); I've attached versions that worked. These simply go into OC/Kexts folder (and of course, enabled inside config.plist file). d) And once booted into macOS, open BT preferences and remove all BT items. Then re-connect each one as desired. You need to pass the Network + the USB for BT (on my mobo, as shown in my previous post above), it is at 45:00:0. The associated USB is found with command "lsusb". On my mobo, results are shown in spoiler below. So I pass 8086:2723,8086:0084 for BT and 8087:0029 for the USB power in "/etc/modprobe.d/vfio.conf". Then run "update-initramfs -u -k all" and reboot Proxmox. The other problem I found is that while many things seem to need to be blacklisted, the kernel drivers for Ethernet, SATA and BT should not be entered into the blacklist file. I found out the hard way: I blacklisting 'igb' and on re-boot, I couldn't communicate from laptop to Proxmox: the blacklisted Ethernet driver shut down all host Ethernet. But since I kept 2nd monitor and keyboards connected, I was able to correct the blacklist file and get things working again. (This is why I'll pass the GPU as the last device after I've made most of my mistakes.) And as for the two Ethernet ports on my mobo, I have both connected to my hub at home, but only pass-thru one (which is all I need on Mac), so as to keep communication lines open from Mac to Proxmox. *** One thing I've noticed is that Proxmox passes all the various mobo devices to macOS as USB devices (including the Realtek 1220 audio device). I can see almost all of them using IORegistryExplorer once Mac has booted. Therefore, it makes sense to pass-thru as many as possible to minimize USB usage (and later so we can limit each USB device to 15 entries). results of command "lsusb": BT-kexts.zip1 point
-
I forgot to mention that to make my 5700XT passthrough work I needed to unbind some system drivers and framebuffers before launching the GPU. Just blacklisting the GPU drivers, enabling nomodeset in Grub or setting GRUB_GFXMODE_LINUX=text in grub didn't work for me. Those unbinds need to be done each time you restart the computer, before launching the VM. I automated it using the linux crontab utility. First open crontab config using this command in a proxmox terminal: crontab -e Add this line into the document and save it: @reboot /root/unbind.sh Create a script in the specified path: nano /root/unbind.sh Add those unbind command (Change 03:00 with the PCI address of your GPU): #!/bin/bash echo "0000:03:00.0" > /sys/bus/pci/drivers/vfio-pci/unbind echo 0 > /sys/class/vtconsole/vtcon0/bind echo efi-framebuffer.0 > /sys/bus/platform/drivers/efi-framebuffer/unbind Don't forget to set the correct permissions for the script after saving: chmod 755 /root/unbind.sh Now, each time you restart the computer proxmox will run this script and the guest mac VM will launch without any conflict.
1 point
-
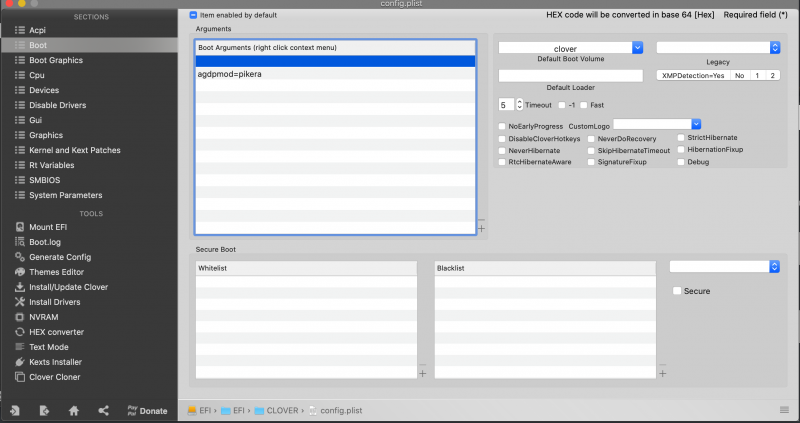
ehmmmmmm I discover a thing... take a look 🙂
1 point
-
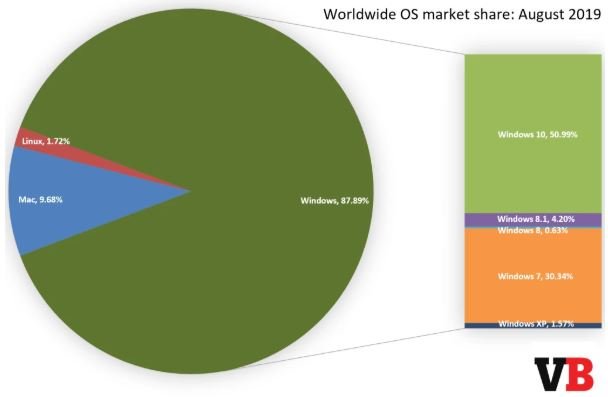
Ad Agosto cmq ancora una bella fetta di Computer era rimasta fedele a Windows 7, qualche irriducibile (che conosco) a Windows XP 🙂 -
1 point
-
vecchiotto a 42!? 🤔 allora io sono una mummia egizia
0 points