Leaderboard
Popular Content
Showing content with the highest reputation on 04/17/2020 in all areas
-
per chi avesse bisogno ecco la efi funzionante...a chi servisse un pc tipo mac mini ne consiglio senz'altro l'acquisto...con mojave è perfetto...da testare bene con catalina...un enorme grazie al munifico boss EFI.zip2 points
-
Hi people! Opencore EFI Maker is a simple app useful to automate download and compilation task of latest release and beta versions of this BootLoader . it is also useful to download latest base kexts and drivers of Acidanthera group It creates also complete EFI structure. You can choose also to use or not FV2 , and automatically it downloads the correct driver for you It modifies plist as from your choice.1 point
-
Trovata soluzione, messo igfxonln=1 nel nei boot del config.plist per WhateverGreen1 point
-
1 point
-
consigliato, acquistato più volte nessun problema unica cosa se vogliamo dirla sono i tempi di preparazione e spedizione dell'ordine, spesso hanno merce non fisicamente nel loro magazzino1 point
-
1 point
-
mai acquistato, ma che io sappia, è parecchio conosciuto, e per quel che mi risulta, affidabile e serio poi aspetta di sentire altre campane, magari menziona Ciro, così lo tiriamo fuori dal server per qualche minuto lui mi pare abbia acquistato li alcune cose1 point
-
non so se gengik non lo ha visto o ha fatto finta di non vederlo ma prevenire è meglio, secondo me se clicchi su guida in firma del boss e procedi con il metodo vanilla, è meglio e appunto, di quale hardware si tratta?1 point
-
praticamente ho fatto esattamente come hai detto tu , ho spostato l' installer in accessibilità ed è partito1 point
-
1 point
-
1 point
-
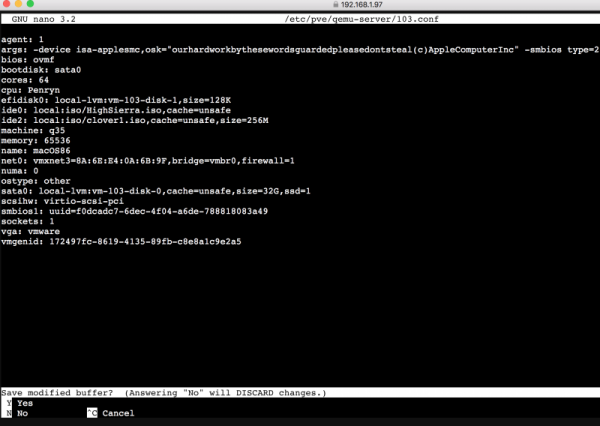
Current cpu features passed through args: -device isa-applesmc,osk="ourhardworkbythesewordsguardedpleasedontsteal(c)AppleComputerInc" -smbios type=2 -cpu Penryn,kvm=on,vendor=GenuineIntel,+kvm_pv_unhalt,+kvm_pv_eoi,+invtsc,vmware-cpuid-freq=on,+fpu,+vme,+de,+pse,+tsc,+msr,+pae,+mce,+cx8,+apic,+sep,+mtrr,+pge,+mca,+cmov,+pat,+pse36,+clflush,+mmx,+fxsr,+sse,+sse2,+ht,+syscall,+nx,+mmxext,+fxsr_opt,+pdpe1gb,+rdtscp,+lm,+pni,+pclmulqdq,+monitor,+ssse3,+fma,+cx16,+sse4_1,+sse4_2,+movbe,+popcnt,+aes,+xsave,+avx,+f16c,+rdrand,+lahf_lm,+cmp_legacy,+extapic,+abm,+sse4a,+misalignsse,+3dnowprefetch,+osvw,+ibs,+skinit,+wdt,+tce,+topoext,+perfctr_core,+perfctr_nb,+ssbd,+ibpb,+stibp,+fsgsbase,+bmi1,+avx2,+smep,+bmi2,+rdseed,+adx,+smap,+clflushopt,+clwb,+xsaveopt,+xsavec,+xgetbv1,+xsaves,+wbnoinvd,+arat,+npt,+lbrv,+nrip_save,+tsc_scale,+vmcb_clean,+flushbyasid,+decodeassists,+pfthreshold,+umip Current cpu features seen by macOS: machdep.cpu.features: FPU VME DE PSE TSC MSR PAE MCE CX8 APIC SEP MTRR PGE MCA CMOV PAT PSE36 CLFSH MMX FXSR SSE SSE2 HTT SSE3 PCLMULQDQ SSSE3 FMA CX16 SSE4.1 SSE4.2 x2APIC MOVBE POPCNT AES VMM XSAVE AVX1.0 RDRAND F16C machdep.cpu.leaf7_features: RDWRFSGS BMI1 AVX2 SMEP BMI2 RDSEED ADX SMAP CLFSOPT CLWB UMIP STIBP SSBD machdep.cpu.extfeatures: SYSCALL XD 1GBPAGE EM64T LAHF LZCNT PREFETCHW RDTSCP TSCI1 point
-
1 point
-
1 point
-
1 point
-
devi avere anche fakesmc di slice e se non funziona vuol dire che ancora non è supportata la tua video1 point
-
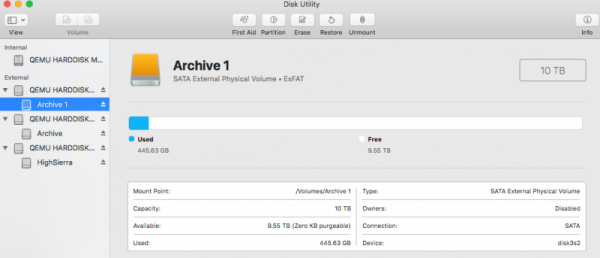
Optimizing our VM in Proxmox VE (Proxmox wiki reference): Add an existing physical disk to OSX's VM Open Web interface and open a shell window. If you do not have lshw terminal command type: apt-get install lshw to install it, then type: lshw -class disk -class storage to see disks attacched to our Threadripper PC You will see a list of useful data for your disk: *-disk:1 description: ATA Disk product: ST10000VX0004-1Z physical id: 1 bus info: scsi@5:0.0.0 logical name: /dev/sdd version: AV01 serial: ZA26YT4A size: 9314GiB (10TB) capabilities: gpt-1.00 partitioned partitioned:gpt configuration: ansiversion=5 guid=52a25657-f7d6-45a2-b0b4-07337d277d16 logicalsectorsize=512 sectorsize=4096 I would like to attach this disk, it is a windows disk formatted in exfat. type this command using serial number you see above: ls -l /dev/disk/by-id | grep ZA26YT4A output in my case is: root@pve:~# ls -l /dev/disk/by-id | grep ZA26YT4A lrwxrwxrwx 1 root root 9 Apr 5 14:58 ata-ST10000VX0004-1ZE101_ZA26YT4A -> ../../sdd lrwxrwxrwx 1 root root 10 Apr 5 14:58 ata-ST10000VX0004-1ZE101_ZA26YT4A-part1 -> ../../sdd1 lrwxrwxrwx 1 root root 10 Apr 5 14:58 ata-ST10000VX0004-1ZE101_ZA26YT4A-part2 -> ../../sdd2 now we can add it to our vm in this way, my VMid is 100, change the command for your id and disk: qm set 100 -scsi2 /dev/disk/by-id/ata-ST10000VX0004-1ZE101_Z852YT4A if all went as it have to be output will be: update VM 100: -scsi2 /dev/disk/by-id/ata-ST10000VX0004-1ZE101_Z852YT4A open from shell your VMID.conf, in my case 100.conf and you should see two pending operation (I renamed scsi2 to sata x. Shutdown VM (no restart) and then start it again In disk utility you have now your new attached disk.1 point
-
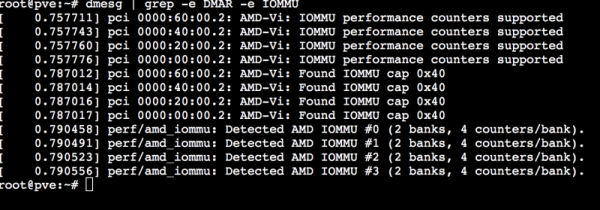
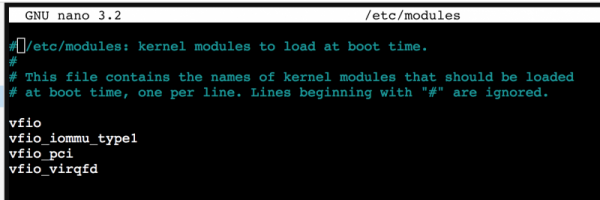
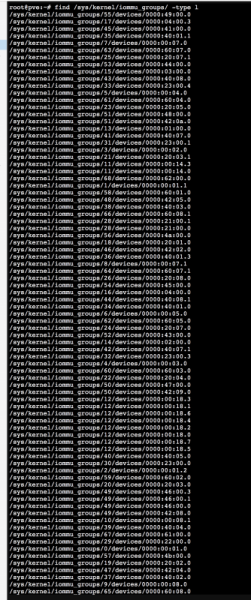
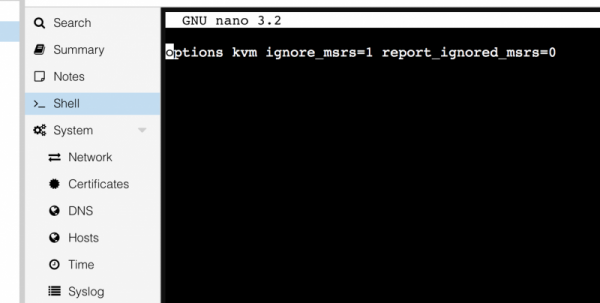
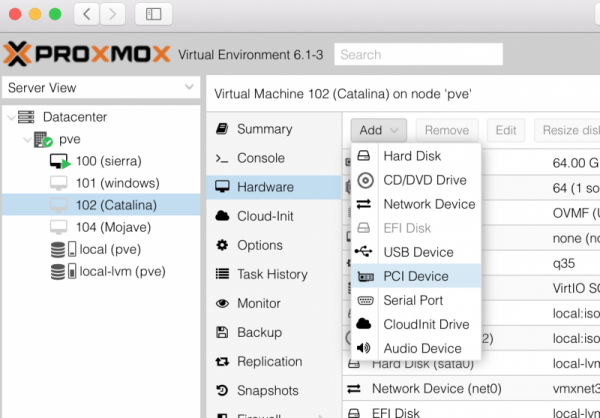
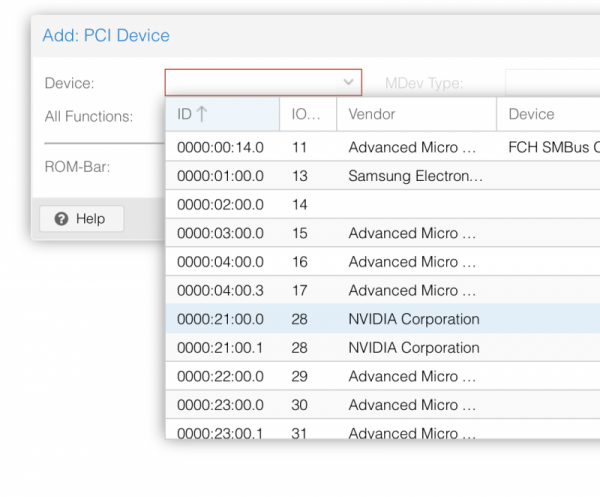
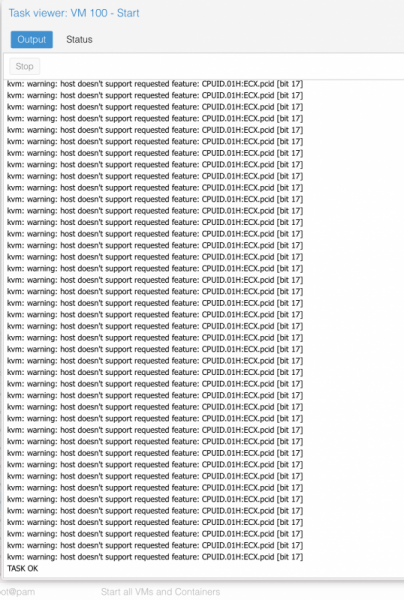
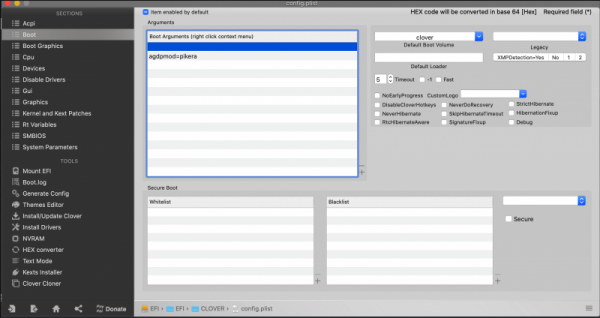
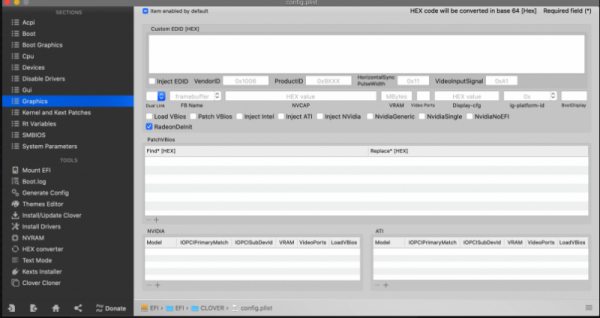
Useful link. Proxmox wiki In this site you can find a tons of useful informations. So read it to clear doubts you can have. Now some useful informations to start thinking to PCI Passthrough. from Proxmod wiki site: Modify grub for your cpu: first step enable the IOMMU. to do this open a shell from Your Proxmox's web interface: type nano /etc/default/grub insert in it "amd_iommu=on" without quote as you see here: ctrl x then Y to save then do not launch upgrade-grub but pve-efiboot-tool refresh then reboot, to verify all is fine, open shell again and type: dmesg | grep -e DMAR -e IOMMU you have a pretty similar output if all is fine..otherwise repeat step above: you can add also iommu=pt to improve some performances in PCI device not in use by your VM. Now another very important part. We need some modules to load, by default they are not loaded: type: nano /etc/modules and add these modules: "Verify also IOMMU isolation (follow Proxmox wiki just in case) (follow my situation which may differ from your)" "To have separate IOMMU groups, your processor needs to have support for a feature called ACS (Access Control Services)." now the tricky thing: Determinate your GPU address: in shell type: lspci and check for your graphic card address: this is my GFX address, then type: lspci -n -s 21:00 you will see: root@pve:~# lspci -n -s 21:00 21:00.0 0300: 10de:1b02 (rev a1) 21:00.1 0403: 10de:10ef (rev a1) root@pve:~# Create a file in etc/modprobe.d/ named vfio.conf: echo "options vfio-pci ids=10de:1b02,10de:10ef" > /etc/modprobe.d/vfio.conf and add on it: options vfio-pci ids=10de:1b02,10de:10ef disable_vga=1 (ctrl x then y) then you have to blacklist the drivers.. PAY ATTENTION and save it , when you reboot after this step it could be possible to have to operate exclusively from Web Pc interface: so type: echo "blacklist radeon" >> /etc/modprobe.d/blacklist.conf echo "blacklist nouveau" >> /etc/modprobe.d/blacklist.conf echo "blacklist nvidia" >> /etc/modprobe.d/blacklist.conf reboot your pc Note.. remember..we have set our VM bios in this way: bios: ovmf GFX need to be UEFI supported visit this link to understand other important stuff just in case: http://vfio.blogspot.fr/2014/08/does-my-graphics-card-rom-support-efi.html then to avoid some crashes add this line in kvm.conf: echo "options kvm ignore_msrs=1" > /etc/modprobe.d/kvm.conf also useful to avoid warning messages in your system log this: echo "options kvm ignore_msrs=1 report_ignored_msrs=0" > /etc/modprobe.d/kvm.conf as advice check always that command went fine in this way ie: for now this is an important step, now we have to access to our previously vm created and add "The passthrough" add PCI Device and choose your GFX: in my case it adds this: and this is enough 😉 to summarize..before rebooting check this files: grub.cfg blacklist.conf kvm.conf vfio.conf and see if all stuff is there. After reboot in your Threadripper you will see initial Proxmox VE Boot menu (blue one page) and the only two lines (loading stuff) If not check again all steps above. Remember some Mandatory parameter: 1) mce=off in grub 2) all conf files set properly for your system/GPU and so on 😛 If you see only those two lines..launch your vm in your Web interface or via terminal command : qm start 100 and see the log: this is good 🙂 (warning message disappear if you do no t use +pcid in VM conf boot args) this no 😛 Any different case could be possible... remember to check Proxmox wiki if some different problems appear! For now is enough..I will check this guide and if you find some incongruence fill free to declare. added 24-04-2020 The above GPU configuration is perfectly calibrate for my system and my Nvidia TitanXp GPU I have asked @Imanol to describe procedure for a different GPU (AMD 5700XT). He had success following this guide and now he is helping me to show you how he did with his Navi card. this is working in his system, maybe you have to adapt it for your system. ------- I'll share some tips to get the 5700XT GPU passthrough working. This can be helpful for other people using AMD GPUS. I had to do some extra things: The default GPU BIOS doesn't have UEFI enabled. Instead of updating the firmware, which is risky (or non existent tools) , you can download a ROM with UEFI support and let proxmox load/expose it when starting the VM. In my case I downloaded this rom (https://www.techpowerup.com/vgabios/212439/gigabyte-rx5700xt-8192-190616). You have to copy it to: /usr/share/kvm/5700xtcustom.rom and specify the ROM file in the GPU pcie passthrough line vm conf: hostpci1: 03:00,pcie=1,x-vga=1,romfile=5700xtref.rom Additionally, I had to enable some extra flags in clover or it didn't boot correctly. Make sure that you pass the agpmod=pikera boot argument. In graphics settings enable RadeonDeinit. Make sure that InjectATI is correctly disabled. If you are using clover configurator press the checkbox twice, otherwise it's enabled by default. I forgot to mention that to make my 5700XT passthrough work I needed to unbind some system drivers and framebuffers before launching the GPU. Just blacklisting the GPU drivers, enabling nomodeset in Grub or setting GRUB_GFXMODE_LINUX=text in grub didn't work for me. Those unbinds need to be done each time you restart the computer, before launching the VM. I automated it using the linux crontab utility. First open crontab config using this command in a proxmox terminal: crontab -e Add this line into the document and save it: @reboot /root/unbind.sh Create a script in the specified path: nano /root/unbind.sh Add those unbind command (Change 03:00 with the PCI address of your GPU): #!/bin/bash echo "0000:03:00.0" > /sys/bus/pci/drivers/vfio-pci/unbind echo 0 > /sys/class/vtconsole/vtcon0/bind echo efi-framebuffer.0 > /sys/bus/platform/drivers/efi-framebuffer/unbind Don't forget to set the correct permissions for the script after saving: chmod 755 /root/unbind.sh Now, each time you restart the computer proxmox will run this script and the guest mac VM will launch without any conflict. ------- Important stuff: macOS86.it is a free site and people here are helpful if tone remain in a calm way..Any different approach will not be tolerate . Now some kudos: to algrey and @Shaneee for their work to understand if there is a way to have this new chip booting in a real hack (for now not possible at all) best people here @Gengik84 to host this and solving many problem for us @Ciro82, @carlo_67 @iCanarofor their invaluable passion and help @tomnic who is corresponsible of this "success"..we can define this hack..."The first AMD Hack fast then ever" Have a nice life1 point
-
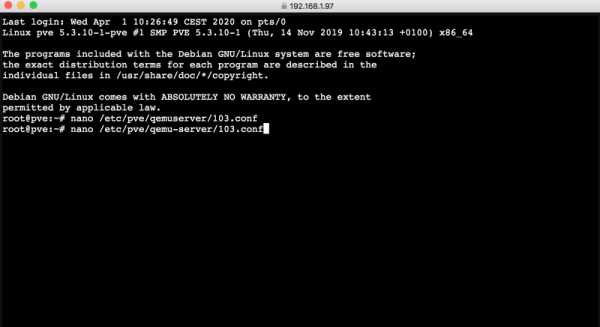
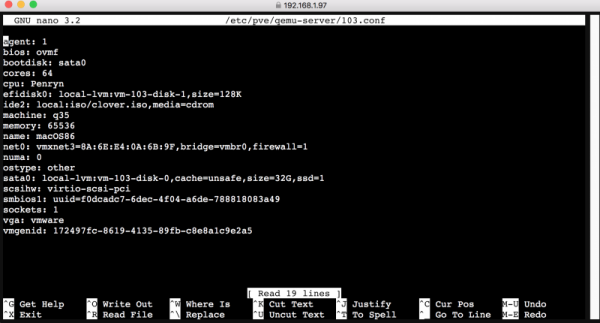
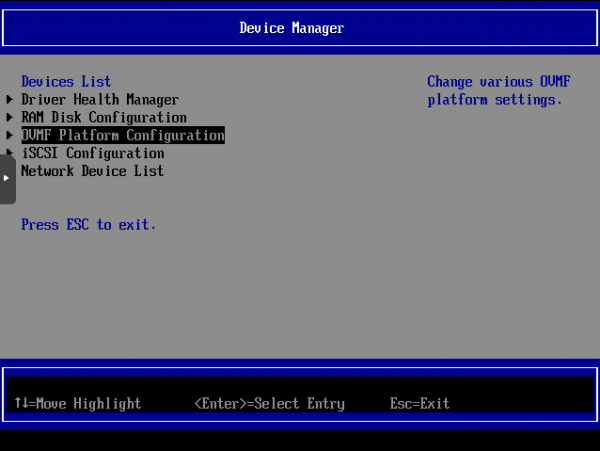
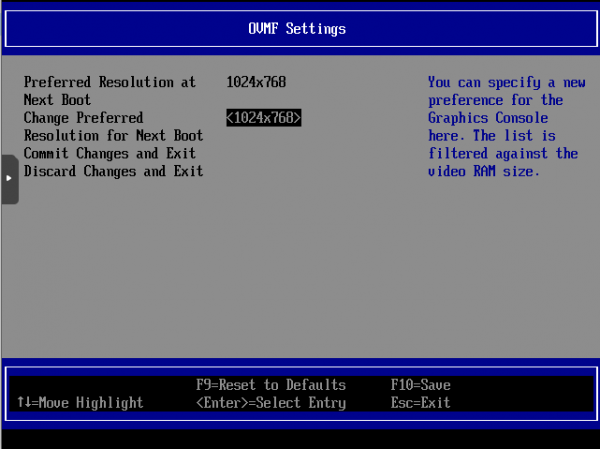
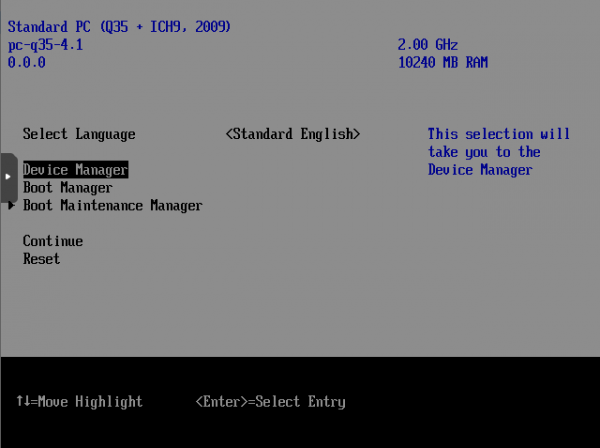
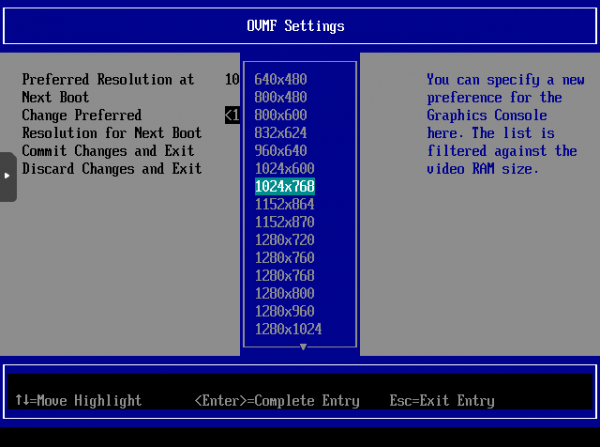
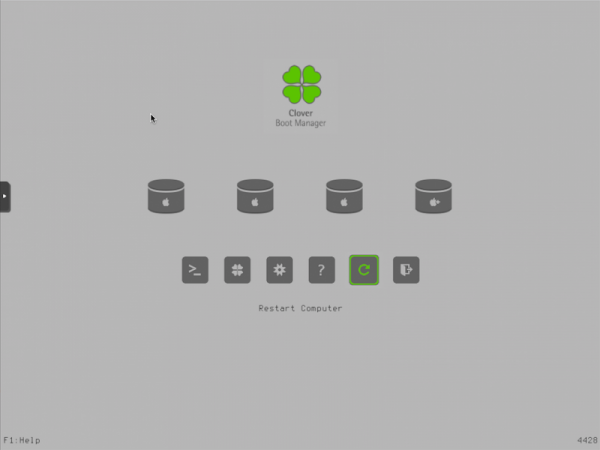
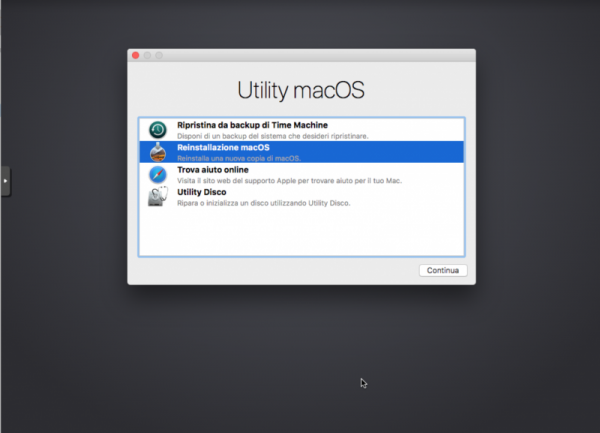
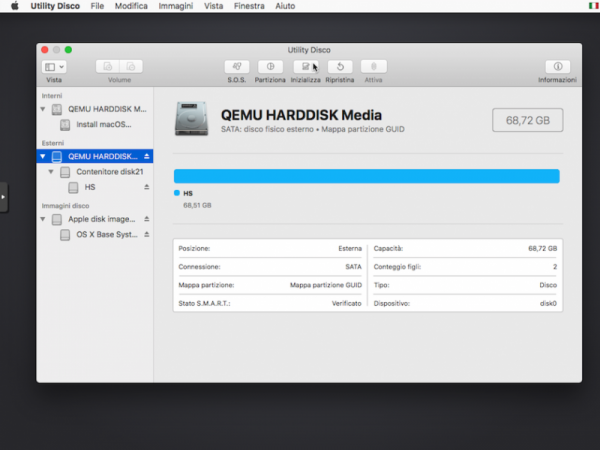
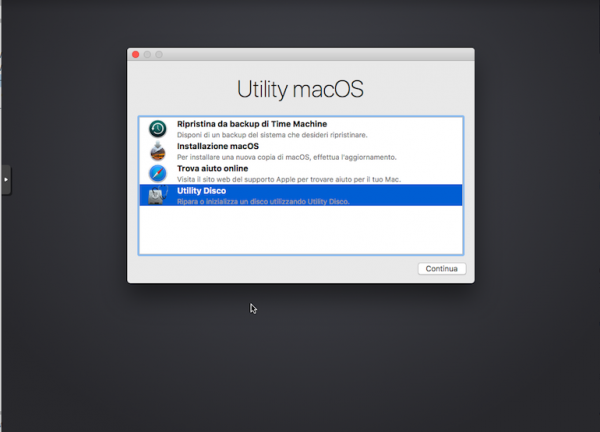
We have to modify manually some part of our VM configuration files and this is stored in /etc/pve/qemu-server/<VM id>.conf file. We have to add as boot arg OSK key and other cpu features not present in old Penryn CPU. So, open a shell: I repeat myself, node name for me is pve, VM id is 103..for your system could be different. you wìll have: now insert this: (Nicholas Sherlock's site) args: -device isa-applesmc,osk="ourhardworkbythesewordsguardedpleasedontsteal(c)AppleComputerInc" -smbios type=2 -cpu Penryn,kvm=on,vendor=GenuineIntel,+kvm_pv_unhalt,+kvm_pv_eoi,+invtsc,vmware-cpuid-freq=on,+pcid,+ssse3,+sse4.2,+popcnt,+avx,+aes,+xsave,+xsaveopt,check -device usb-kbd,bus=ehci.0,port=2 then for a base system reinstall installation: ide0: local:iso/hs.iso,cache=unsafe ide2: local:iso/clover1.iso,cache=unsafe,size=256M or to a full dowloaded iso installer (with the help of VM_Assistant: ide0: local:iso/MacOS_Installer.iso,media=cdrom,size=9G ide2: local:iso/clover1.iso,cache=unsafe,size=256M to have: or: to save press ctrl x / y return now you can select your vm and select Start. Now we have to do some basic stuff to have the chance to start an OSX VM. Follow instructions here to do it simply (Nicholas Sherlock's site): link to OVMF patch ** ** In my system is possible to boot in the same way with clover or OpenCore, without patching this deb file reverting to a not patched file seems to solve also my problem of maintaininga correct boot order in bios settings I leave this step on this guide but you have to verify by yourself if you need or less of this patch (think no...but..it is up to you!) *NOTE* there is a bug , it produces on cold boot weird video result . Proxmox dev have solved this in a new commit! https://forum.proxmox.com/threads/ovmf-screen-resolution-bug.55418/ after that, you can press start on Proxmox web interface to launch the OSX setup process. In this part pay attention to screen resolution (we learn how to modify it if you have scrambling multiple resolution on your display ) You have to match config.plist resolution with OVMF bios resolution pressing F2 to key when you see Proxmox Ve logo on screen* Added on April 9, 2020: In opencore bootloader scrambling graphics is not present at all..so maybe it is a clover bootloader problem press F2 here then click on Device manager and choose: Then verify if Preferred resolution at Next Boot and changed Preferred match. If they do not match open selection and choose the same resolution: Then press F10 (save settings) and commit changes. Reset, now you should see clover boot menu If you see scrambled test or resolution restart computer (clover button) and enter again the procedure above (Opencore solves this problem) If all went fine you can start to install OSX. choose usual bootmacOS install icon and...Gooooooo... Note: if you want to see verbose mode press O and insert -v option also pressing spacebar you can choose -v flag your choice 😉 Ok after few minutes you should see: used here reinstall method.. with latest VM assistant script you can convert your previously downloaded install macOS app and use a full installer to do installation (more faster and useful if you have a no fast internet connection)* To download a full installer you can use this app: runme (a script based on Greg Neagle job) *now it is possible to use new version of VM Assistant for this task So select DiskUtility and format VM disk in usual way: then close Disk Utility and start to instal/re-instal as usual Here it is mandatory to have a working ethernet connection if you use reinstall option (base system.dmg based) After some time system reboot and second steps of installation start. After some reboot (the same steps you have in a real hack) you should see login initial option configuration phase. next..some important part for the main goal of this guide.. GPU passthrough!1 point
-
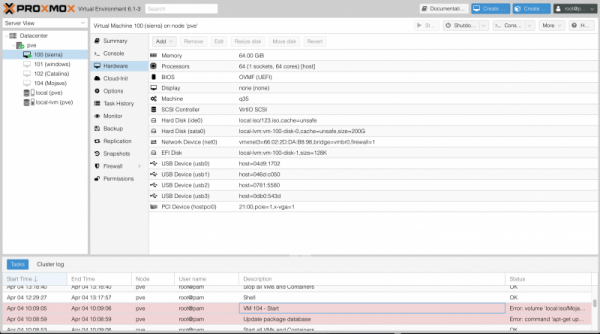
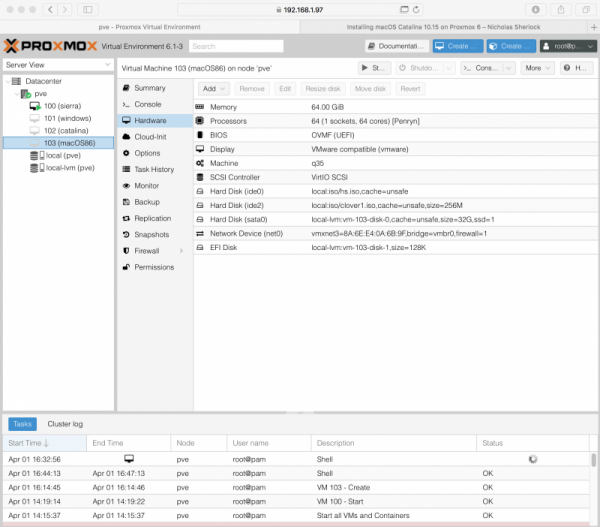
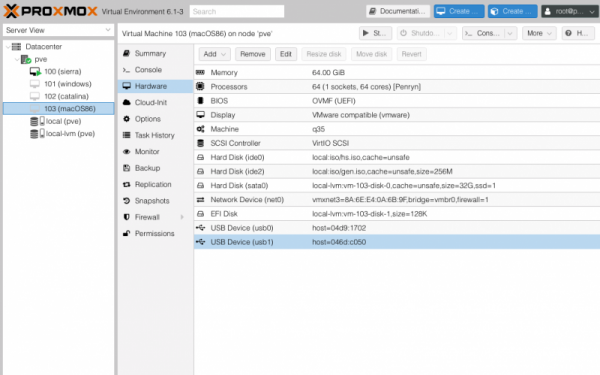
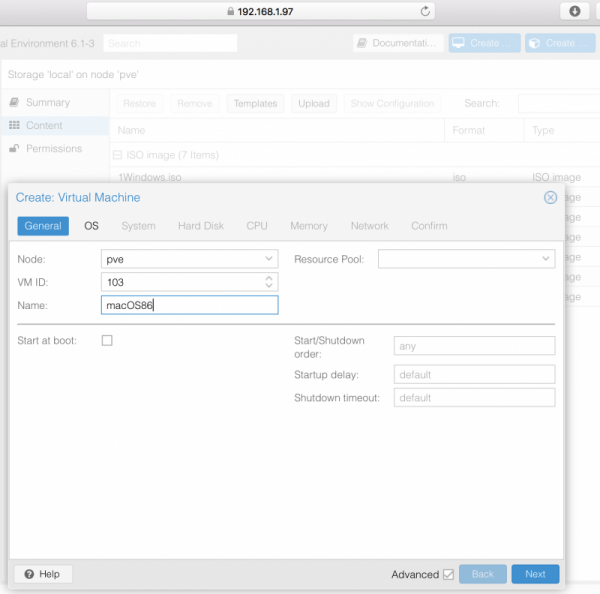
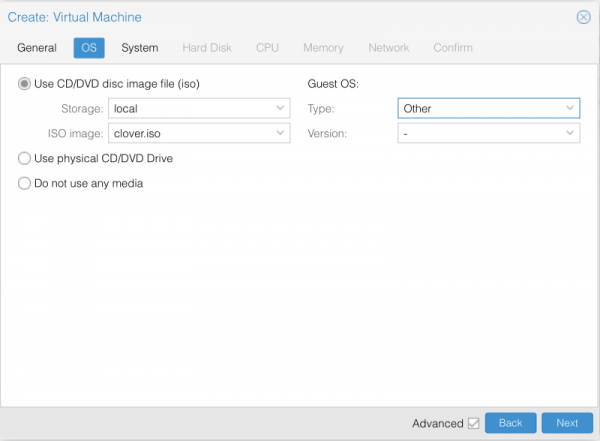
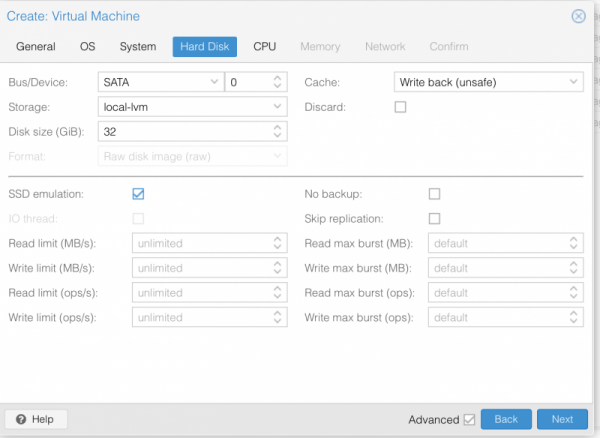
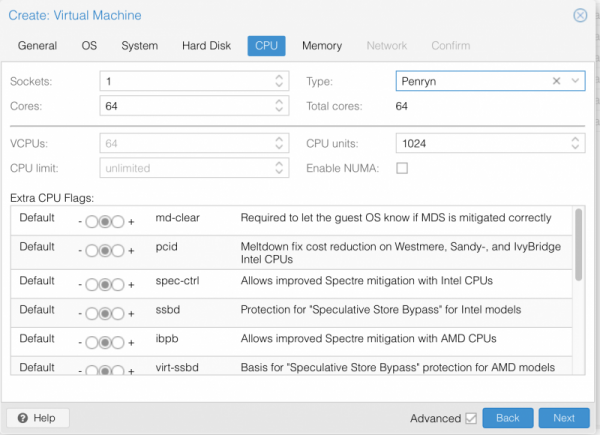
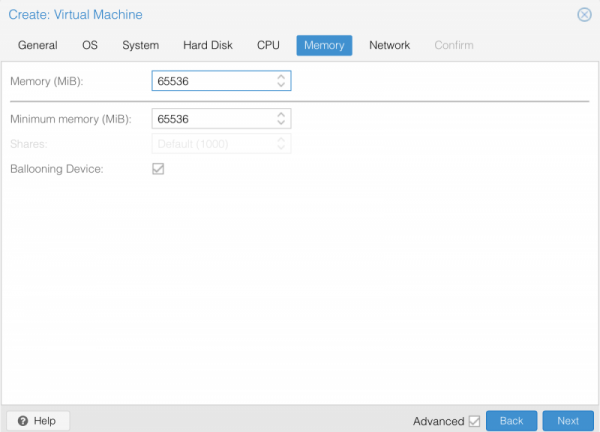
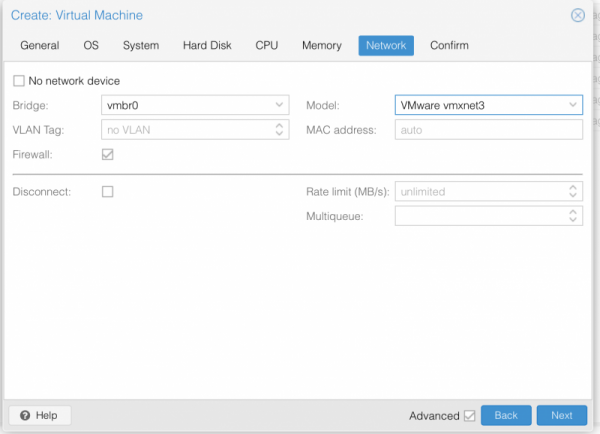
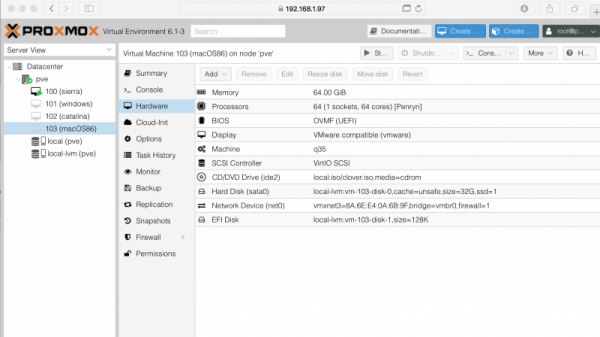
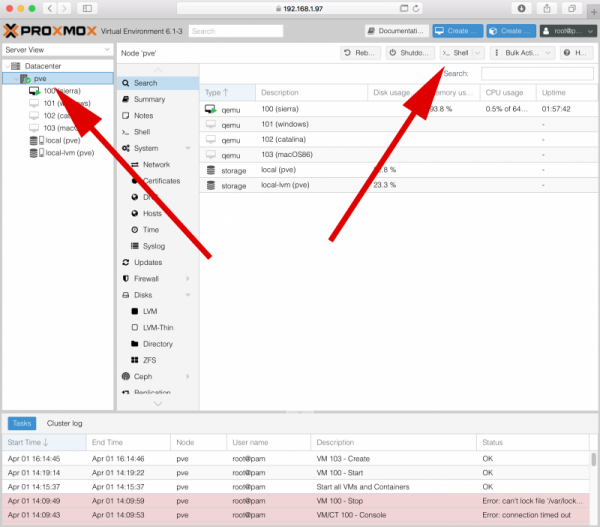
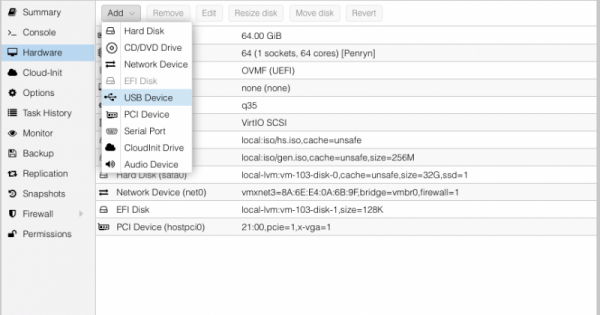
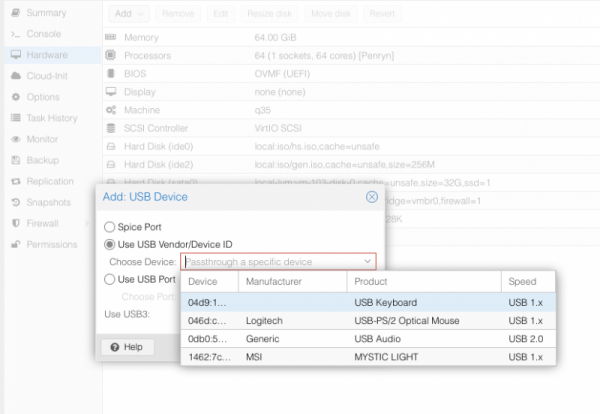
and now....Virtual machine creation. Create button, start to fill all data in the same way I did. Put a flag on Advanced, name your VM in my case macOS86 and go on choose local in Storage tab, clover.iso in ISO image and Other in Guest OS type, next. Now important page (system) . We come back here to the last part of this guide to configure GPU passthrough , for now in Graphic card us VMware compatible, in BIOS OVMF (UEFI) in Machine Q35 in storage local-lvm, then next Hard disk section. Here I have configured in a simple way, pretty similar to other guide, but it is possible to apply many solutions based on your skill to configure this beast... Bus/device SATA cache write back Unsafe, Storage local-lvm, size 32 (as you want), flag on SSD emulation. press next to go to CPU part. In a VM cores and thread are the same (not sure but..hey..I am not an expert 😛 ) so fill as following image, Sockets 1, Cores 64, Type Penryn, flag on enable NUMA, leave default all other parts. You can also try others CPU type but no different results. In a windows VM you can use Host as Processor type. In OSX no! (not really true..we discover it later) next to the memory part. Here you define memory passed to th VM. It is not possible to pass all memory to VM, in my case I can pass about 125 Gb*, in this VM I will use 64 GB (65536 Mb) *less is better, now I am using 118 Gb Next network part. This is very important because it will be mandatory to complete Osx installation (if you use BaseSystem.dmg ReinstallOS method) I use for now VMware vmxnet3 and leave the rest as is. next step review all your selections in confirm tab and If all is ok finish it. Now we have to modify some stuff in a terminal shell so click on node and to shell as shown in this following pictures: now we have to passthrough our keyboard and mouse (I have it connected via USB port) In hardware tab select add and see following pictures: do the same for usb mouse. Important note: disable USB 3 flag otherwise usb are not working for this now..the linux part of VM creation.1 point
-
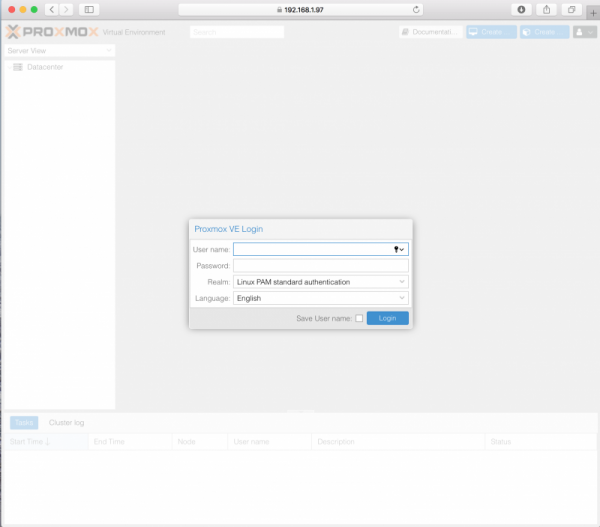
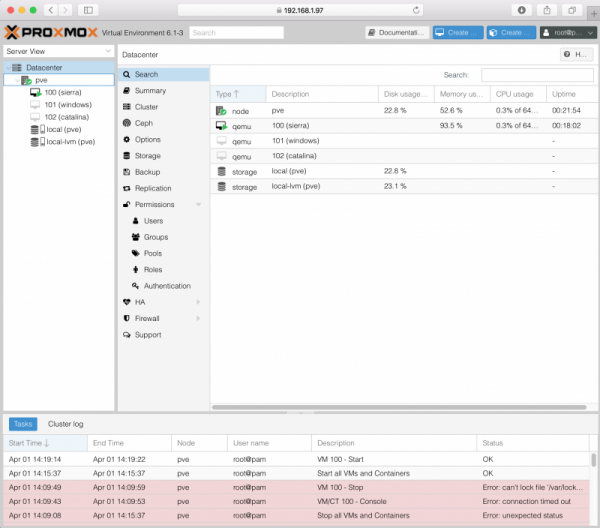
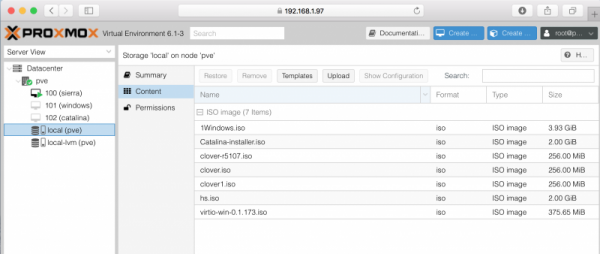
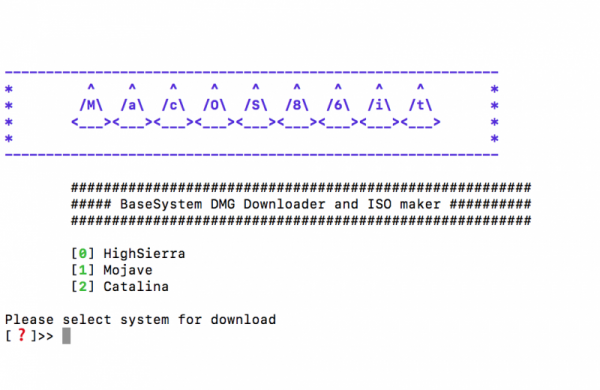
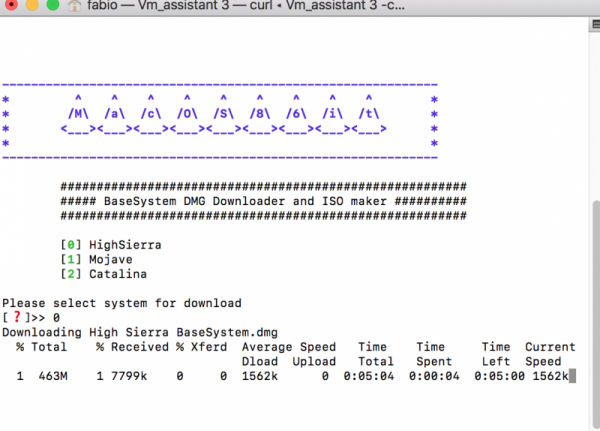
Now, with our Threadripper PC on we have to use another pc or tablet (also phone) connected in the same network, cable or wi-fi is fine Open your browser and digit the address noted above and you will see Proxmox web interface login mask: For the VM configuration part we will spend some time here Login with user name root and password your previously inserted password and you will see: Proxmox has a main subscription way to have a more business support, you can click simply on ok to go on. This is the main page. You can see I have configured 3 VMs and now we start to configure new one. you should have this page empty only pve node and local and local-lvm voices See on the storage 'local' pn node "pve" the upload button. This is the place where we upload things useful like OSX installer or clover iso to use in installation process. We need of new shining script made by @Gengik84 for macOs86.it users to simplify some process, you can reach similar result using other script but this is very simple to use. So download VM assistant from and execute it: choose system you want to install (you need an internet connection for all this process and also for the installation) In my case HighSierra. choose 0 VM Assistant terminal options: ------------------------------------------------------------- Usage: Show this help page: /Users/fabio/Desktop/VM_Assistant-2 -h ------------------------------------------------------------- Download latest clover for VM: /Users/fabio/Desktop/VM_Assistant-2 -dc or /Users/fabio/Desktop/VM_Assistant-2 --downloadclover ------------------------------------------------------------- Convert Installer.app to ISO: /Users/fabio/Desktop/VM_Assistant-2 -cti or /Users/fabio/Desktop/VM_Assistant-2 --apptoiso ------------------------------------------------------------- Download Catalina full Installer: /Users/fabio/Desktop/VM_Assistant-2 -dcata or /Users/fabio/Desktop/VM_Assistant-2 --downloadcatalina ------------------------------------------------------------- Download Mojave full Installer: /Users/fabio/Desktop/VM_Assistant-2 -dmoja or /Users/fabio/Desktop/VM_Assistant-2 --downloadmojave ------------------------------------------------------------- Download HighSierra full Installer: /Users/fabio/Desktop/VM_Assistant-2 -dhs or /Users/fabio/Desktop/VM_Assistant-2 --downloadhighsierra ------------------------------------------------------------- when all is done you can find on your desktop a new folder named Apple_DMG with inside: 10_13 folder, hs.iso and clover1.iso files (their name could be different). You can now upload them via web interface pressing upload button. In this place you have to upload all iso useful to create a VM (also windows.iso or other linux iso if your goal is to instal others system) Osx needs of clover1.iso and hs.iso (boot loader and Osx installer), nothing else!1 point
-
1 point
-
0 points
-
0 points


