Leaderboard
Popular Content
Showing content with the highest reputation on 04/11/2020 in all areas
-
2 points
-
Version 1.1.0
272 downloads
Unico SSDT per abilitare il power management su varie serie Molto più utile per OpenCore Attualmente supporta e abilita il PM, indistintamente da Desktop o Laptop, su: Haswell Skylake Skylake-R Kabylake Kabylake-R Coffelake Whiskeylake Icelake Nota: per IvyBridge è consigliato usare ssdt_automator che crea un ssdt apposito basato sul lavoro di Piker Alpha Ringraziamento speciale al team ACPICA per tutte le loro preziose informazioni la versione decompilata (.dsl) è disponibile qui: https://github.com/macos86/OpenCore-Utility/blob/master/SSDT-PM-All.dsl1 point -
Auguro che passiate tutti una Sana e Serena Pasqua e che possa allontanare questo Male atroce che è arrivato che possa andarsene in silenzio come è arrivato Ricordiamoci in questo giorno tutti i nostri compatrioti e non che ci hanno lasciato e che piangiamo ogni giorno AUGURIII A TUTTO IL FORUM ( la seconda famiglia specialmente in questo Periodo )1 point
-
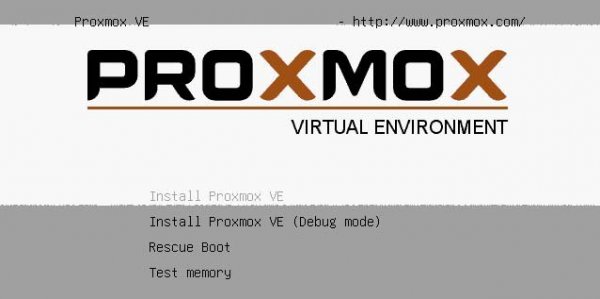
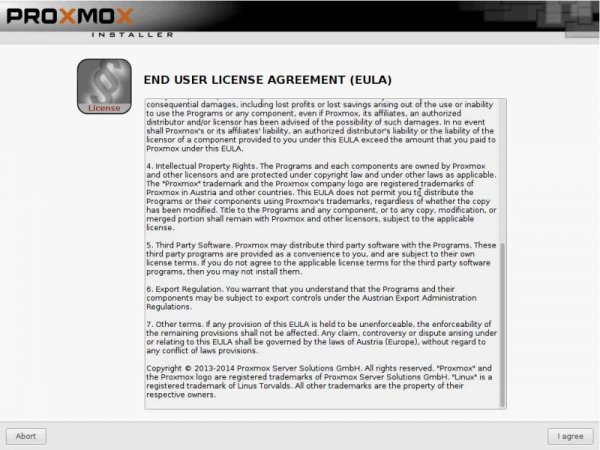
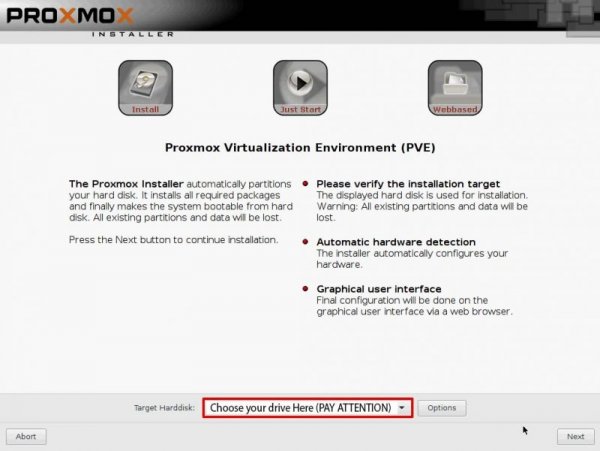
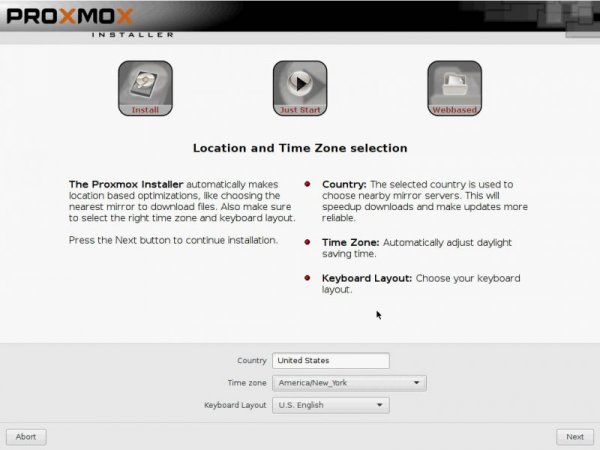
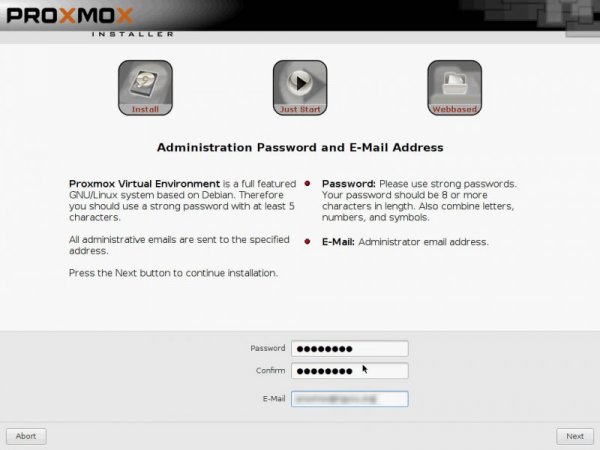
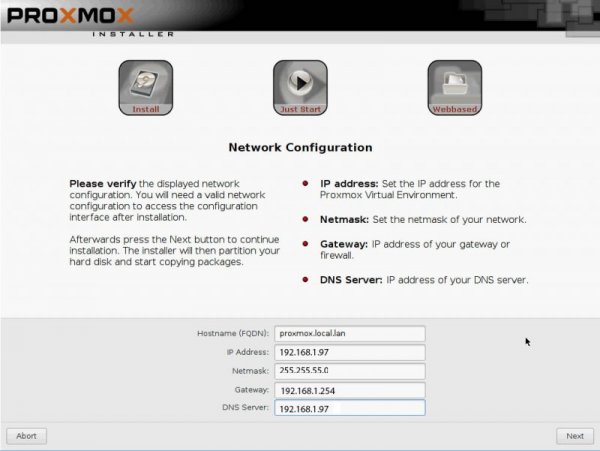
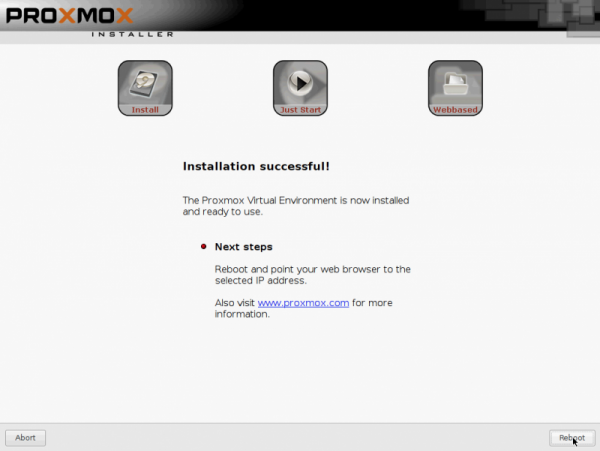
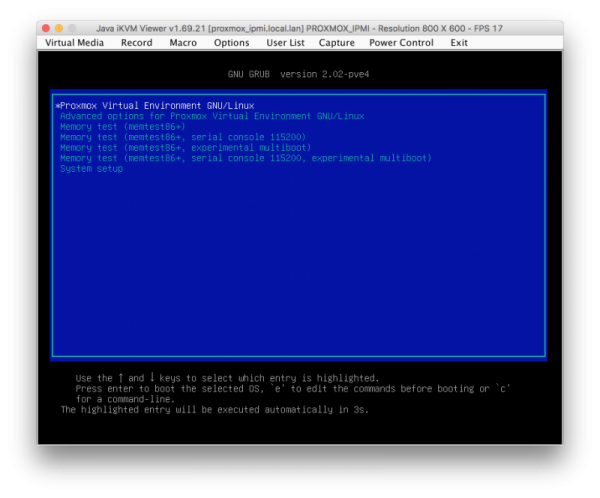
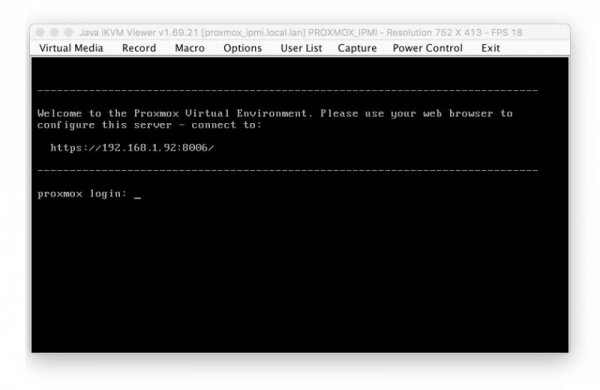
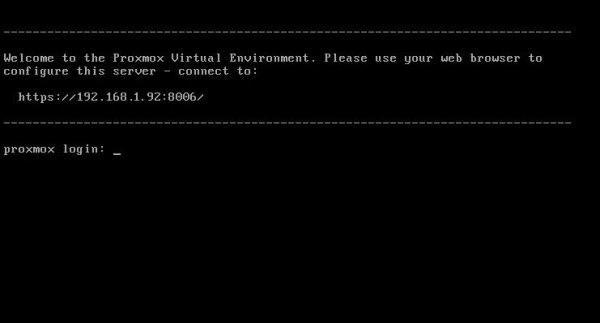
Preface: Inspired by the lack of patches for this new ThreadRipper CPU series , I have started to find a way to have "the fast Amd hack ever". Hard task was to setup a pretty bare machine inside an OSX linux vm. Many solutions were evaluated to reach this important goal. Ubuntu, CentOS, UnRaid and so on Tested many VM and found many interesting stuff on the net. Kholia's or foxlet's GitHub guide for example or nicksherlock's guide more Proxmox like. With these guide is possible to start our job and to have a working OSX..but I need more! 😉 I want to use my single Nvidia Gpu on it and for it I need a different approach. Single GPU usually is a pain because when we passthrough* it to the guest PC..we will loose it. So, we have to use another PC to connect in it or a simple Android or iOS tablet (now I am use my iPhone for this task 🙂 ) So, after some days of brainstorming with @tomnic we choose to start with Proxmox VE. It seemed the most flexible linux distro to reach my goal. macOS High Sierra and Nvidia web driver installed with no compromise. Proxmox Ve allows to build a bare metal system with Gpu passthrough, and, most important thing it has a web interface to control guest PC * Passthrough is a technique to "pass" hardware to a virtual machine loosing only a minimal part of hardware performance More difficult and critical task is passthrough our hardware to VM in a way which will allow me to have a pretty similar performance as a real hack and overall to have GPU at its best in this system. Prequisites: A minimal linux experience (I have had no idea before about linux and this was the main difficulty for me) To know what to search usefull for my need! A OSX, linux or windows system to collect some files (I have used used linux and OSX, with latest one preferred. System configured is in my signature, summarized here: MSI Trx40 10G Pro AMD 3970x Threadripper 32 cores / 64 threads (this guide is also useful for 3960x and maybe for 3990x (capping cores not supported by OSX kernel) 1Tb Nvme Sabrent and so on... Let's start! Mandatory Elements: 0) Proxmox VE (Proxmox Ve's wiki link) 1) a working OSX. Linux, Windows ( in this guide we use OSX High Sierra 10.13.6 2) download Vm_assistant's script, an exclusive script by macOS86.it and @Gengik84 VM assistant From this link a simple guide: Promox VE installation procedure: In this guide I will not do a detailed guide to install this linux release, you can find useful information on: link to Proxmox link to iso installer Use your favorite Iso installer to produce a bootable USB pen drive (8gb or more is fine) In this guide I have used Balena Etcher: link Balena Etcher Warning for initial installation part! * Due a problem with new TRX40 motherboard , ProxMox 6.1 and lower will hang on early booting stage. To avoid this you have to modify grub.cfg file in this way: find this line: linux /boot/vmlinuz-5.3.10-1-pve root=/dev/mapper/pve-root ro quiet with this linux /boot/vmlinuz-5.3.10-1-pve root=/dev/mapper/pve-root ro quiet mce=off adding mce=off allows us to start this exciting journey.... Alternatively you can modify this line directly on boot menu selection before selecting your choice (press E and add mce=off as shown before) thanks @KTC for pointing me in the right direction * this problem could be resolved with a future Proxmox update SOLVED in Proxmox 6.1-3 and greater step 1: boot from your ProxMox Ve USB pen drive, you will have: select Install Proxmox VE and then follow indication you can see below. Note Fill your network data with your (setup should do it for you except for Domain and your email) Installation is done! 😛 Reboot and choose your usb pen drive and boot from it. In a few second you will see: Now pay attention..if you have not modified grub.cfg...you MUST do it now pressing E on keyboard and adding manually mce=off as previously shown. You have also to remember to do it permanently when we start in Proxmox VE first time. At login user is root password (your previous choice during Proxmox installation) now it is possible to be a bit worried..if you are (as I was) not confident with linux command)..but I will try to stay more simple I can. Start to find googling how to read or to modify some files in linux (text configuration file I mean). I have used nano command..you can also use vim or similar command. Now, take note of link you can see in this picture: https://192.16.1.92:8006 (yours could be different) and the magic starts : )1 point
-
Ciao speeed83 ad una veloce occhiata del config vedo che nella sezione devices properties è iniettato un edid anche per il secondo schermo la stringa è: "AAPL01,override-no-connect" devi eliminare quella stringa. Naturalmente per non crearti problemi nella fase di avvio ti ricordo di fare le modifiche prima nel config della usb. poi una volta accertato il funzionamento modificare quello presente sulla unità interna1 point
-
si esatto, rimuovi il vecchio e rinomini *Giorgio in DSDT.aml1 point
-
a regola sono quelli i driver che risolvono quel problema in caso vedi le info anche mentre installi clover, se vai sul relativo driver, sotto dovrebbe dirti a cosa serve circa1 point
-
ok ragazzi, allora dovremmo aver risolto tutti i problemi; tramite tasto d'accensione entra e esce dallo stop tranquillamente e una volta cambiate le batterie alla tastiera quest'ultima è tornata a ricollegarsi istantaneamente al risveglio, per cui credo che finalmente posso dire che l'hack è perfettamente ottimizzato. non immaginavo delle simili prestazioni e una compatibilità di questo tipo con un hardware di recupero cosi obsoleto, ma voi siete dei maghi e sono sicuro riuscireste a far girare nativamente osx anche sulla mia macchina del caffè. vi ringrazio tantissimo; macos86 si dimostra come al solito la top comunity hack della storia ps: ah ci sarebbe un ultima virgola un ultimo problemino riguarda l'inutilizzabilità del mouse sulla Gui di Clover, che nonostante venga rilevato correttamente, il cursore scompare ad ogni movimento e riappare da un altra parte dello schermo solo dopo che clicco ed il mouse è fermo. ho notato che non mi fa nemmeno accedere con doppio click alla partizione se riesco a posizionarlo sopra l'icona del boot dell'ssd (con tanta fatica). pensavo fosse un problema di driver ma nella cartella avevo già messo: UsbMouseDxe.efi, e per precauzione anche XhciDxe.efi ovviamente non è un problema rilevante in quanto posso benissimo selezionare il disco da bootare e premere invio con la tastiera, o mettere un countdown da Clover, ma già che ci ne approfitto e ve lo chiedo1 point
-
@foskvs non ti ha detto di cambiare versione di macOS, rimani con high sierra, ma lo devi aggiornare all'ultima release rilasciata, altrimenti sarà difficoltoso attivare la grafica della iGPU UHD630 che hai tu (coffy lake refresh) tutto chiaro?! aggiorna e poi vediamo per la grafica ora SSDT x hack è correttamente caricato 👌1 point
-
no devi usare tasto power sul case per forza adesso1 point
-
normale che tu debba usare il tasto power per risvegliare con ultimo dsdt controllo il resto1 point
-
Quello può essere un effetto collaterale comune. Di solito, è meglio disabilitare il risveglio da USB, perché causa problemi.1 point
-
Hi, I prefer a public discussion so it is useful for other For your question I have only executed a VM not 2 or more togheter My main goal was to have a perfect hackintosh and it is a near task 🙂 For now I have passed audio (working on it because it seems to be shared its IOMMU group) , HDMI/DP audio (perfect with a ssdt created by @Gengik84here) nvme and all sata disk passed Nvidia passed...1 point
-
nessuna fissa, è come dici, da provare ed ognuno trovare il proprio punto di equilibrio poi iMacPro si può lasciare la iGPU attiva con e senza uscita video se @alboz nel thread del suo hack mi posta il config, posso prepararne qualcuno per vedere che abbia iGPU attiva ma con videoproc gli veda la 5801 point
-
Ciao Ragazzi, scusate per l'assenza, diciamo che tramite vie traversa sono riuscito a contattare baio77 che si è dimostrato molto disponibile nel problema del trackpad i2c. In questo momento scrivo dall'hack; diciamo che in questo momento dovrei giusto cambiare la scheda interna wifi e risolvere un fastidiosissimo problema con lo schermo, ho un effeto banding assurdo che si manifesta con l'attivazione del ci/qi1 point
-
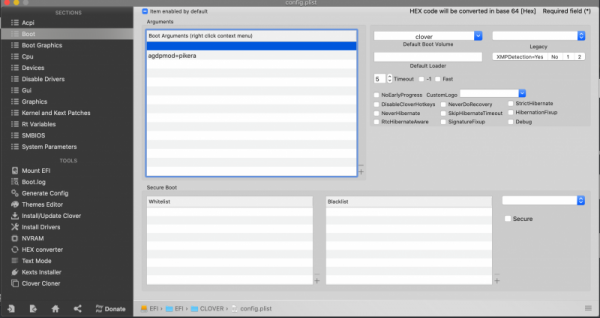
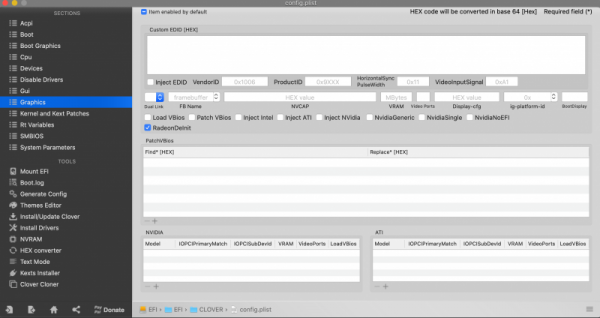
Thanks Fabio for this excellent guide! I got my hackintosh working! I'm using 3970x, 5700XT GPU passthrough, and MP600 NMVE passthrough. Performance is great. I'll share some tips to get the 5700XT GPU passthrough working. This can be helpful for other people using AMD GPUS. I had to do some extra things: The default GPU BIOS doesn't have UEFI enabled. Instead of updating the firmware, which is risky (or non existent tools) , you can download a ROM with UEFI support and let proxmox load/expose it when starting the VM. In my case I downloaded this rom (https://www.techpowerup.com/vgabios/212439/gigabyte-rx5700xt-8192-190616). You have to copy it to /usr/share/kvm/5700xtcustom.rom and specify the ROM file in the GPU pcie passthrough line vm conf: hostpci1: 03:00,pcie=1,x-vga=1,romfile=5700xtref.rom Additionally, I had to enable some extra flags in clover or it didn't boot correctly. Make sure that you pass the agpmod=pikera boot argument. In graphics settings enable RadeonDeinit. Make sure that InjectATI is correctly disabled. If you are using clover configurator press the checkbox twice, otherwise it's enabled by default.1 point
-
1 point
-
dico così perchè diverso tempo fa provai codifica stesso file sul notebook dove con high sierra lavora la 970m e sulla Z370 con la vega 56 in cui però su videoproc si veda la UHD630 per la codifica... il risultato finale fu che il portatile rullò di brutto come tempi quello che allora era il mio hack più performante, aveva finito quando l'altro stava a poco meno di 1/4 del lavoro... ergo, meglio avere la GPU o NA su videoproc 😉1 point
-
avevo chiesto se non lasciavi dentro la cartella apple che non serve e pesa un botto, stare più attenti prego 🙂 sostituzione totale EFI, al desktop esegui e posta ioreg ti ho attivato audio analogico, spostando applealc da off a other con layout 7 nel config EFI.zip1 point
-
1 point
-
la dmg è come fosse una cartella diciamo compressa, quindi tu la devi montare ossia aprire, dopo avrai accesso al contenuto e troverai il vero e proprio installer.app questo è quello che serve 🙂1 point
-
1 point
-
aaaaaah perché da safari sulla vm non avevo effettuato il login!1 point
-
1 point
-
Senza 710 si blocca sempre lì..con la 710 avvio possibile sono se metto il flag nv disable altrimenti arriva alla mela con linea che arriva alla fine senza andare nella pagina dove si sceglie la lingua1 point
-
1 point
-
1 point
-
Ciao Carlo, è un bug indipendente da hack infatti poco sopra @tomnic posta una patch prodotta da apple con Proxmox VE non usiamo patches...installazione pressochè vanilla 😉1 point
-
1 point
-
1 point
-
Now a tricky part if you are not confident as I am not with linux.. If you have followed this guide you have (maybe ) a working VM and you are experimenting things.. One of the most important think in an OSX installation is bootloader EFI folder and its content. Now when you upload bootloader iso files in Proxmox you have an iso extension but it is a sort of img file converted in iso, not accessible in a simple way, so, if you need to modify it or change something inside it is hard to achieve (rebuild a proper Efi structure with @Kholia script or similar method with all things you need (ssdt, kext, efi drivers, config and so on adapted for your particular pc) We learn here how to transfer a file from guest to host and vice versa. Thanks @tomnic to point me in right direction with very useful example. first part: Copy a file from OSX folder to host linux Host root via terminal windows in osx: ie 4428.iso file I have in /Users/fabio/Desktop/fab_iso path I would like to copy in: host root my host address is: 192.168.1.97 open terminal windows and type: scp /Users/fabio/Desktop/fab_iso/4428.iso root@192.168.1.97:/ insert your root linux password and you will have this: root@192.168.1.97's password:******* 4428.iso 100% 256MB 212.7MB/s 00:01 iMac-Pro:~ fabio$ scp /Users/fabio/Desktop/fab_iso/4428.iso root@192.168.1.97:/root Open a shell in linux via Proxmox web interface and in it type dir: file is there ! try to do the same by yourself from host to VM guest. just in case.... 😉 iMac-Pro:~ fabio$ scp root@192.168.1.97:102.conf /Users/fabio/Desktop/fab_iso/ root@192.168.1.97's password: 102.conf 100% 858 227.8KB/s 00:00 iMac-Pro:~ fabio$1 point
-
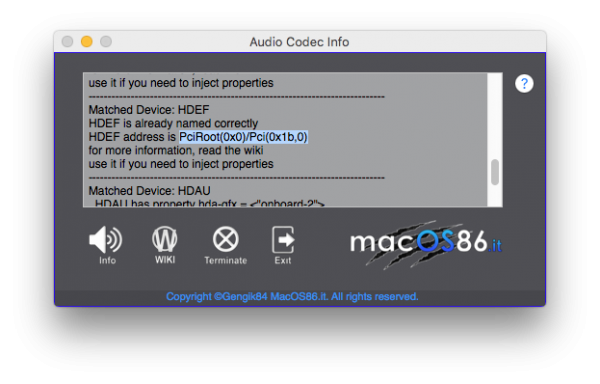
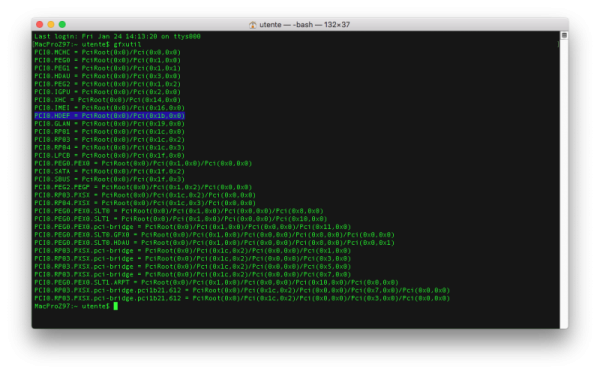
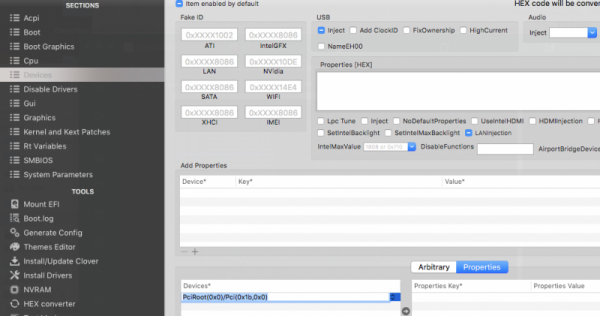
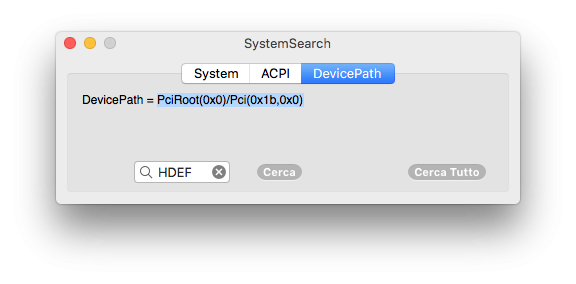
tentativo di guida per principianti 🙂 Per quale motivo si dovrebbe iniettare l'audio da properties? 1- perché con l'iniezione classica di Clover non funziona 2- perché si vuole usare OpenCore NB: prima di procedere, leggere la nota 1 in fondo Per iniettare l'audio analogico in properties, occorre determinare il percorso PCI dell'audio HDEF con uno dei seguenti strumenti: A >> Audio Codec Info B >> gfxutil (consigliato per hack AMD) C >> System Search [ ottimo per piattaforme AMD e Intel] Basta inserire HDEF nel riquadro in DevicePath e cliccare cerca e si otterrà il percorso PCI della propria periferica audio Una volta determinato il percorso PCI HDEF lo inseriamo nel config con Clover Configurator devices --> properties --> devices clicchiamo su + ed incolliamo il percorso poi clicchiamo + nel riquadro di destra ed inseriamo il layout attivazione basta scrivere layout-id ed inserire il numero come NUMBER nella maggior parte dei casi funziona perfettamente. Esiste qualche caso ostico in cui l'iniezione con numbers non viene caricata, nello screenshots ho riportato i tre esempi, il primo evidenziato è quello con DATA e in questo caso sicuramente viene caricato, NB: occorre prestare attenzione che con data il numero deve essere convertito da decimale a HEX, nell'esempio riportato nello screenshot abbiamo layout 99 in decimale da usare con number, con data invece si deve inserire 63 00 00 00 (ho messo gli spazi per far capire che vanno inseriti otto numeri, nella pratica, niente spazi) Il cancelletto davanti alle stringhe serve per disabilitarle senza doverle eliminare Per la conversione si può usare il tool incluso in clover configurator, naturalmente il 0x si omette nell'inserimento Per lavorare sul config ed in particolare sul config di OC è molto meglio usare o xcode o un plist editor, molto più qualitativo e facile per modifiche ed aggiunte Se fossimo nella situazione in cui non si conosce quale codec audio si ha, o si verifica sul sito del produttore della propria scheda madre/notebook, oppure si esegue il dump del codec, ecco come fare: occorre avere in drivers >> UEFI il driver Audiodxe.efi dopodiché dalla GUI di Clover si preme il tasto F8 si aspetta 30/40 secondi, si avvia, poi si monta la EFI e in EFI --> CLOVER --> misc saranno presenti i file necessari per analisi nel cui titolo sarà scritto il modello del codec Determinato il modello del codec, si verifica quali sono i layout usabili per il codec rilevato, consultando il database supported codecs di AppleALC PS: facciamo qualche esempio pratico di conversione da decimale a HEX_ 1 >> 01000000 7 >> 07000000 11 >> 0B000000 28 >> 1C000000 Nota 1 >> leggendo la guida russa di vit9696 mi sono reso conto che è meglio integrare altre informazioni in caso di problematiche relative alla attivazione audio analogico: - patch dispositivi audio: HDAS-> HDEF, B0D3-> HDAU non sono necessari se si inietta l'audio da properties. - AppleHDA kext di sistema deve essere vanilla, non patchato, per saperlo leggere il report di hack_info. - rimuovere tutte le patch per il suono, in caso fossero presenti nel config.plist sezione KextsToPatch. - disabilitare tutte le patch audio nella configurazione Clover (FixHDA, AddHDMI e UseIntelHDMI) in caso fossero flaggate. - indicare nella configurazione Clover Devices → Audio → Inject = NO - rimuovere DummyHDA.kext, realtekALC.kext, EAPDFix.kext, FakePCIID_Intel_HDMI_Audio.kext, VoodooHDA.kext, AppleHDADisabler.kext ( se utilizzati). - ricostruire la kextcache, aprire il terminale e scrivere: sudo mount -uw / (prerequisito solo per catalina) sudo kextcache -i / oppure è possibile usare kext&repair by gengik84 Per il momento.... The End1 point
-
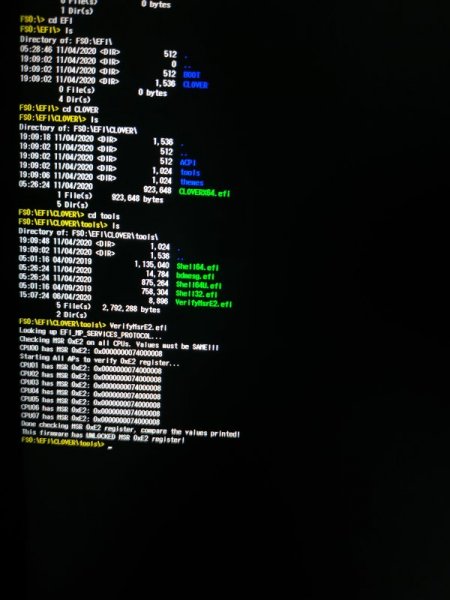
Ok ragazzi, aggiornamenti in merito interessanti. Sono riuscito ad accedere ad alcune (parecchie impostazioni) del bios che di norma non sono raggiungibili, tra cui CFG-Lock, DVMT Pre Allocated (e anche TotalMem di solito impostato su Max, ma questo si configurerà più avanti, quello che più mi doleva appunto era poter avere accesso a quel registro senza patch kernel, e ci sono riuscito - grazie ad una guida su github). Per sbloccare questo famoso CFG-Lock è stata un po' una via crucis, ho prima consultato altre guide che dicevano che in alcuni lenovo una sequenza di tasti ti permetteva di entrare in modalità BIOS Debug, ma non andava, poi ho provato da UEFI Shell utilizzando il setup_var 0x(offset trovato con UEFITool e Universal IFR Extractor) - 0x0 ma mi dava l'errore "cannot write efi variable" quindi ho dovuto agire seguendo questa guida, che molto probabilmente tradurrò in italiano per dare la possibilità a tutti di accedere a impostazioni nascoste del loro proprio BIOS https://translate.googleusercontent.com/translate_c?depth=2&nv=1&rurl=translate.google.com&sl=zh-CN&sp=nmt4&tl=en&u=https://github.com/lietxia/XiaoXinAir14IML_2019_hackintosh/wiki/DVMT Comunque i settaggi BIOS stock che avevate chiesto li inoltro volentieri, ecco il video, convertito dagli 81MB prima in H265 (diventato da 4.5MB 😄 ma putroppo il forum lo voleva in H264 quindi l'ho riconvertito da H265 a H264 ed è diventato da 8.4MB 👍) VID_20200411_152854_1.mp4 vorrei valutare con voi se è proprio necessario intervenire per disabilitare thunderbolt (indagando dal .txt del BIOS se è possibile) Setup.txt.zip apritelo con subilmetext o altri tool come VsCode o simili perché può darvi problemi di encoding... Per ora rimango fermo qui... Aggiorno il config togliendo AppleXCPUCfgLock nel frattempo.... p.s. un piccolo passo per un bios, un grande passo per macOS ahahah0 points
-
0 points
-
0 points
-
anche clover 5110 come 5109 non carica correttamente tutte icone GUI, ma questo è il meno, non carica il comando verbose -v quindi sorge il dubbio che non carichi anche altri boot-arg0 points


