
fabiosun
-
Posts
11,955 -
Joined
-
Days Won
581
Content Type
Profiles
Forums
Events
Downloads
Everything posted by fabiosun
-
WhatsApp Video 2023-01-19 at 18.04.22.mp4

- 269 replies
-
- 6
-

-
- amd ryzen 7950x
- asus x670e
- (and 1 more)
-
Ah non in pvt! altrimenti le ram me cancellano pure i messaggi 😂
-
Al momento le ho provate tutte A chi?😂 a me no
-
-
adieu 🙂 GoodBye 🙂 Ciao 🙂 (joking a bit)
- 3,995 replies
-
- 4
-
-

-

-
- amd vanilla patches
- amd kernel patches
- (and 3 more)
-
sorry for the delay I see onlyy now if you use the EFI posted in OP you have to change core count number in your EFI config plist kernel patches section
-
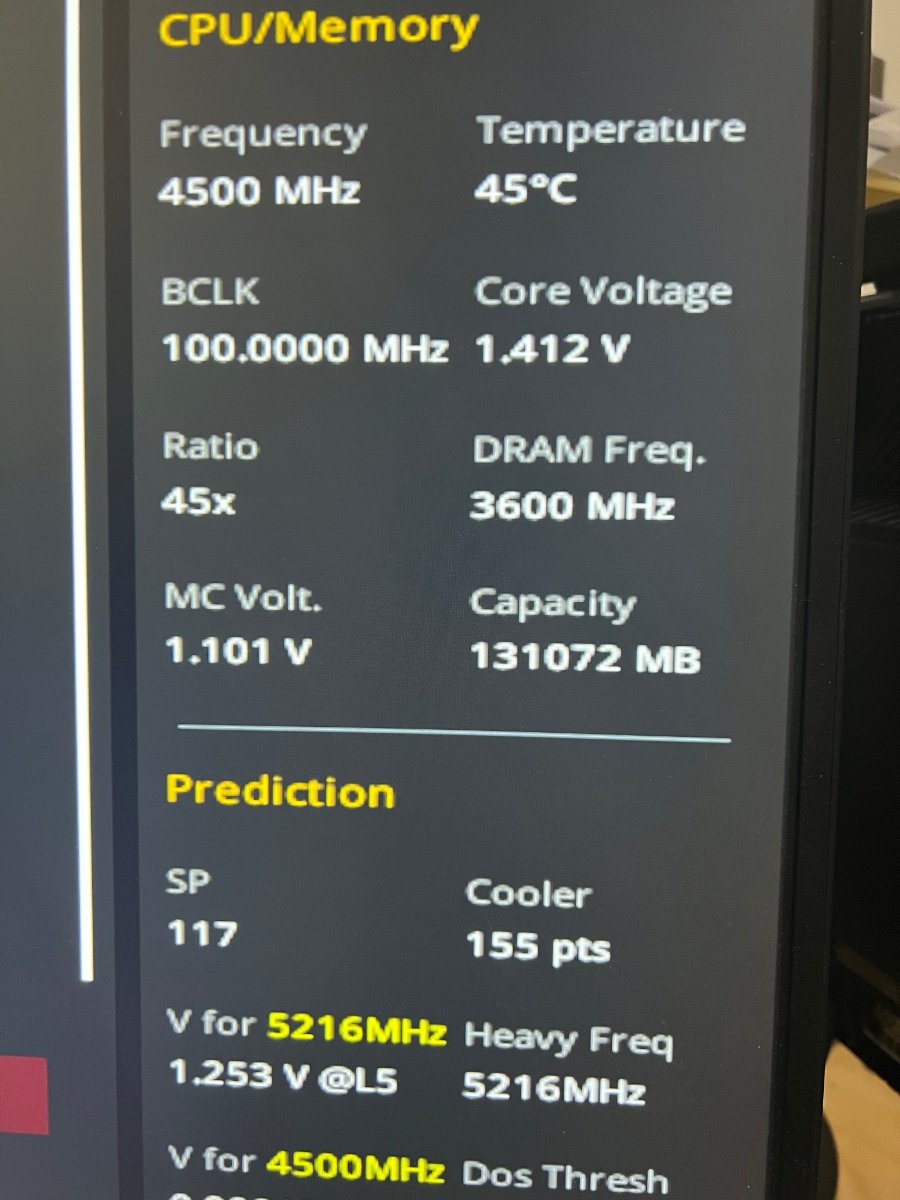
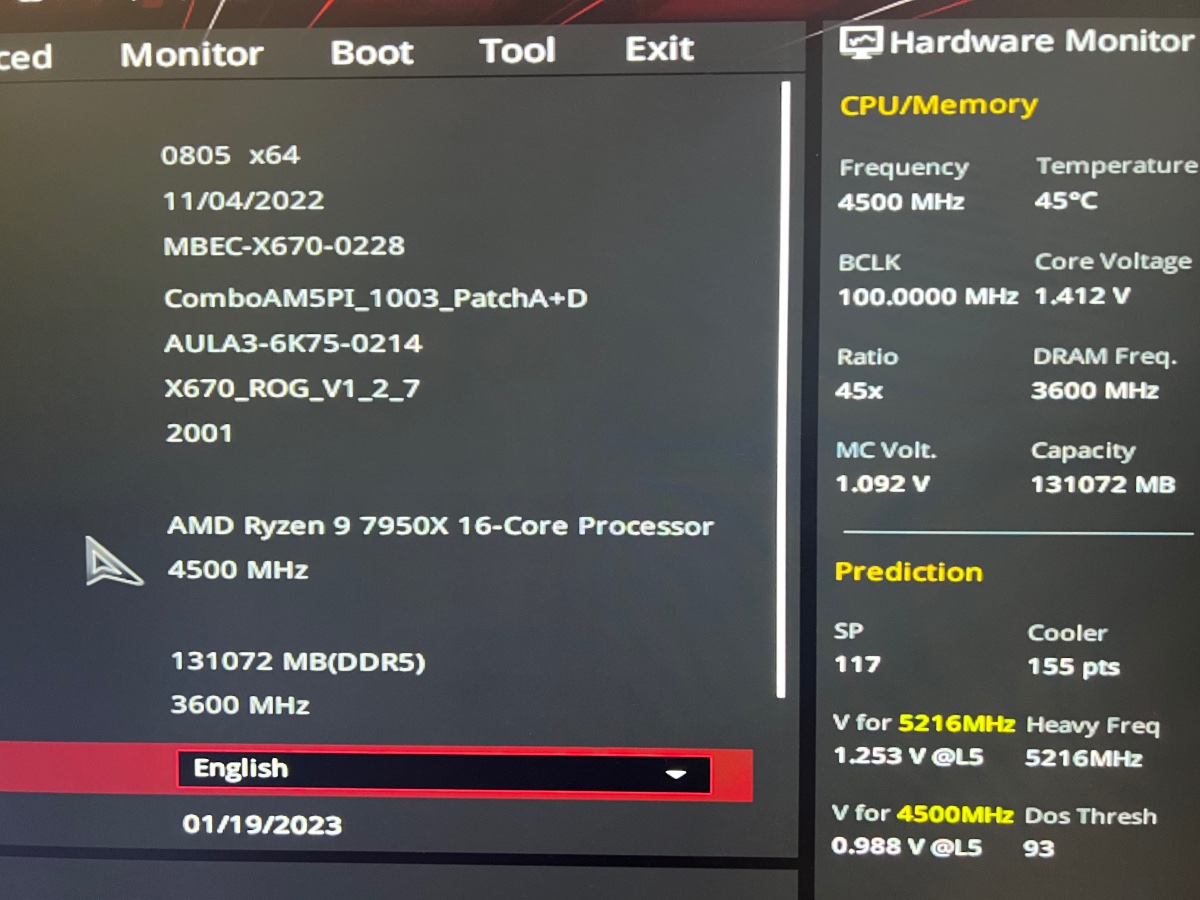
tie allora ti frego io ho aspettato tanto ma se non ti decidi! 🙂 😛 ho problemi seri di RAM non guardate qui che dice 128 a causa della memoria mappata Il sistema parte e funziona perfettamente solo con una memoria installata in uno slot nemmeno consigliato per il singolo modulo chissà cosa e' rotto La cos che mi lascia dubbioso e' che la macchina funziona normalmente con un solo modulo con piu' non posta
-
full installer qui (runmedownloader) e nei soliti posti
-
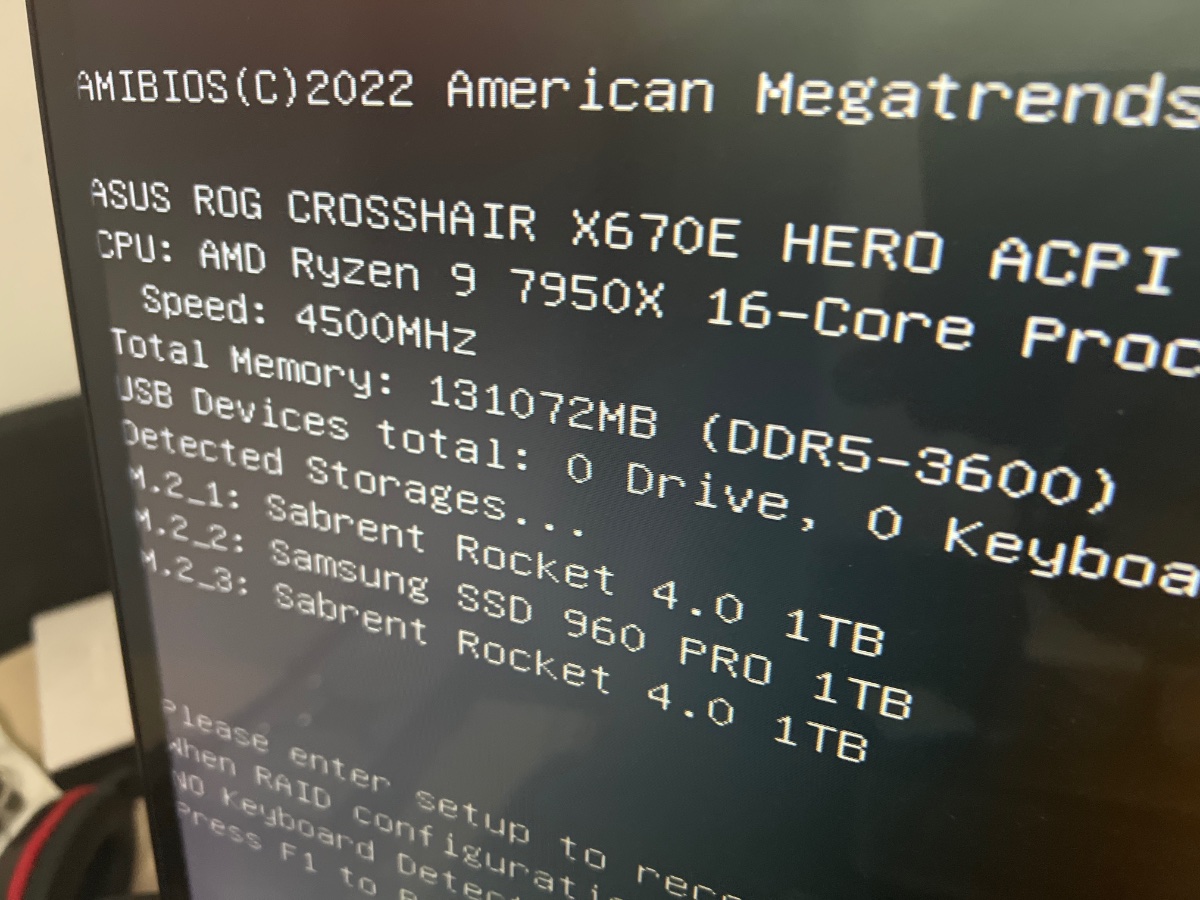
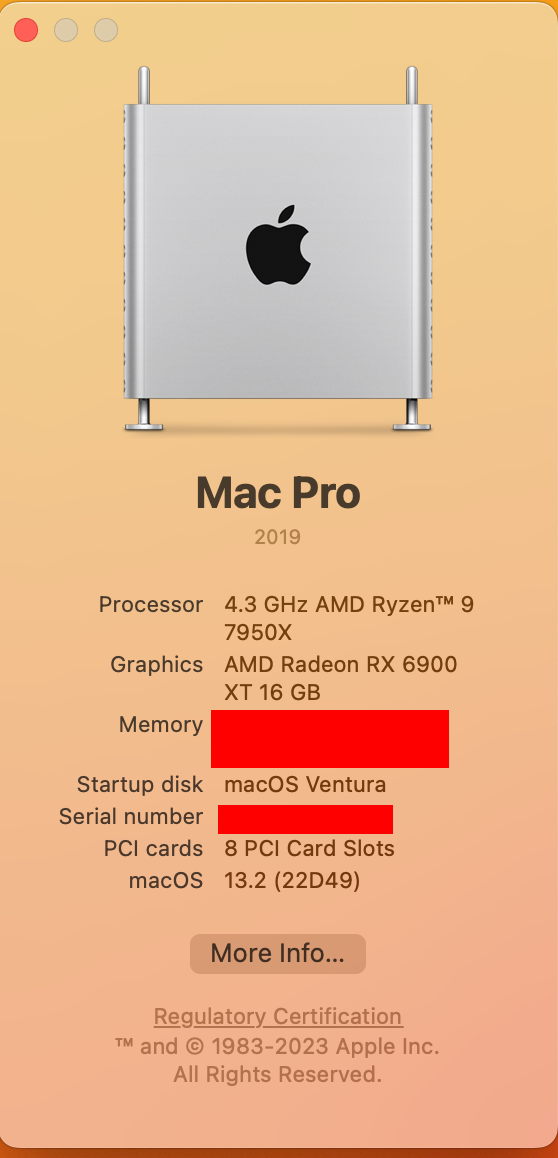
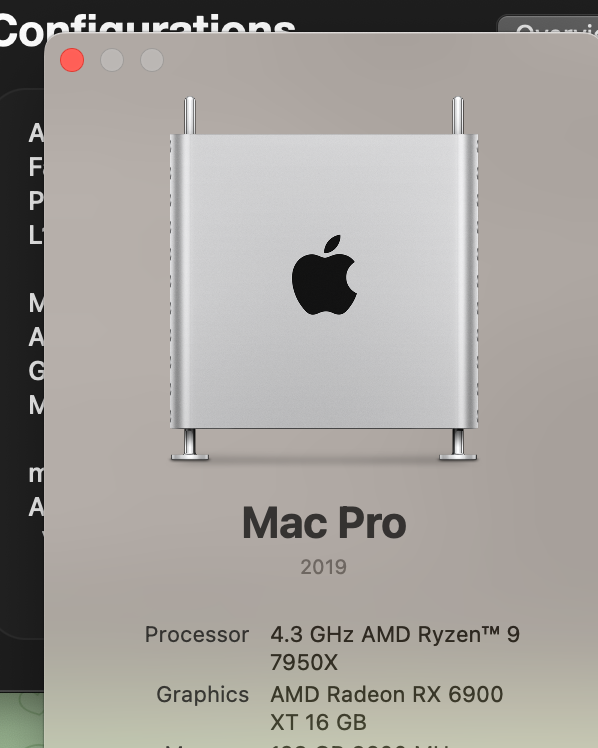
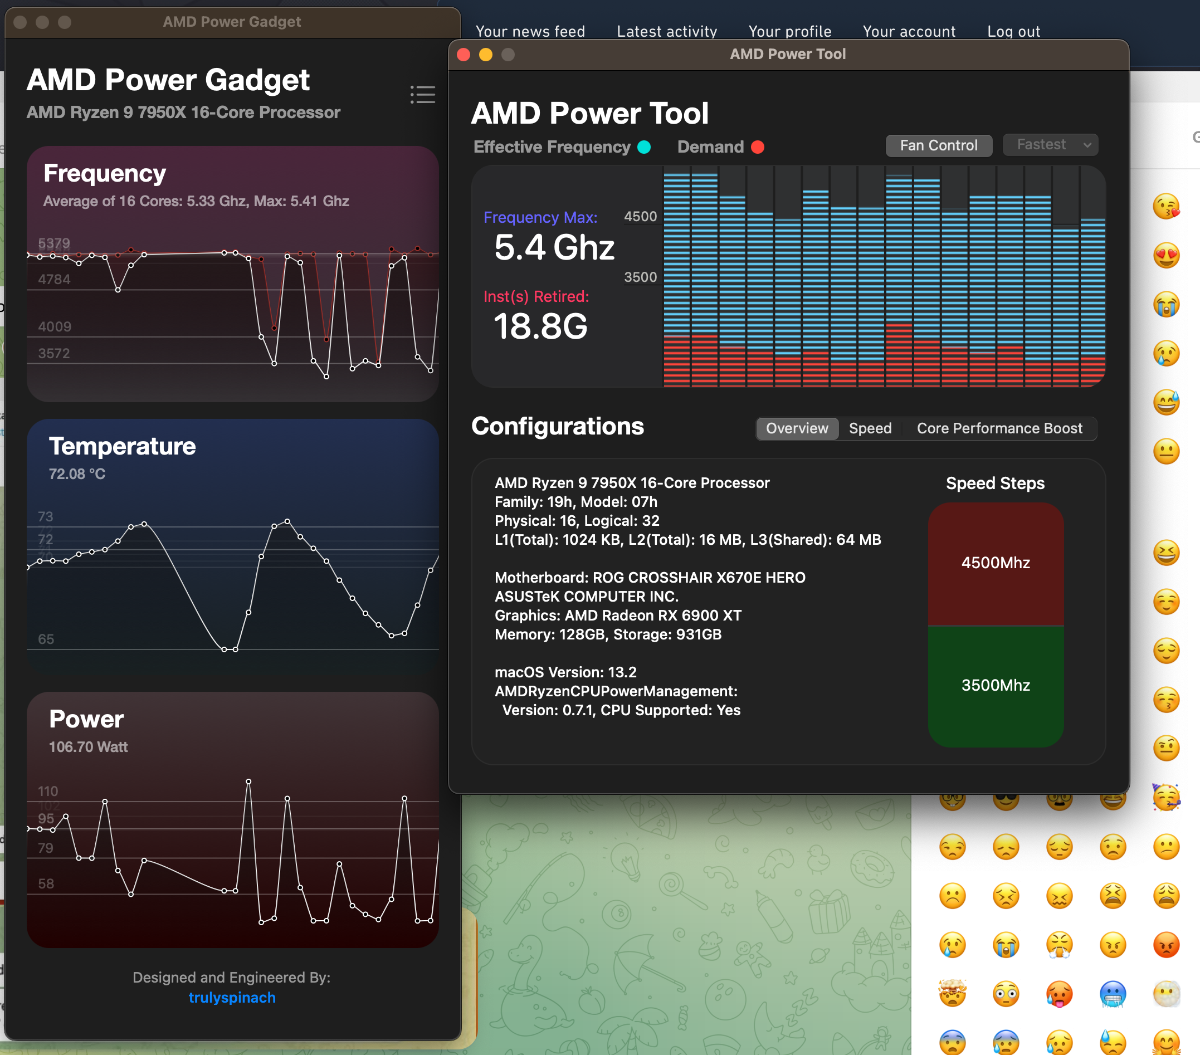
After a few years where I enjoyed and used my ThreadRipper with immense satisfaction, I made the decision to venture into another project. This time taking advantage of the tremendous work done by @CaseySJand other users, I will struggle much less to get my PC working than we suffered three years ago for TRX40 Motherboard: https://rog.asus.com/it/motherboards/rog-crosshair/rog-crosshair-x670e-hero-model/ CPU: AMD Ryzen 7950X https://www.amd.com/en/direct-buy/5676499200/it 128 Gb DDR5: 2kit of Kingston Fury Beast DDR5 RGB 64GB (2x32GB) 5200MT/s DDR5 CL40 DIMM https://www.amazon.it/gp/product/B0B1QNPM2T/ I will keep the CPU heatsink and some of the disks that I have now This system loses in multicore to my TRX40 but performs better in other areas I hope to see you still developing our historical thread on the TRX40, I certainly will a touched TrexIntosh 🙂 🙂 SysReport.zip EFI_ASUS_ROG_x670E_HERO_Clover5149.zip EFI_ASUS_ROG_x670E_HERO_OC_098.zip EFI-ASUS_x670E_HERO_Bios2124-fabiosun.zip
- 269 replies
-
- 10
-
-

-
-
- amd ryzen 7950x
- asus x670e
- (and 1 more)
-
13.2 beta 2
- 3,995 replies
-
- 1
-
-
- amd vanilla patches
- amd kernel patches
- (and 3 more)
-
hai scaricato il sistema operativo e lo hai in applicazioni? se si basta inizialmente creare l'installer con un comando da terminale e poi copiarci la EFI dalla quale partire a proposito oggi puoi installare anche sistemi piu' nuovi utilizzando OCLP app con alcune limitazioni
-
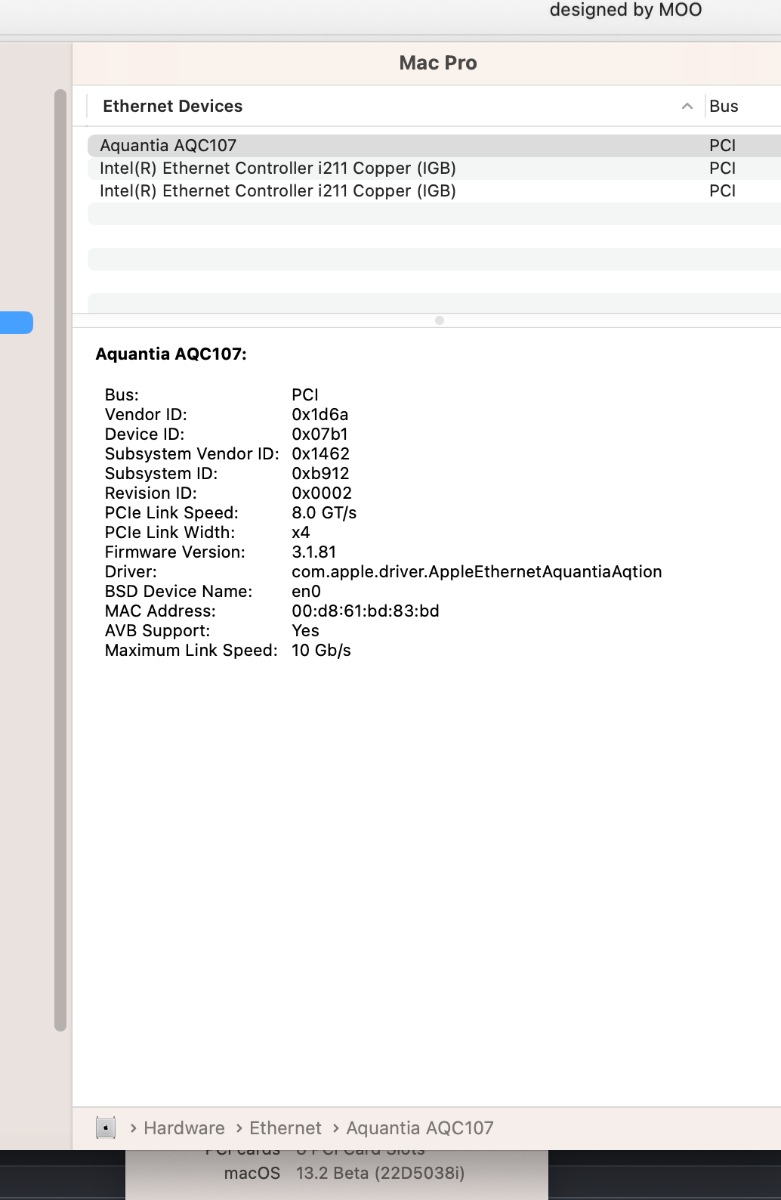
@valmeida check here for aquantia
-
non escono perche' le hai solo copiate e non dichiarate nel config prova con lo zip allegato config.plist.zip
-
@Coolerm690se hai usato il config qui sopra al boot menu devi premere spazio e dovresti vedere due opzioni in piu' se non riesci posta tramite un link esterno la cartella EFI (se pesa piu' di 6 Mb) e provo a modificare io il tutto
-
config.plist.zip aggiungi a questo config i driver per la versione di opencore che stai usando di: ResetNvramEntry.efi ToggleSipEntry.efi una volta aggiunti al boot menu premi spazio e resetti Nvram e disabilita SIP da boot menu
-
se vuoi posta il tuo config.plist senza i tuoi seriali
-
Hai disabilitato sip?
-
Se vi capita che prima del login la macchina si riavvia dopo l'aggiornamento b pulire la Nvram Da me si creava un riavvio senza errori (ho provato per tre volte) poi ho pulito Nvram ed e' entrato regolarmente
-
-
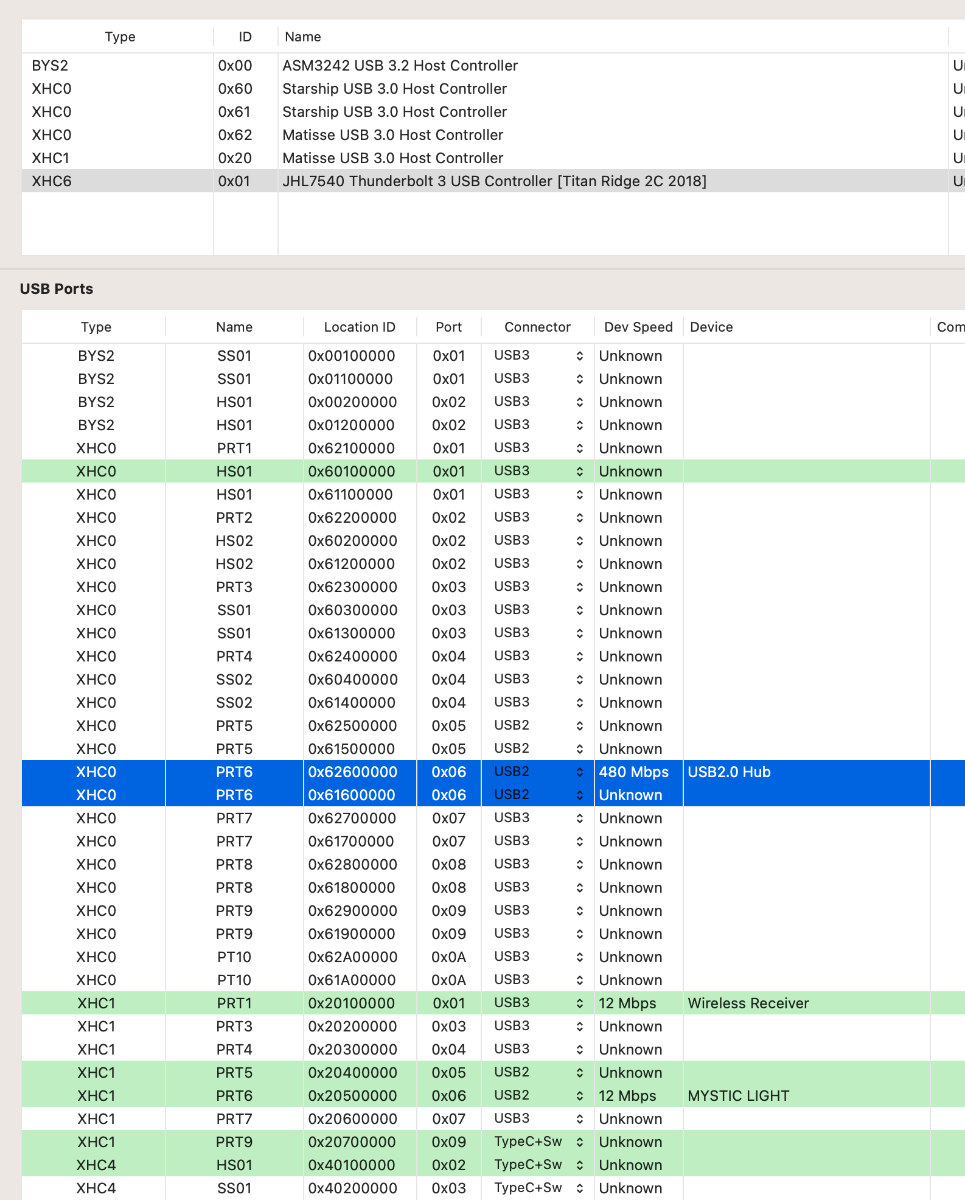
se non va solo il BT potrebbe essere la mappatura delle usb
-

Software vari per guide che vorrei realizzare qui sul forum
fabiosun replied to Macedone81's topic in Off Topic
si tramite spoofing -
-
a me nemmeno lo dice ma funziona regolarmente tutta la parte BT
-
non sono un esperto e da me fortunatamente non serve mapparla ma molti utenti intel per avere il BT funzionante devono mapparla ad interna valore 255 ma mi ripeto non sono esperto in questo e mi baso esclusivamente da quello che leggo in giro