Leaderboard


Popular Content
Showing content with the highest reputation on 05/27/2020 in Posts
-
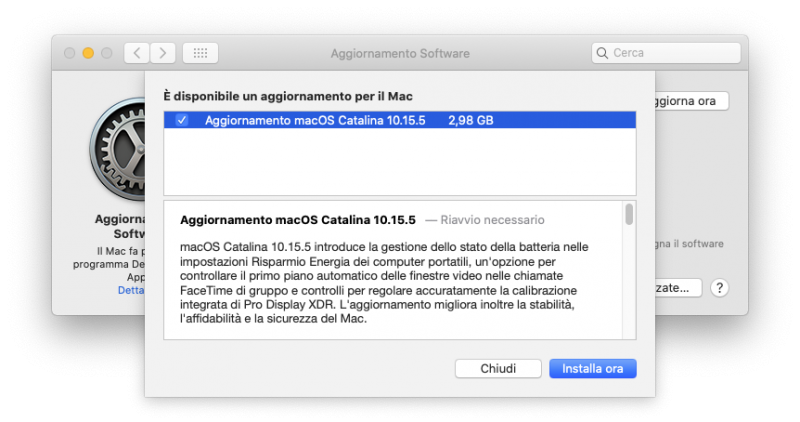
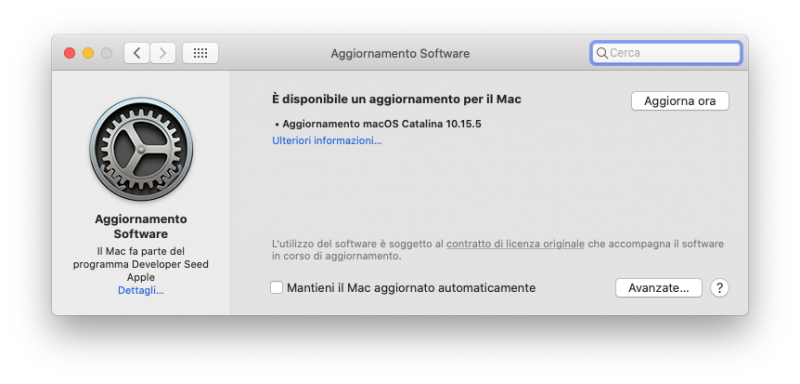
macOS Catalina 10.15.5 (19F96) ✅Download: ComboUpdate 10.15.5 -- Normal Update 10.15.5
 3 points
 -
3 points
-
Grazie Mille, sei stato un grande! Ultima cosa: probabilmente le due porte non rilevate da Ioreg (hs5 e hs6 , due porte 2,0 frontali del case) hanno un Problema di collegamento hardware, se dovessi sistemarle devo solo aggiungere le due voci in più negli ssdt giusto? L'importante stare sotto le 15 totali. @iCanaro grazie mille anche a te! Siete stati davvero gentilissimi e disponibili tutti e due!2 points
-
si Adesso sei ok... mantieni questa configurazione e magari fatti anche un backup della efi2 points
-
Io ho provato prima, HD 630, Ripristinata dalla VM 10.15.5, solita EFI, funziona tutto, non ho provato lo spegnimento monitor, ma ho lasciato gfxonln=12 points
-
Apologies @fabiosun. My mouse on an old Hack Mac running the host web console proxmox is faulty, I should have copied out to end of line! It is corrected now. I think the config is good for my case (because I use Decklink and Firewire pcie cards) but of course don't take things literally as other people's build / mobos are different. The ASRock Creator has come with a few headaches and I am keen in the future to see what other boards are out there - like the msi. Of course, when there's time for me, I will investigate further the problem with the other USB hub to see if we can knock that out of the equation as Im missing the 3 x USB 3.2 Gen2 (1 Front Type-C, 2 Rear) with this config. Apologies once again, I did not mean to offend you in any way. Thank you @Pavo for coming in to answer whilst I was afk.2 points
-
Maybe I can chime in here and explain the reason behind the IRQ setting that was used in his config. It does look like his copy and paste was off a little. It should look like this. args: -smbios type=2 -cpu host,vendor=GenuineIntel,+invtsc -machine q35,kernel_irqchip=on The kernel_irqchip=on args was added because his Firewire card was having ORQ conflicts which slowed his system to a crawl after 10-15 minutes of use. Adding this arg fixed that issue and at the same time fixed his audio crackling issue that he was having, btw he Firewire card is what maintains his external audio devices. Here are some informational links about the issue. https://forum.proxmox.com/threads/fix-for-pci-passthrough-and-issues-with-proxmox-6-gui-regex-that-needs-resolving-after-upgrade.56507/ https://bugzilla.proxmox.com/show_bug.cgi?id=23082 points
-
link comboupdate al primo post2 points
-
Z370 Clover 5118 PS: OC 059
2 points
-
macOS Mojave 2020-003 - 1,68 Gb1 point
-
Premessa: modificare il Bios può causare gravi danni. Non mi assumo alcuna responsabilità. Fate un backup del vostro bios. In caso in cui il pc non si avvii, provare a fare un CMOS reset. Il modo più sicuro per effettuare l'undervolt rimane quello da app, come Intel XTU, Throttlestop, eccetera... Perché effettuare l'undervolt dal Bios, allora? Per prima cosa, non avremo bisogno di usare app all'avvio del sistema operativo. Inoltre, cosa più importante, l'undervolt funzionerà avviando anche altri sistemi (soprattutto macOS). Requisiti: Un PC Dell (la guida potrebbe funzionare anche su altri PC, ma non ho modo di provare). Windows 10 installato (per configurare inizialmente i voltaggi e verificare se sono stabili) - è sufficiente anche una versione Trial non attivata. Un'app per provare i voltaggi su Windows (ho usato XTU, ma potete usare altre app). Delle app per controllare se le tensioni sono stabili (vanno bene app di benchmark o giochi). Per prima cosa, installiamo XTU e modifichiamo Core Voltage Offset e Graphics Voltage Offset. Modificare un valore per volta e non esagerare con l'undervolt. Testare i voltaggi con i benchmark ogni volta. Se vi compaiono schermate blu, significa che state esagerando con gli offset. Segniamoci gli offset che ci soddisfano. Nel mio caso, -0.060 V sui Core e -0.040 V sulla IGPU. A questo punto, possiamo disinstallare XTU. Estrarre il Bios seguendo la guida: https://macos86.github.io/Estrazione-BIOS-da-exe/#/Estrazione_BIOS_Dell Nel file di testo generato cerchiamo Overclocking Lock: 0x4A893 One Of: Overclocking Lock, VarStoreInfo (VarOffset/VarName): 0x658, VarStore: 0x1, QuestionId: 0x378, Size: 1, Min: 0x0, Max 0x1, Step: 0x0 {05 91 A7 03 A8 03 78 03 01 00 58 06 10 10 00 01 00} 0x4A8A4 One Of Option: Disabled, Value (8 bit): 0x0 (default) {09 07 04 00 30 00 00} 0x4A8AB One Of Option: Enabled, Value (8 bit): 0x1 {09 07 03 00 00 00 01} 0x4A8B2 End One Of {29 02} Nel mio caso si trova immediatamente sotto a CFG Lock. Overclocking Lock deve essere disabilitato. Nel mio caso, è già disabilitato, ma con le versioni recenti del Bios è stato abilitato per correggere la falla di sicurezza "Plundervolt" (INTEL-SA-00289). Se Enabled fosse impostato come default, segniamoci l'offset della variabile (0x658). Cerchiamo poi OverClocking Feature: 0x4D0A6 One Of: OverClocking Feature, VarStoreInfo (VarOffset/VarName): 0x724, VarStore: 0x1, QuestionId: 0x487, Size: 1, Min: 0x0, Max 0x1, Step: 0x0 {05 91 6E 13 6F 13 87 04 01 00 24 07 10 10 00 01 00} 0x4D0B7 One Of Option: Disabled, Value (8 bit): 0x0 (default) {09 07 04 00 30 00 00} 0x4D0BE One Of Option: Enabled, Value (8 bit): 0x1 {09 07 03 00 00 00 01} 0x4D0C5 End One Of {29 02} Deve essere abilitato. Nel mio caso, non lo è, quindi mi segno l'offset (0x724). Se rimanesse disabilitato, tutti i valori dei voltaggi non verrebbero usati. Cerchiamo poi Core Voltage Offset: 0x4D273 Numeric: Core Voltage Offset, VarStoreInfo (VarOffset/VarName): 0x72A, VarStore: 0x1, QuestionId: 0x495, Size: 2, Min: 0x0, Max 0x3E8, Step: 0x1 {07 94 84 13 85 13 95 04 01 00 2A 07 10 11 00 00 E8 03 01 00} 0x4D287 Default: DefaultId: 0x0, Value (16 bit): 0x0 {5B 07 00 00 01 00 00} 0x4D28E End {29 02} 0x4D290 One Of: Offset Prefix, VarStoreInfo (VarOffset/VarName): 0x72C, VarStore: 0x1, QuestionId: 0x496, Size: 1, Min: 0x0, Max 0x1, Step: 0x0 {05 91 9A 13 9E 13 96 04 01 00 2C 07 10 10 00 01 00} 0x4D2A1 One Of Option: +, Value (8 bit): 0x0 (default) {09 07 46 03 30 00 00} 0x4D2A8 One Of Option: -, Value (8 bit): 0x1 {09 07 47 03 00 00 01} 0x4D2AF End One Of {29 02} Segniamoci i due offset (0x72A per il valore dell'offset e 0x72C per il segno). Cerchiamo infine GT Voltage Offset: 0x4D48C Numeric: GT Voltage Offset, VarStoreInfo (VarOffset/VarName): 0x9A8, VarStore: 0x1, QuestionId: 0x49F, Size: 2, Min: 0x0, Max 0x3E8, Step: 0x1 {07 94 41 14 43 14 9F 04 01 00 A8 09 10 11 00 00 E8 03 01 00} 0x4D4A0 Default: DefaultId: 0x0, Value (16 bit): 0x0 {5B 07 00 00 01 00 00} 0x4D4A7 End {29 02} 0x4D4A9 One Of: Offset Prefix, VarStoreInfo (VarOffset/VarName): 0x9AA, VarStore: 0x1, QuestionId: 0x4A0, Size: 1, Min: 0x0, Max 0x1, Step: 0x0 {05 91 9B 13 9E 13 A0 04 01 00 AA 09 10 10 00 01 00} 0x4D4BA One Of Option: +, Value (8 bit): 0x0 (default) {09 07 46 03 30 00 00} 0x4D4C1 One Of Option: -, Value (8 bit): 0x1 {09 07 47 03 00 00 01} 0x4D4C8 End One Of {29 02} Segniamoci i due offset (0x9A8 per il valore dell'offset e 0x9AA per il segno). Altri valori che possiamo modificare sono GTU Voltage Offset (parte Unslice della GPU integrata, dedicata ad alcune funzionalità multimediali come l'encoding H.264 in tempo reale) e Uncore Voltage Offset (System Agent). Ora avviamo la shell come spiegato nella guida per l'estrazione del Bios. Scriviamo Se Overclocking Lock è abilitato setup_var 0x658 0x00 Se OverClocking Feature è disabilitato setup_var 0x724 0x01 Se vogliamo fare undervolt ai core della CPU setup_var 0x72C 0x01 setup_var 0x72A 0x3C Se vogliamo fare undervolt alla GPU integrata setup_var 0x9AA 0x01 setup_var 0x9A8 0x28 Negli ultimi due casi, la prima riga imposta il segno dell'offset come "-" (dopotutto vogliamo fare UNDERvolt...). La seconda riga imposta il valore dell'offset. Nel mio caso ho impostato -0.060V per la CPU, quindi 60 mV. Convertendo 60 in esadecimale si ottiene 0x3C. Per la IGPU ho impostato -0.040V, quindi 40 mV. Convertendo 40 in esadecimale si ottiene 0x28. Ricordate di usare i vostri valori di offset delle variabili, che probabilmente saranno diversi dai miei. Ora non ci resta che riavviare la shell con il comando reboot Avviamo Windows e verifichiamo da un'app come HWMonitor che gli offset dei voltaggi siano stati salvati. Verifichiamo anche che i voltaggi siano diversi anche su altri sistemi operativi. Nel mio caso, su macOS sono passato da circa di 0.710V a circa 0.650V sui core in idle.1 point
-
Perfetto. Grazie ancora!1 point
-
ah ok Grazie 🙂1 point
-
a me la proposto circa un 20 minuti fa portato a Termine solo che adesso ha messo le caratteristiche della macchina da solo, ricordo sempre Clover 5100 tutto ok nessuna gap fino a tre riavii Grazie Ragazzi
1 point
-
I value this site more than anyone. I hardly know about Discord and not much Linux. Yourds was the first post I saw fabiosun so I want to say it was you who caught my eye first. I needed a fast video compression/editing machine for raw files first and foremost and didn't want to spend a fortune on a Mac so it was fab to see your post. The first 🙂 This thread ids great and I value all the guys here, most of all you. As I learn more about Proxmox and Linux in my free time I will be able to answer better. It won't take long as Ive learned a lot here, and with Pavo. This thread and group is wonderful I value what you say and the path of discovery. I tried to get all this kit working inside a week - spending unto 12 hours a day (sleeping at 5am!) to try and get this working. But to learn the knowledge of you and others will take me time. But Ill get there. I understand all the principles. After all, we all want our big investment to work for us. Its not just geekery stuff.1 point
-
C’è da dire che se uno fa l’hacintosh solo per risparmiare rispetto all’originale la vedo dura, quello che risparmi in denaro lo spendi in tempo, non essendo stimolato dall'interesse è frustrante, se invece c’è un interesse nella pratica la cosa è completamente diversa. Forse se uno ha un amico che si occupa della parte software, ma rimane il fatto che davanti a qualsiasi problema rimani impotente…1 point
-
SI si avevo capito 😀1 point
-
Anni e anni fa facevo così anche io, una volta l'anno o a ogni SP di Windows o Major Release di macOS o Windows spianavo tutto e ripartivo, infatti per abitudine i dati sono o su NAS o su HDD secondari sotto backup. Però oggi ho meno tempo e solo l'idea di reinstallare i software, i font, travasare centinaia di migliaia di file tra HDD meccanici, ecc mi sbatte non poco. Probabilmente con la 10.16 farò così perchè ho un sistema "sporco" da Clover e i suoi rc script e con l'occasione passerò definitivamente a OpenCore. Per baloccarmi con le nuove versioni uso VirtualBox e via! Siamo un filo OT 🤣 K.1 point
-
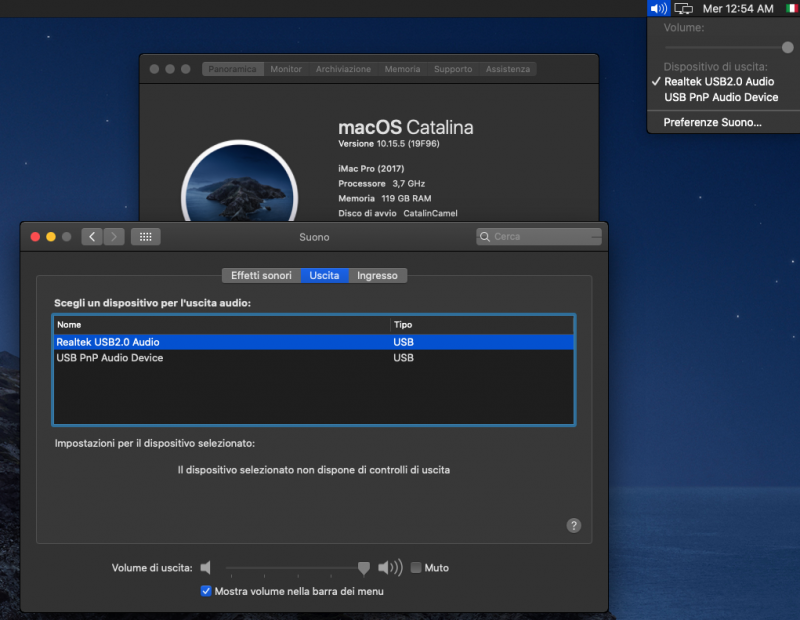
nessuna meraviglia, è per far vedere che anche un'hack se fatto a modo si aggiorna come un vero iCoso 😉1 point
-
Acer Nitro 5 & OC057, tutto alla grande!
1 point
-
0.6.4 The experimental fan speed control was included in this release. At current stage only a very limited set of controllers are supported. You can open fan control menu to find out what SMC chip you have or whether your board is supported. Please refer to this(#66) discussion for more updates or request for support. KEXTs Added fan control support for some IT86XXE Family SuperIO SMC devices. AMD Power Gadget Added new translucent appearance that can be switched from menu bar. Fixes a crash when no GPU was detected on the system.1 point
-
Allora ci sono novità.. penso di aver risolto il problema. ho smontato il portatile ed ho tolto il disco di windows che era all'interno e ci ho messo quello dove ho installato catalina che si trovava all'interno del caddy dove ho tolto il lettore dvd ed ora funziona. quindi il problema penso sia del disco windows e la bios che fa casino con la uefi. Ora provo a mettere il disco di windows nel caddy e vediamo che succede.1 point
-
aggiornamento alla 10.15.5 Release OpenCore 0.5.8
1 point
-
Z68 Clover 5116 PS: OC 059
1 point
-
So here it is without the crackling - get rid of the nasty USB/USB audio controllers and viola - no more crackling. Spent an hour or two sorting this with Pavo. And he suspected the 47:00 Matisse USB 3 Controller was the culprit. Got rid of and now firewire has no crackle and mouse moves fluidly without lag. Also, in vm conf's 'Args' at the top, try kernel_irqchip=on, as this may have helped. Looking good to start using this beast now 🙂 Pic below showing 64 core/threads barely at work!
1 point
-
E temporale sia!!😁 origin.zip0 points
-
bene allora prepara una pendrive con PartedMagic o GParted live https://www.macos86.it/topic/322-gparted-live/?tab=comments#comment-5172 poi inizializzi l'intero disco dove vuoi installare windows, in GPT UEFI poi crei tu una partizione primaria ad inizio disco da 200MB in FAT32 con flag esp/boot poi crei la partizione primaria dove vuoi installare windows e la formatti in NTFS finito avvi con la pendrive per installazione UEFI di windows e lo installi nella partizione appena creata come ho già detto diverse volte, tutte queste belle cose, meglio le fai con il solo disco dove vuoi installare windows l'altro dove hai macOS meglio lo scolleghi se non riesci, ultimo metodo:
0 points
-
VM conf above VFIO conf below Thats my latest VM conf and VFIO conf. Noticed Ive now removed the other problematic USB, the Args line has the IRQ statement, and Ive ensured Proxmox is booting with at least 4Gb and have lowered RAM to 48Gigs until I get more RAM! Safety measure. The firewire and Decklink dont produce weird errors anymore like crackle and erratic mouse lag - now they just work! I think any one of those changes was responsible for problems. Ive also got monitor screen saver working without going black after coming back from its sleep. Hope this helps anyone. Pavo has been instrumental in getting this working and he clearly knows what he is doing, so rather than spend days sorting this (i understand more what he tells me all the time) I think advice from an expert is advise-able if you haven't got the time atm - got jobs on. I have to try that shutdown script @Roxer67 when I get the time. But my system is VERY stable now and Im very happy. It flies! ID 4d:00 and 4c:00 are the black magic Decklink and firewire cards0 points
-
Yesssss odo gli angeli... funge! ora cosa faccio elimino i kext applealc e codecommander da other? ora resterebbe webcam e wifi che non va e poi se cisono altre cose da fare per ottimizzare al meglio.. @icanaro vedi che sto facendo il bravo.. e comunque ti devo ringraziare anche se ogni tanto mi riprendi😉0 points
-
Solo perchè è un'immagine da clonare poi quando serve, giusto? A me piace portare avanti il sistema, sui precedenti Mac che ho avuto ho aggiornato anche per 4 major release consecutive travasando a volte anche con Time Machine 😎 K.0 points
-
Perché paranoico, io la rifaccio sempre da ZERO!0 points
-
Noooooooooooo!0 points
-
Dalla mia eseguo sempre il clone su HDD meccanico con CCC, avvio lì, aggiorno lì. Se non seplode nulla ritorno su SSD, rifaccio il clone per avere uno snapshot alla 10.xx.y e poi aggiorno definitivamente a 10.xx.y+1. Troppo paranoico? 🤣 K.0 points
-
Lo stop sul T-RyZo continua a non funzionare 4 frecce e clackson si 😂0 points
-
si per noi è così, ma siamo una piccola elite, per molti altri è quasi magia o roba inverosimile, basta leggi i commenti qui dove stanlio & ollio hanno piazzato una niresh su loro build0 points
-
Nell ultimo aggiornamento che ho fatto ho utilizzato OC. Era la prima volta che lo usavo per aggiornare...a metà aggiornamento mi hanno chiamato e non ho più potuto seguire la procedura, quando sono tornato al pc era già tutto installato,ti dico la verità...ci sono rimasto un po' male)0 points
-
Ma come mai ad ogni Build i meravigliate che funzioni 😄...0 points


.jpg.cb4e852f332aa269bf122c6f314cf3a9.jpg)