Search the Community
Showing results for tags 'oclp'.
Found 2 results
-
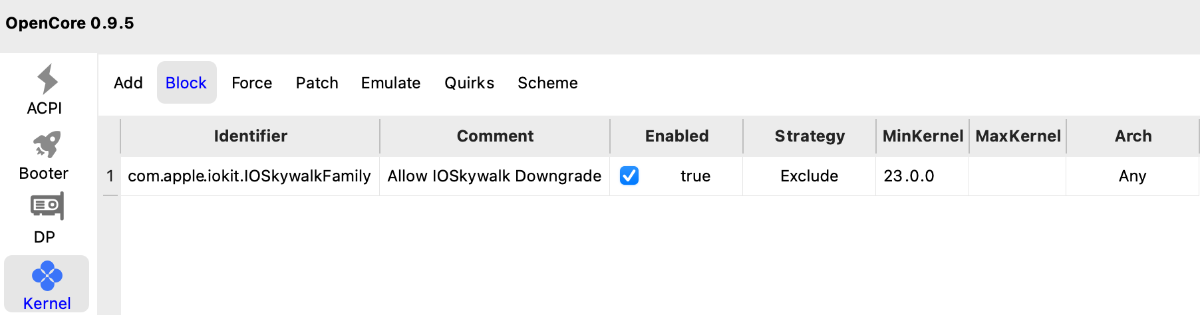
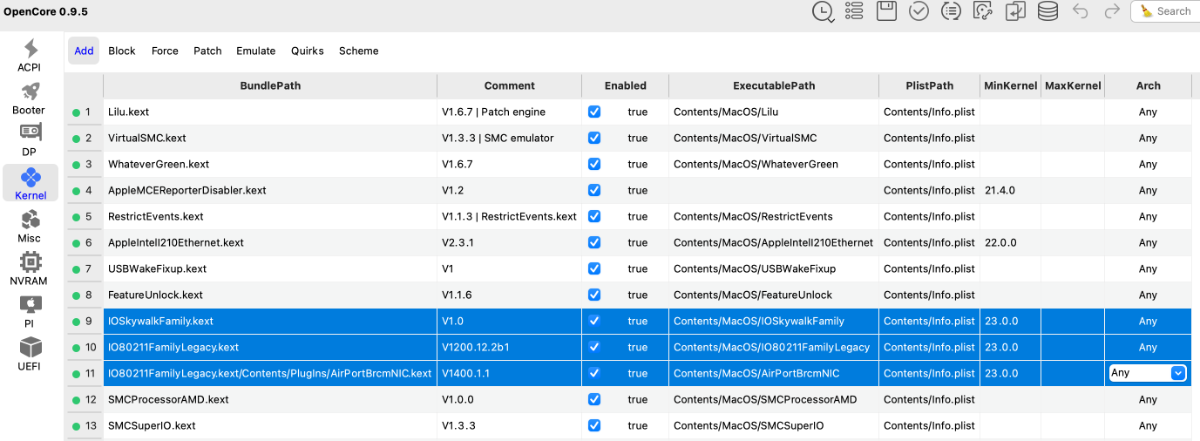
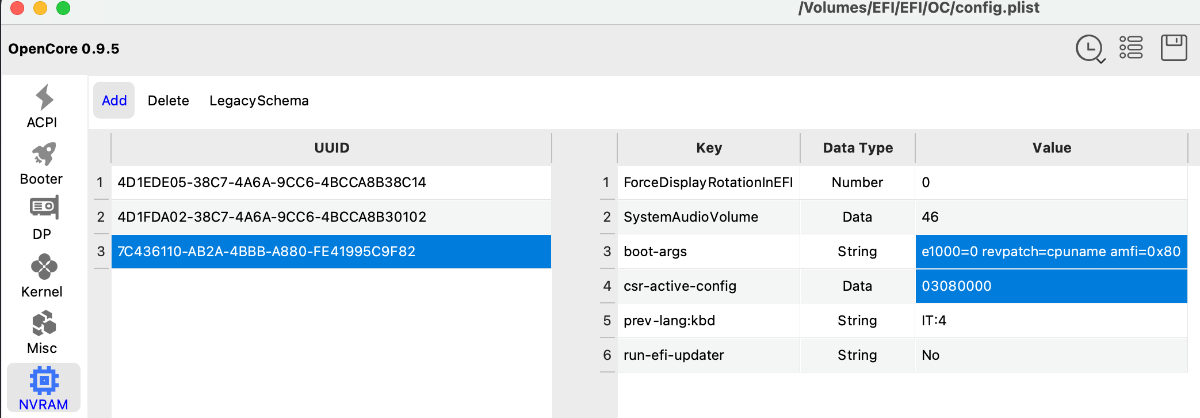
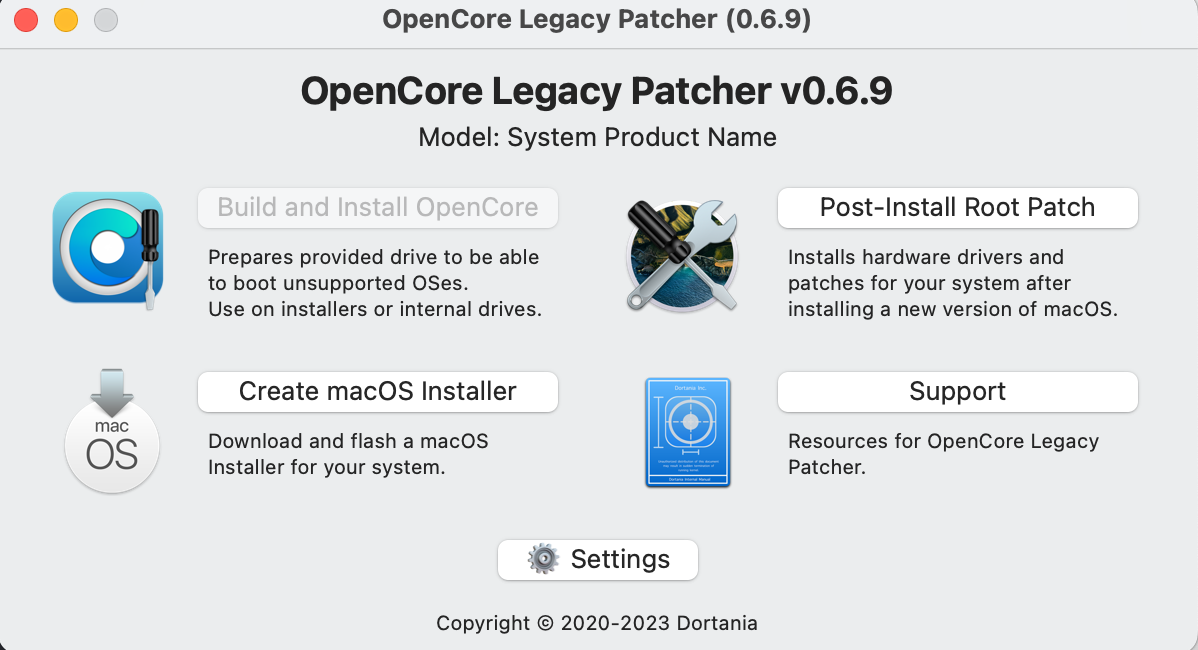
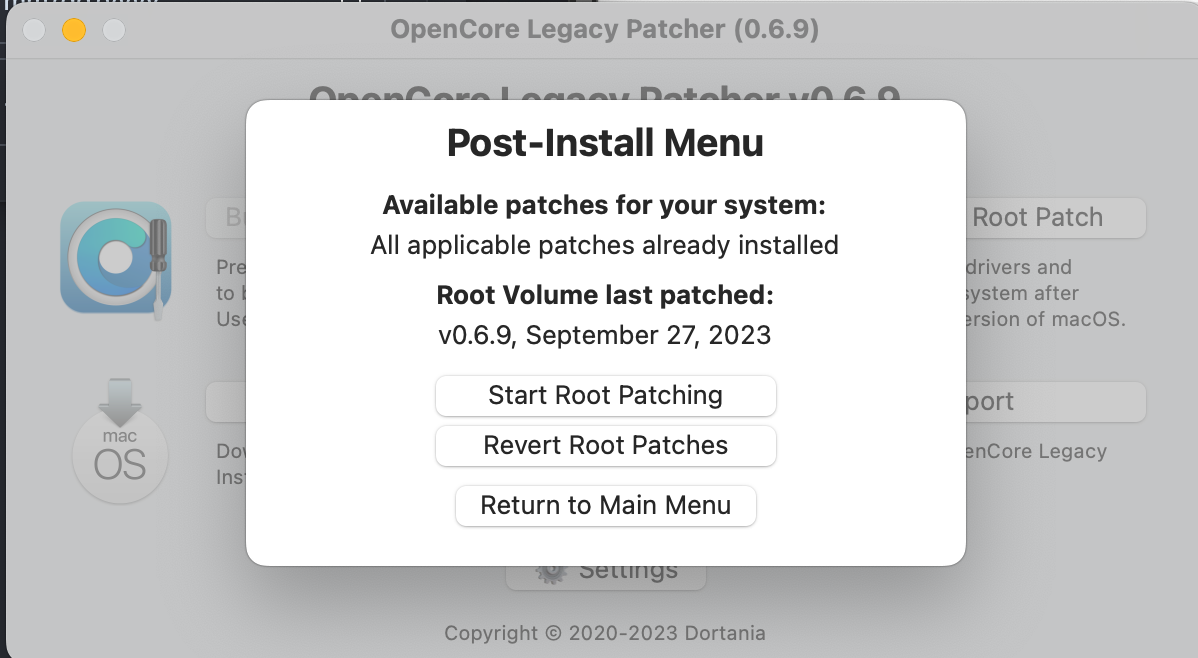
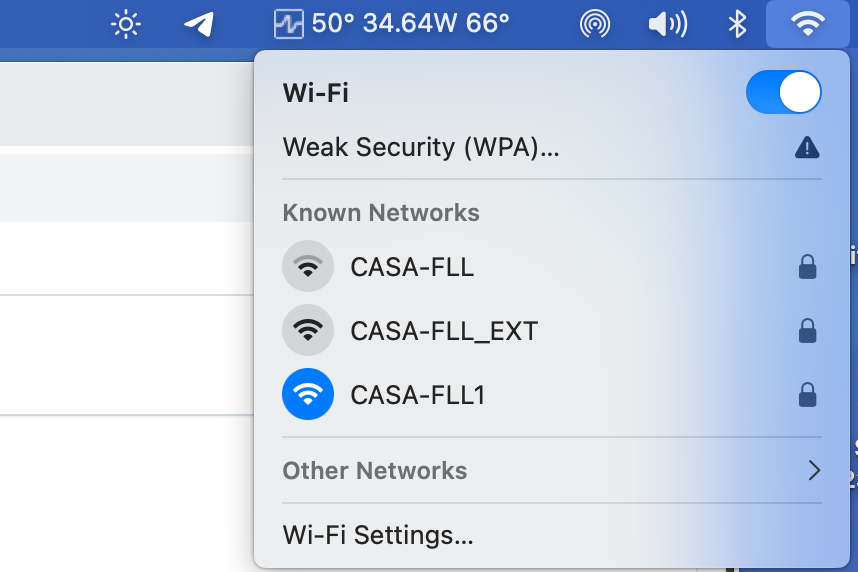
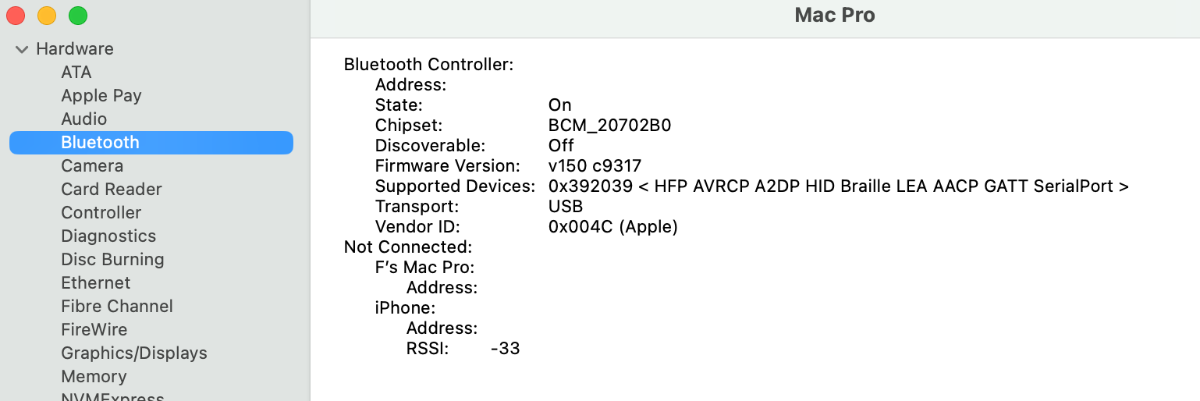
With the definitive release of the new Apple operating system, many users have experienced first hand the complete loss of Wi-Fi and some Apple services such as (Airdrop, Imessage, Facetime, photobooth) especially for Apple users with iPhone mobile phones the problem is annoying as you lose some conveniences that having an Apple ecosystem allowed in previous OS up to macOS Ventura. A tool, OCLP, or OpenCore Legacy Patcher in full, comes to our aid. It is a tool designed for "original" Macs, but which also comes in handy for those who use Hackintosh systems. There are important compromises to accept (it is not the job of this post to explain them), but once accepted it is possible to use the wifi cards that were previously recognized also on the latest Apple OS To date you must use the "nightly" version of OCLP as the release is not yet available with Sonoma support, below is the link: OCLP (latest) Below are the steps to prepare our system for the installation of OCLP: 1) install macOS Sonoma by updating kexts and bootloader to the latest versions 2) edit the config.plist and set SecureBootModel to Disabled* (in misc/Security section of your config.plist) 3) block com.apple.iokit.IOSkywalkFamily 4) add the kexts and a dependency in the OC's appropriate folder and declare them in the config.plist as shown in the pictures below: IOSkywalkFamily.kext IO80211FamilyLegacy.kext IO80211FamilyLegacy.kext/Contents/PlugIns/AirPortBrcmNIC.kext 5) use a soft unlock for SIP**: 03080000 6) use a boot-arg for AMFI***: amfi=0x80 or use AMFIPass.kext and -amfipassbeta boo-targ*** 6 bis) Now it is possible to use only amfipass.kext (1.4.x release or greater ) and avoid to use any bootargs 7) if you also use different operating systems remember to set the min kernel for the block and kext in the appropriate section of the config.plist * After OCLP is installed is possible to set SecureBootModel as you like ** After OCLP is installed is possible to set SIP to 0008000 (sip Enabled 0x800) *** it is only possible to use a kext and a bootarg for this step and this step could solve crash in some apps like Dropbox , Firefox and Whatsapp (https://macos86.it/topic/6463-oclp-il-wi-fi-è-tornato-in-macos-sonoma/?do=findComment&comment=143907 ) Example for the modification to be made for point 3): Example for the modification to be made for point 4): After copying the two kexts IOSkywalkFamily.kext and IO80211FamilyLegacy.kext, declare them in the config with the order shown in the photograph (the third is inside the main kext) Example for the modification to be carried out for points 5) and 6): boot-arg amfi0x80 e csr-active-config 03080000 Once these changes have been made, you need to restart OSX At the OpenCore menu it is strongly recommended to reset NVRAm and check that SIP is disabled at this point. After logging in it is now possible to launch OCLP (taken from the link posted just above in this thread). OCLP adds a service that requires acceptance. You will have the options available in the image below: Click on Post-Install Root Patch and then click on start root patching: OCLP will ask to be relaunched as root, enter your password and let the software make its changes in a few seconds OCLP will ask to restart and if everything went well the next restart you will be able to enjoy your fully functional wifi! 🙂 Remember always to reset NVRAM when some modifies is done in OCLP app or config.plist (related to OCLP options) For more informations about OCLP: kexts.zip

-
 Ciao a tutti, vi segnalo un problema molto strano (e grave) che mi è capitato recentemente, sperando che qualcuno abbia vissuto la stessa situazione o possa confermare quanto accaduto. Contesto: Ho un vecchio MacBook Pro con macOS High Sierra installato su un SSD HFS+. Per trasferire i dati, ho montato quel disco in un box USB 3.0 e l’ho collegato a un altro Mac su cui gira macOS Sonoma installato tramite OCLP (OpenCore Legacy Patcher). L'intenzione era quella di usare Assistente Migrazione per importare i dati da High Sierra verso Sonoma. Il problema: Non appena ho collegato il disco al Mac con Sonoma+OCLP, è successo qualcosa di strano. Non ho neppure iniziato il processo di migrazione, ma il solo fatto di collegare il disco ha modificato il file system del volume, convertendolo da HFS+ ad APFS (senza alcuna conferma o avviso). Quando ho poi rimesso il disco nel MacBook originale per avviare High Sierra, il sistema ha mostrato il classico simbolo di divieto 🚫 e non è più riuscito a bootare. Ulteriori test: Ho creato una USB boot di High Sierra per provare a recuperare il disco, ma Utility Disco non vede nessuna unità. Anche da Terminale (diskutil list) non riesco a vedere i volumi, il che mi fa pensare che High Sierra non riesca più a leggere il disco dopo la conversione forzata ad APFS (forse in una versione più recente di quella supportata dal 10.13). Domanda: A qualcuno di voi è capitato qualcosa di simile? È normale che Sonoma+OCLP forzi la conversione da HFS+ ad APFS al solo collegamento di un disco esterno? Possibili soluzioni per recuperare il filesystem originale o almeno accedere ai dati? Ogni consiglio è benvenuto Grazie in anticipo!